Sleeves. Sleevils. Tricky little buggers.
I wanted to avoid them as long as possible, so I didn’t really bother mocking up my wedding dress sleeves.
Ok, I made one sleeve mock-up. I didn’t like it so I abandoned the pursuit of perfecting a sleeve pattern all together and just ignored the fact I wanted sleeves on my wedding dress until it was actually time to make and attach said sleeves. At which point, I formulated a plan.
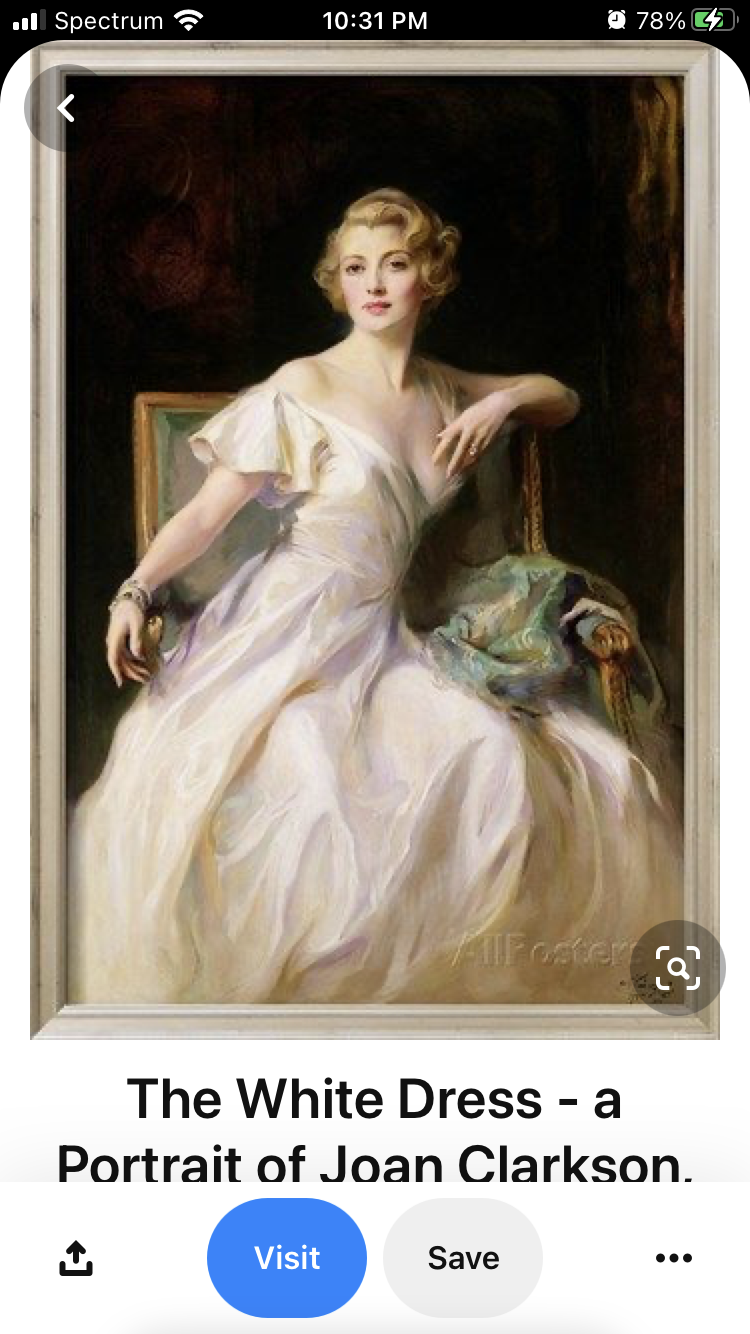
I wanted full, flared, cap sleeves. Similar to this inspiration image.
To get this shape, the hem of the sleeve needs to curved. There was just one problem with this. I wanted to use the scalloped edge of my bodice lace for the sleeve hem. And this edge was, of course, straight across, not curved in the required simi-circle shape. How could I get the sleeves I wanted out of the fabric I wanted?
After a bit of brainstorming and contemplating pattern shapes and fabric options in my head, I figured it out. I would cut the sleeve pattern out of some sort of netting fabric, then shape my lace border to fit, following the tips and instructions in Bridal Couture for adding a lace border to a curved hem. But what netting would I use as my sleeve base to attach my lace to?

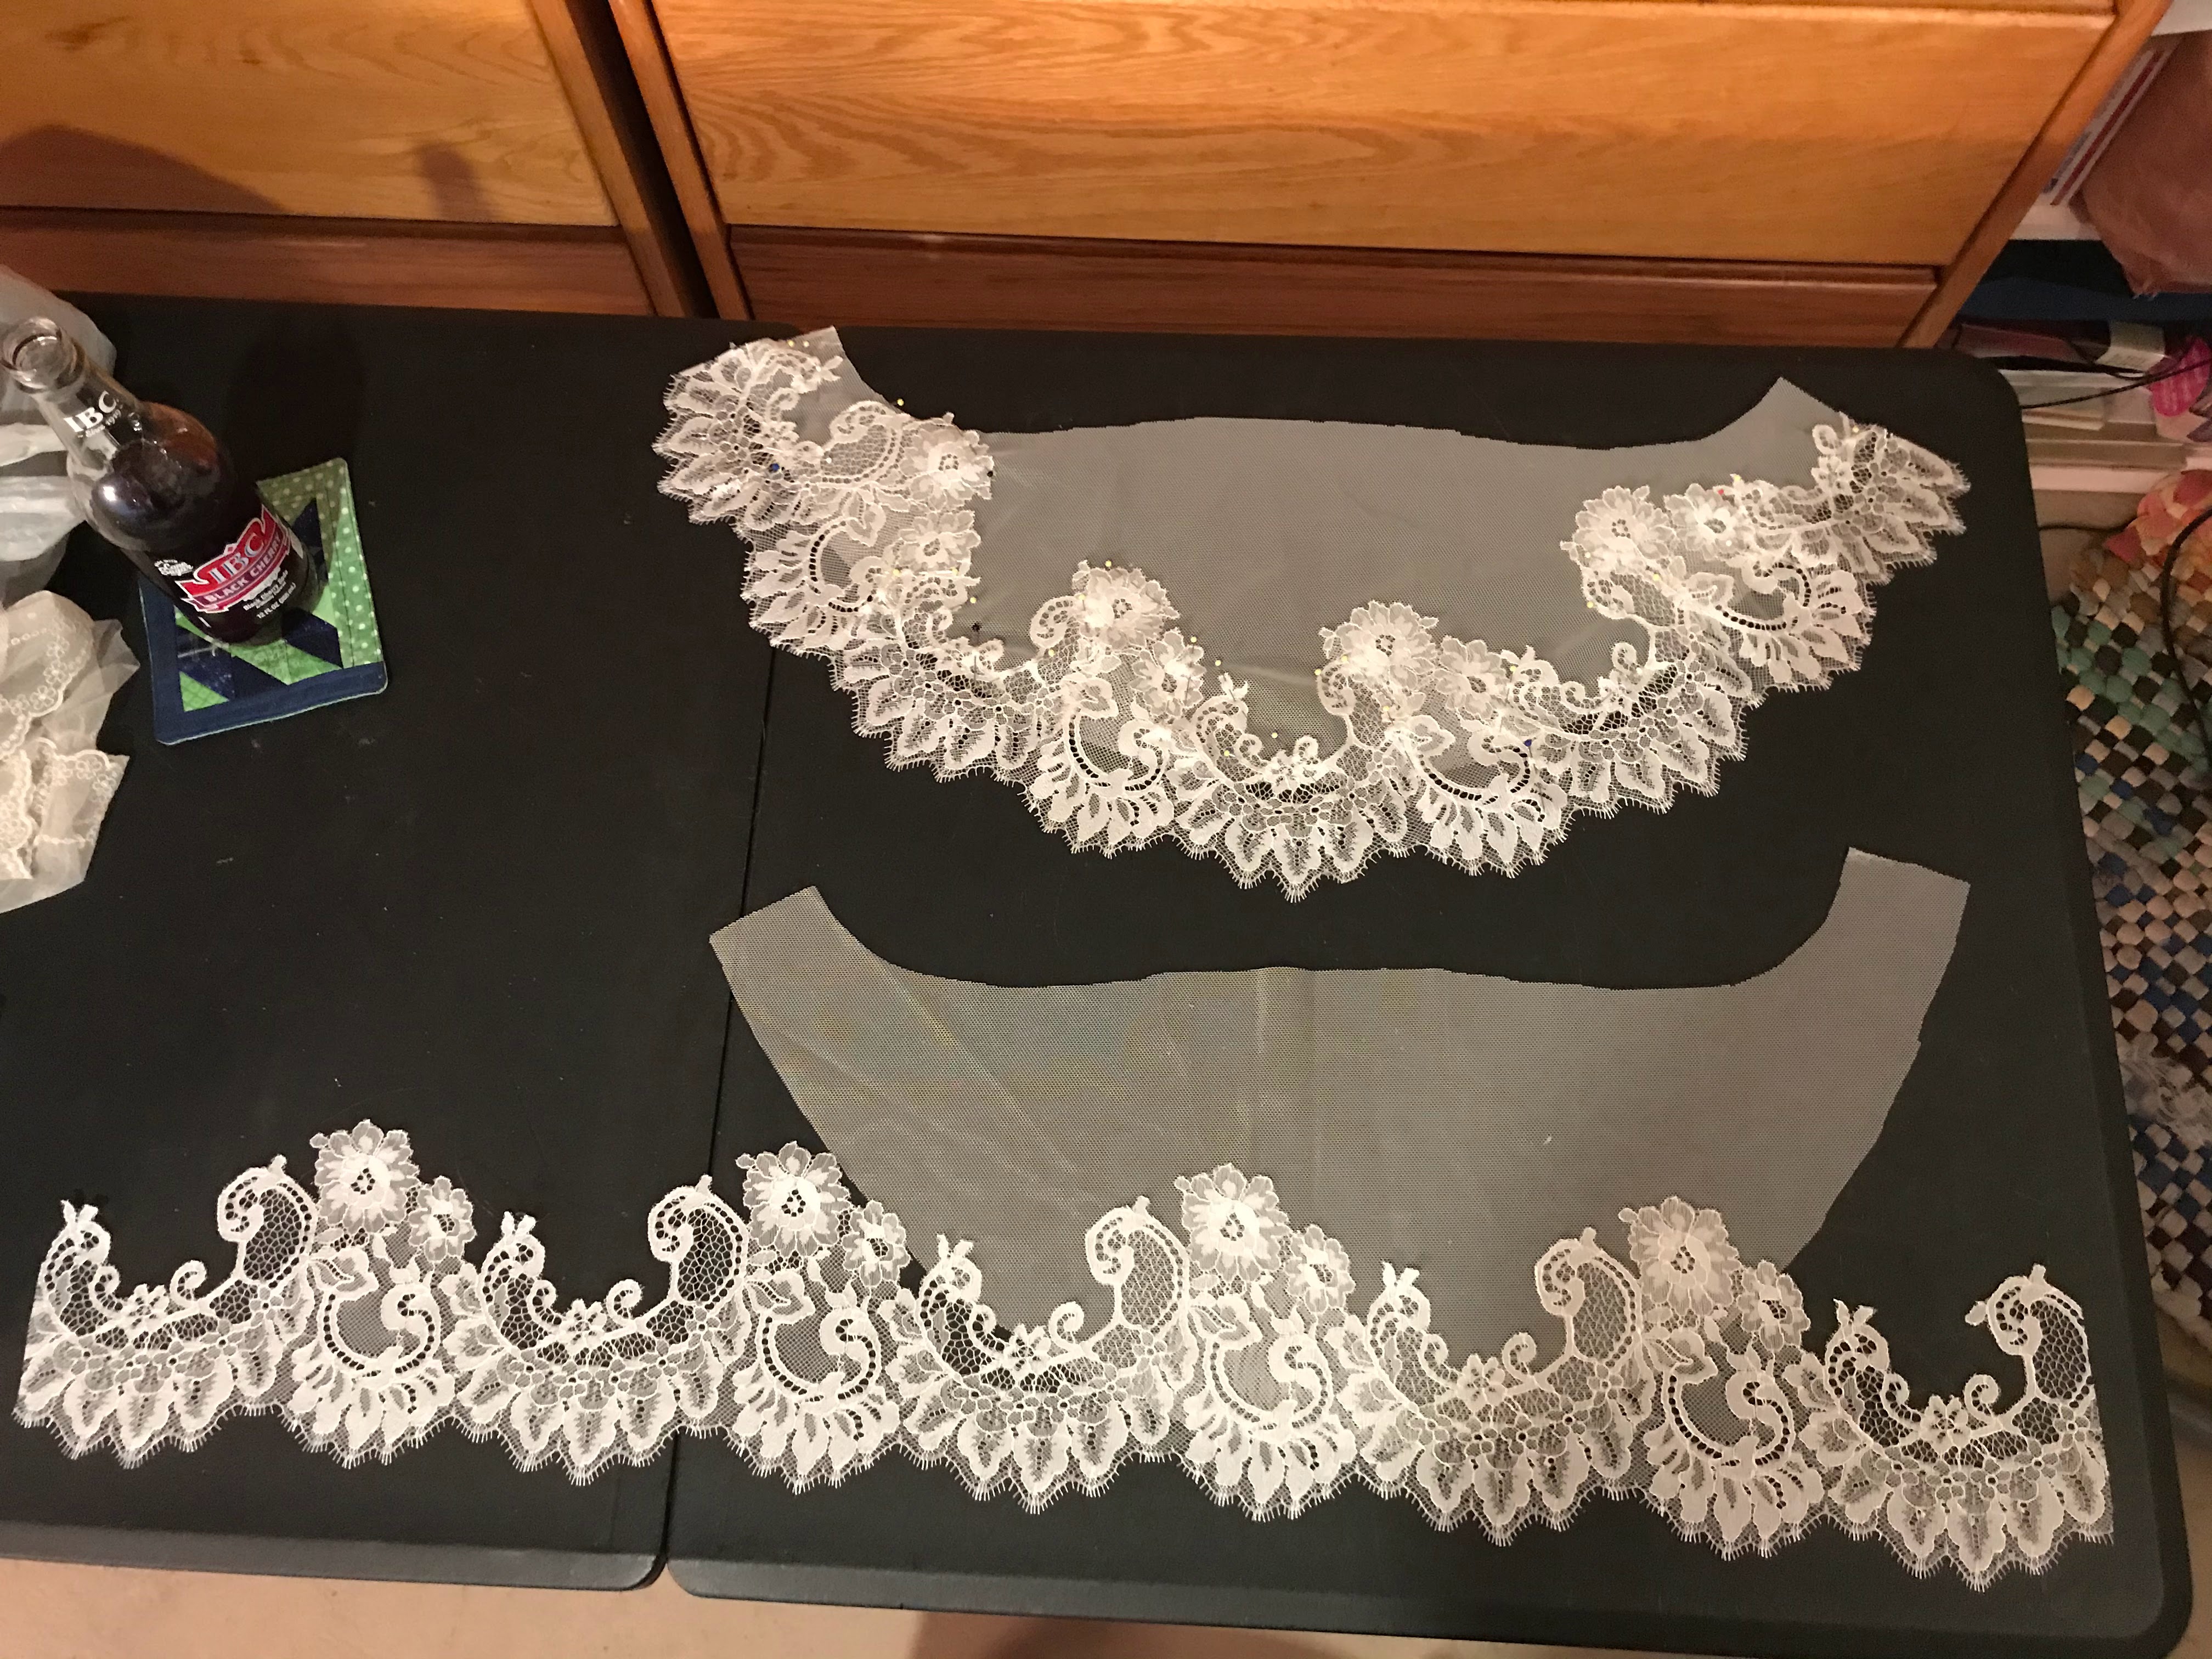
Admittedly, this stumped me for a while. I needed a netting that would be more sturdy than tulle, have a nice drape, not be stiff and itchy and be the exact same shade of creamy white as my lace. I could have ordered something online, but it would have been rather tricky to get the color just right. After contemplating this for way too long, I realized I already the perfect netting. The upper edge of my skirt lace was unembroidered for about the first 12 to 15 inches. It was a nice, soft, sturdy, netting in just the right shade of white. (I never realized how many shades of white there were until I started making a wedding dress!)
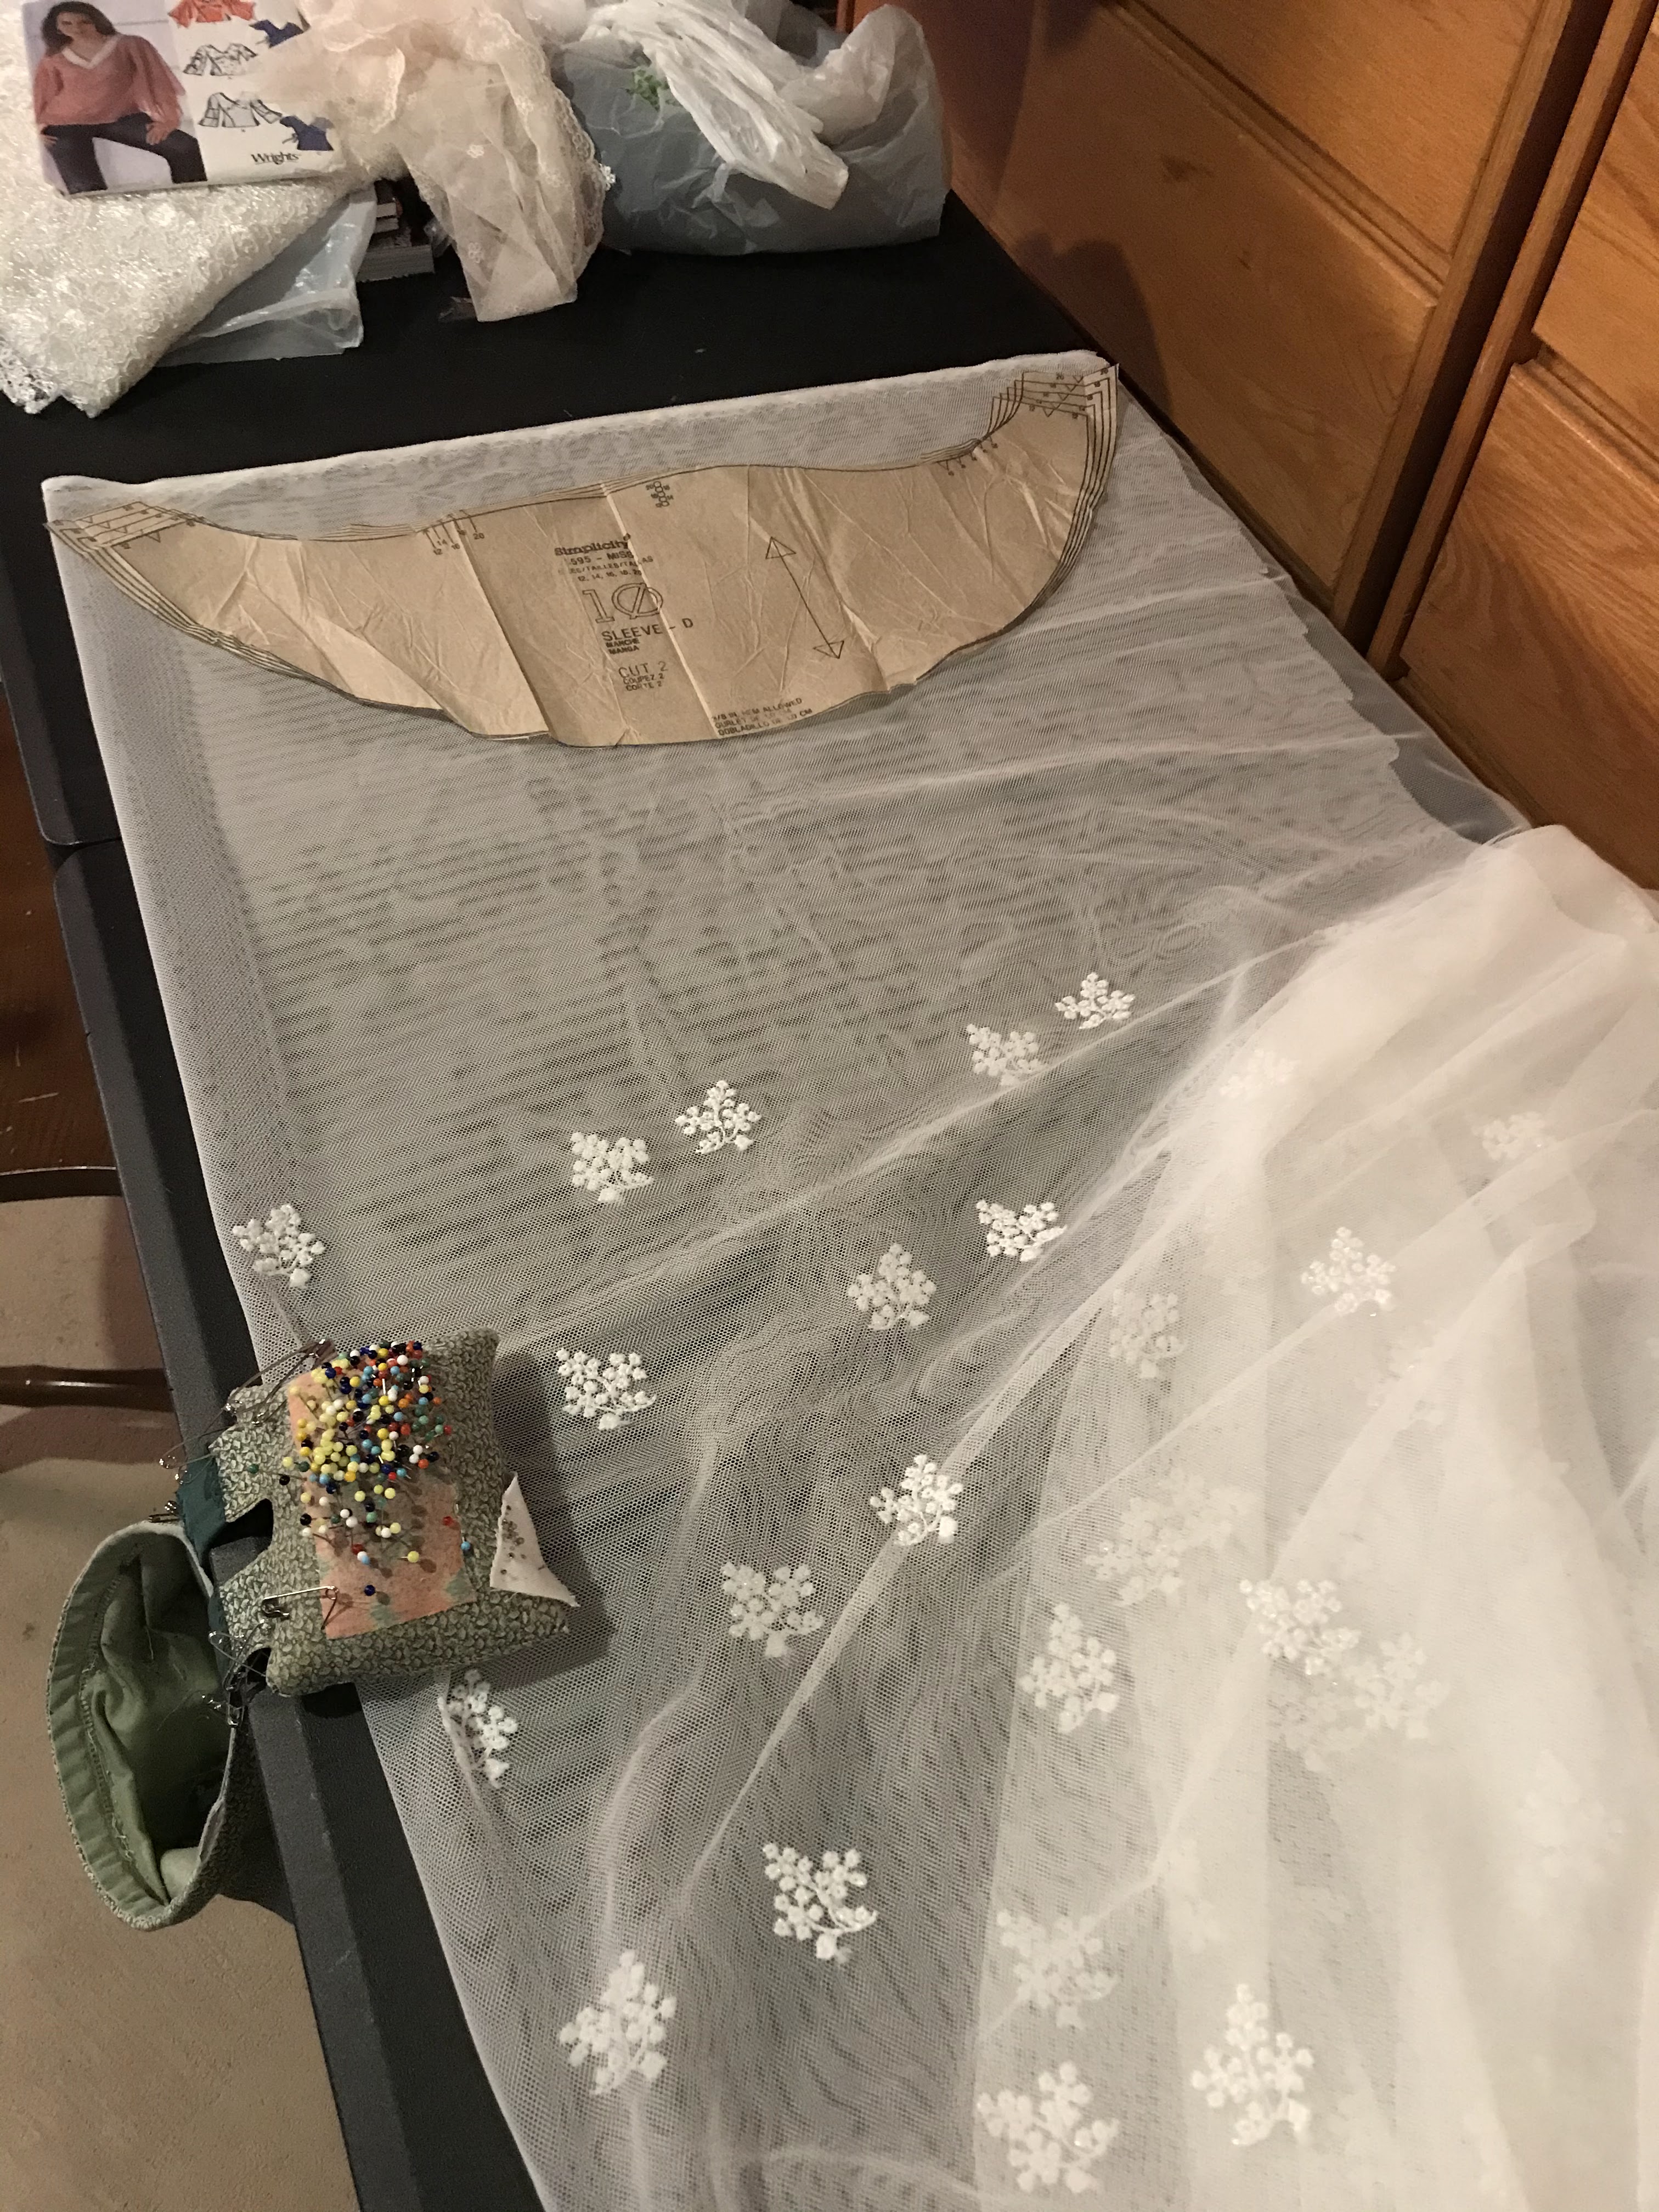
Sleeve fabric conundrum solved I looked through my pattern collection until I found something with approximately the right shape - Simplicity 5595. I cut out the sleeve pattern in the largest size, preferring sleeves slightly too large rather than slightly too small in my mash-two-patterns-together-without-making-a-mock-up endeavor.
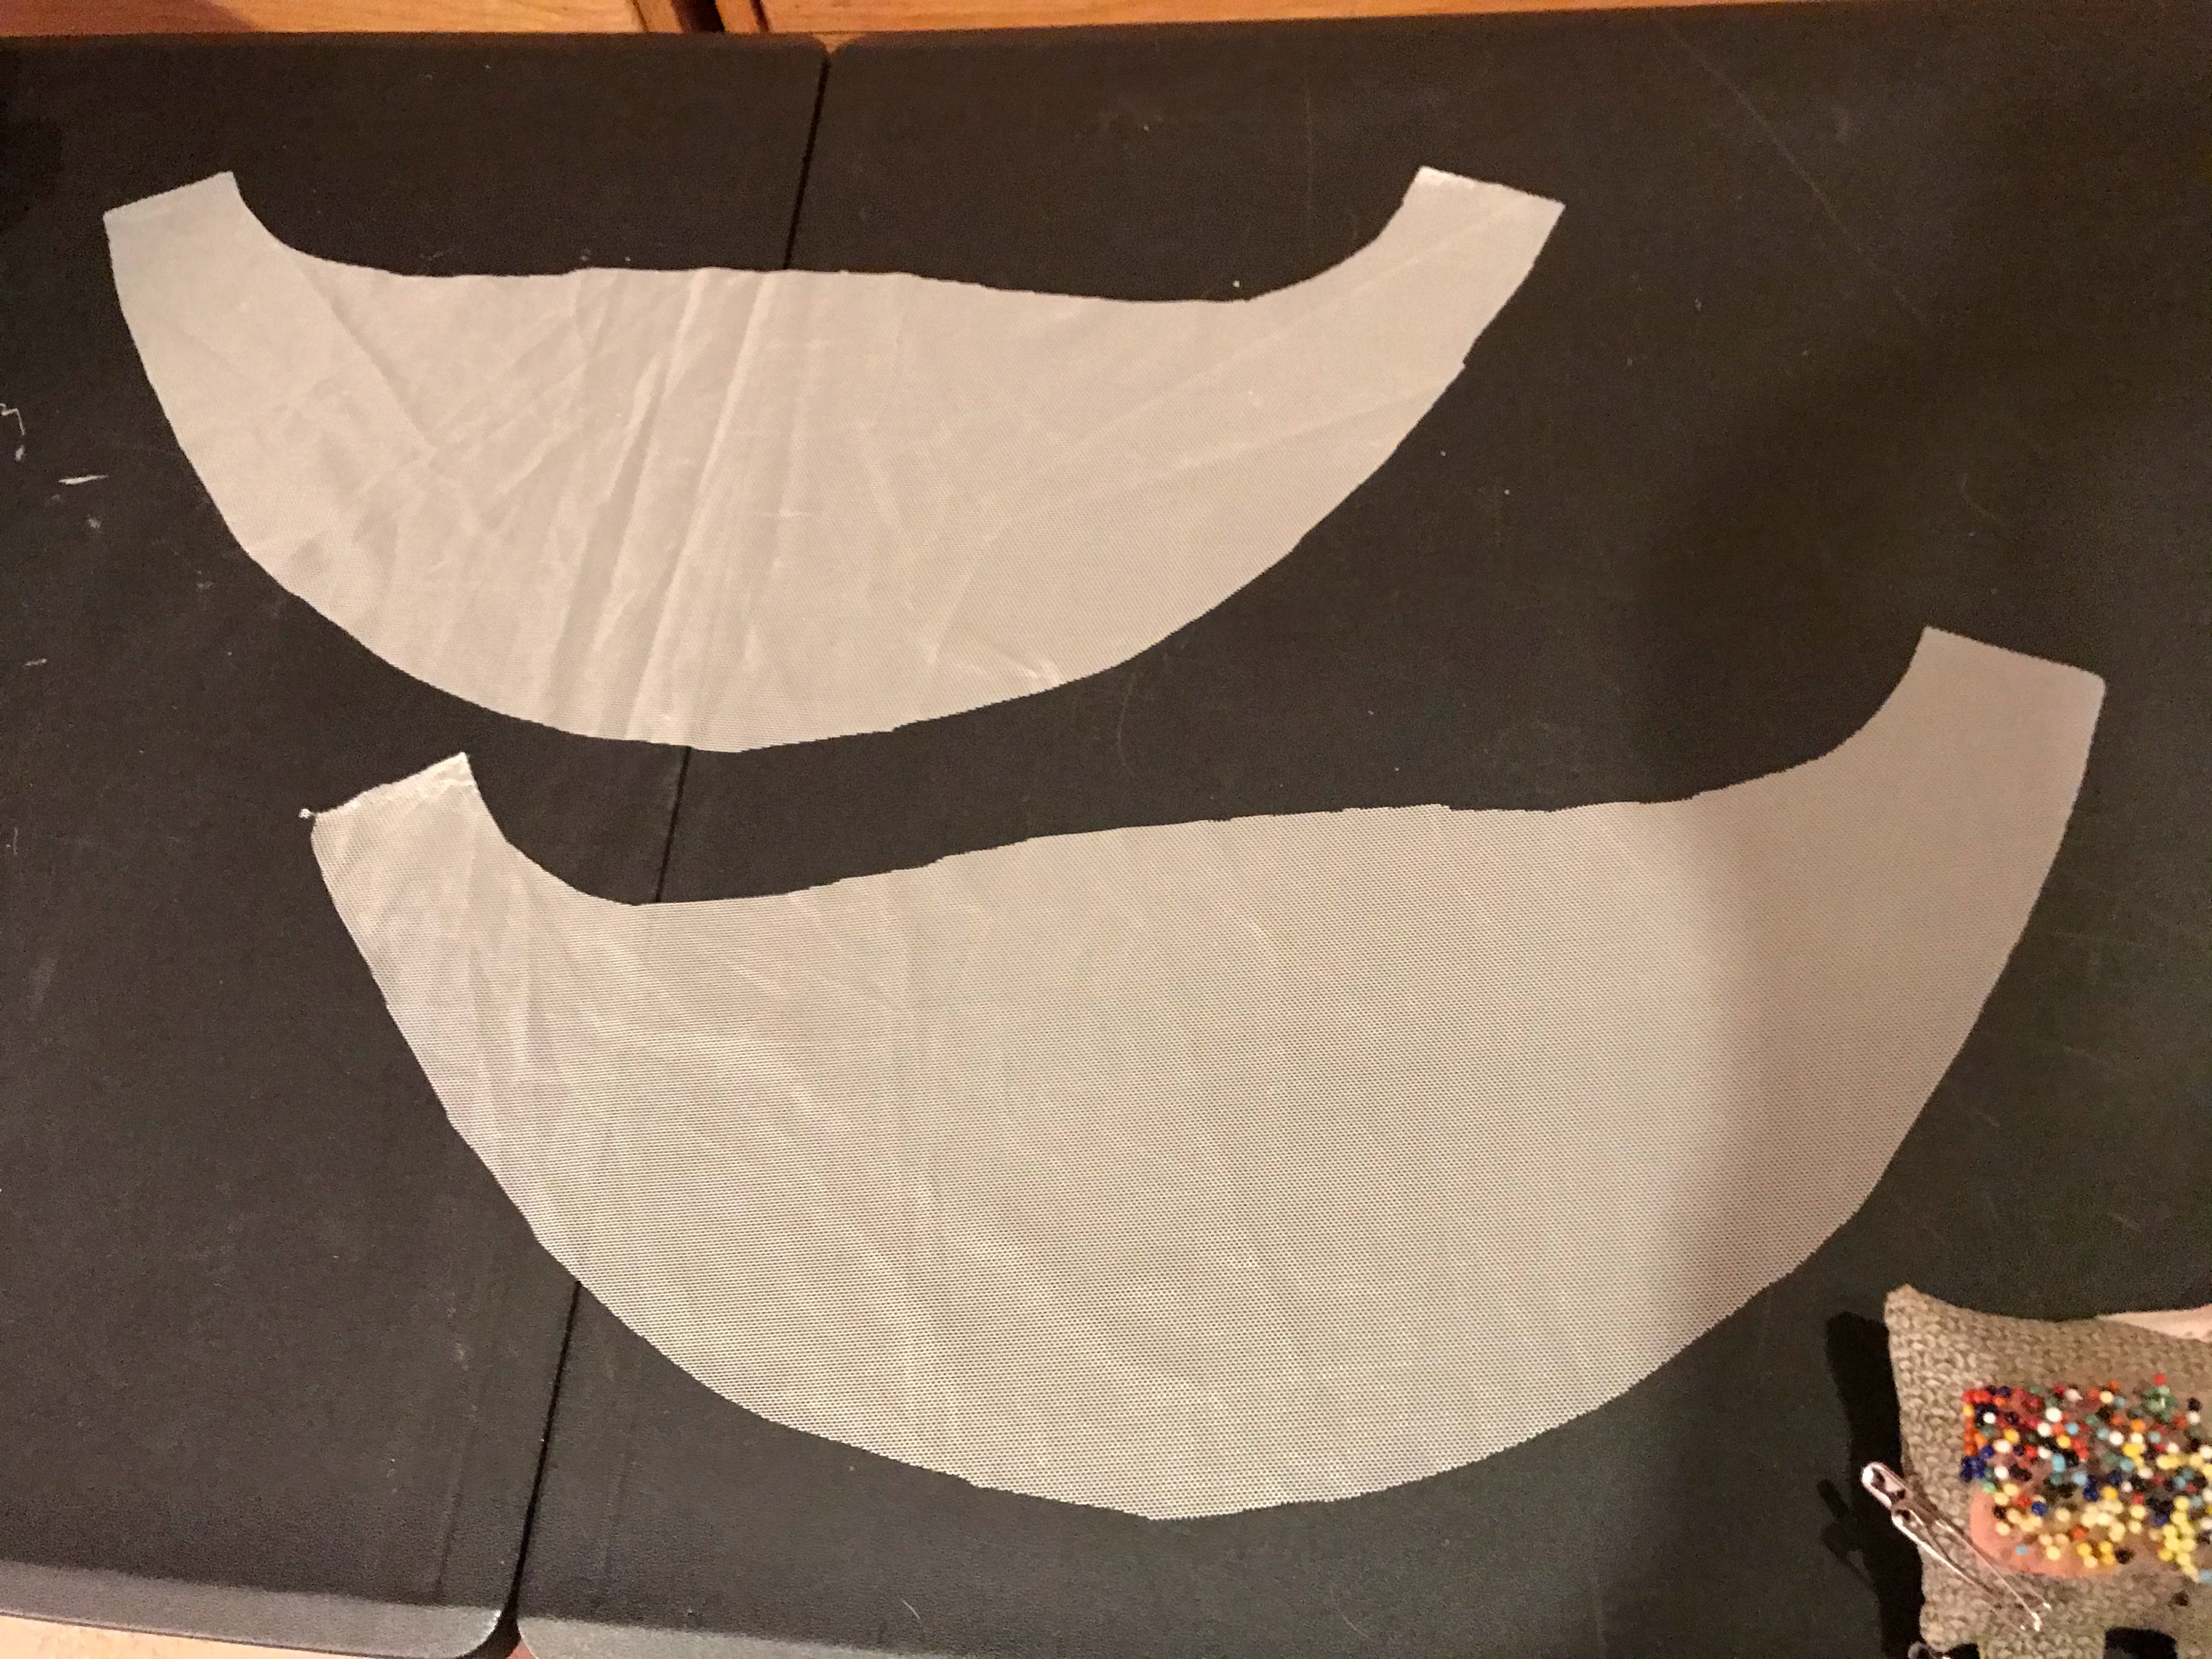
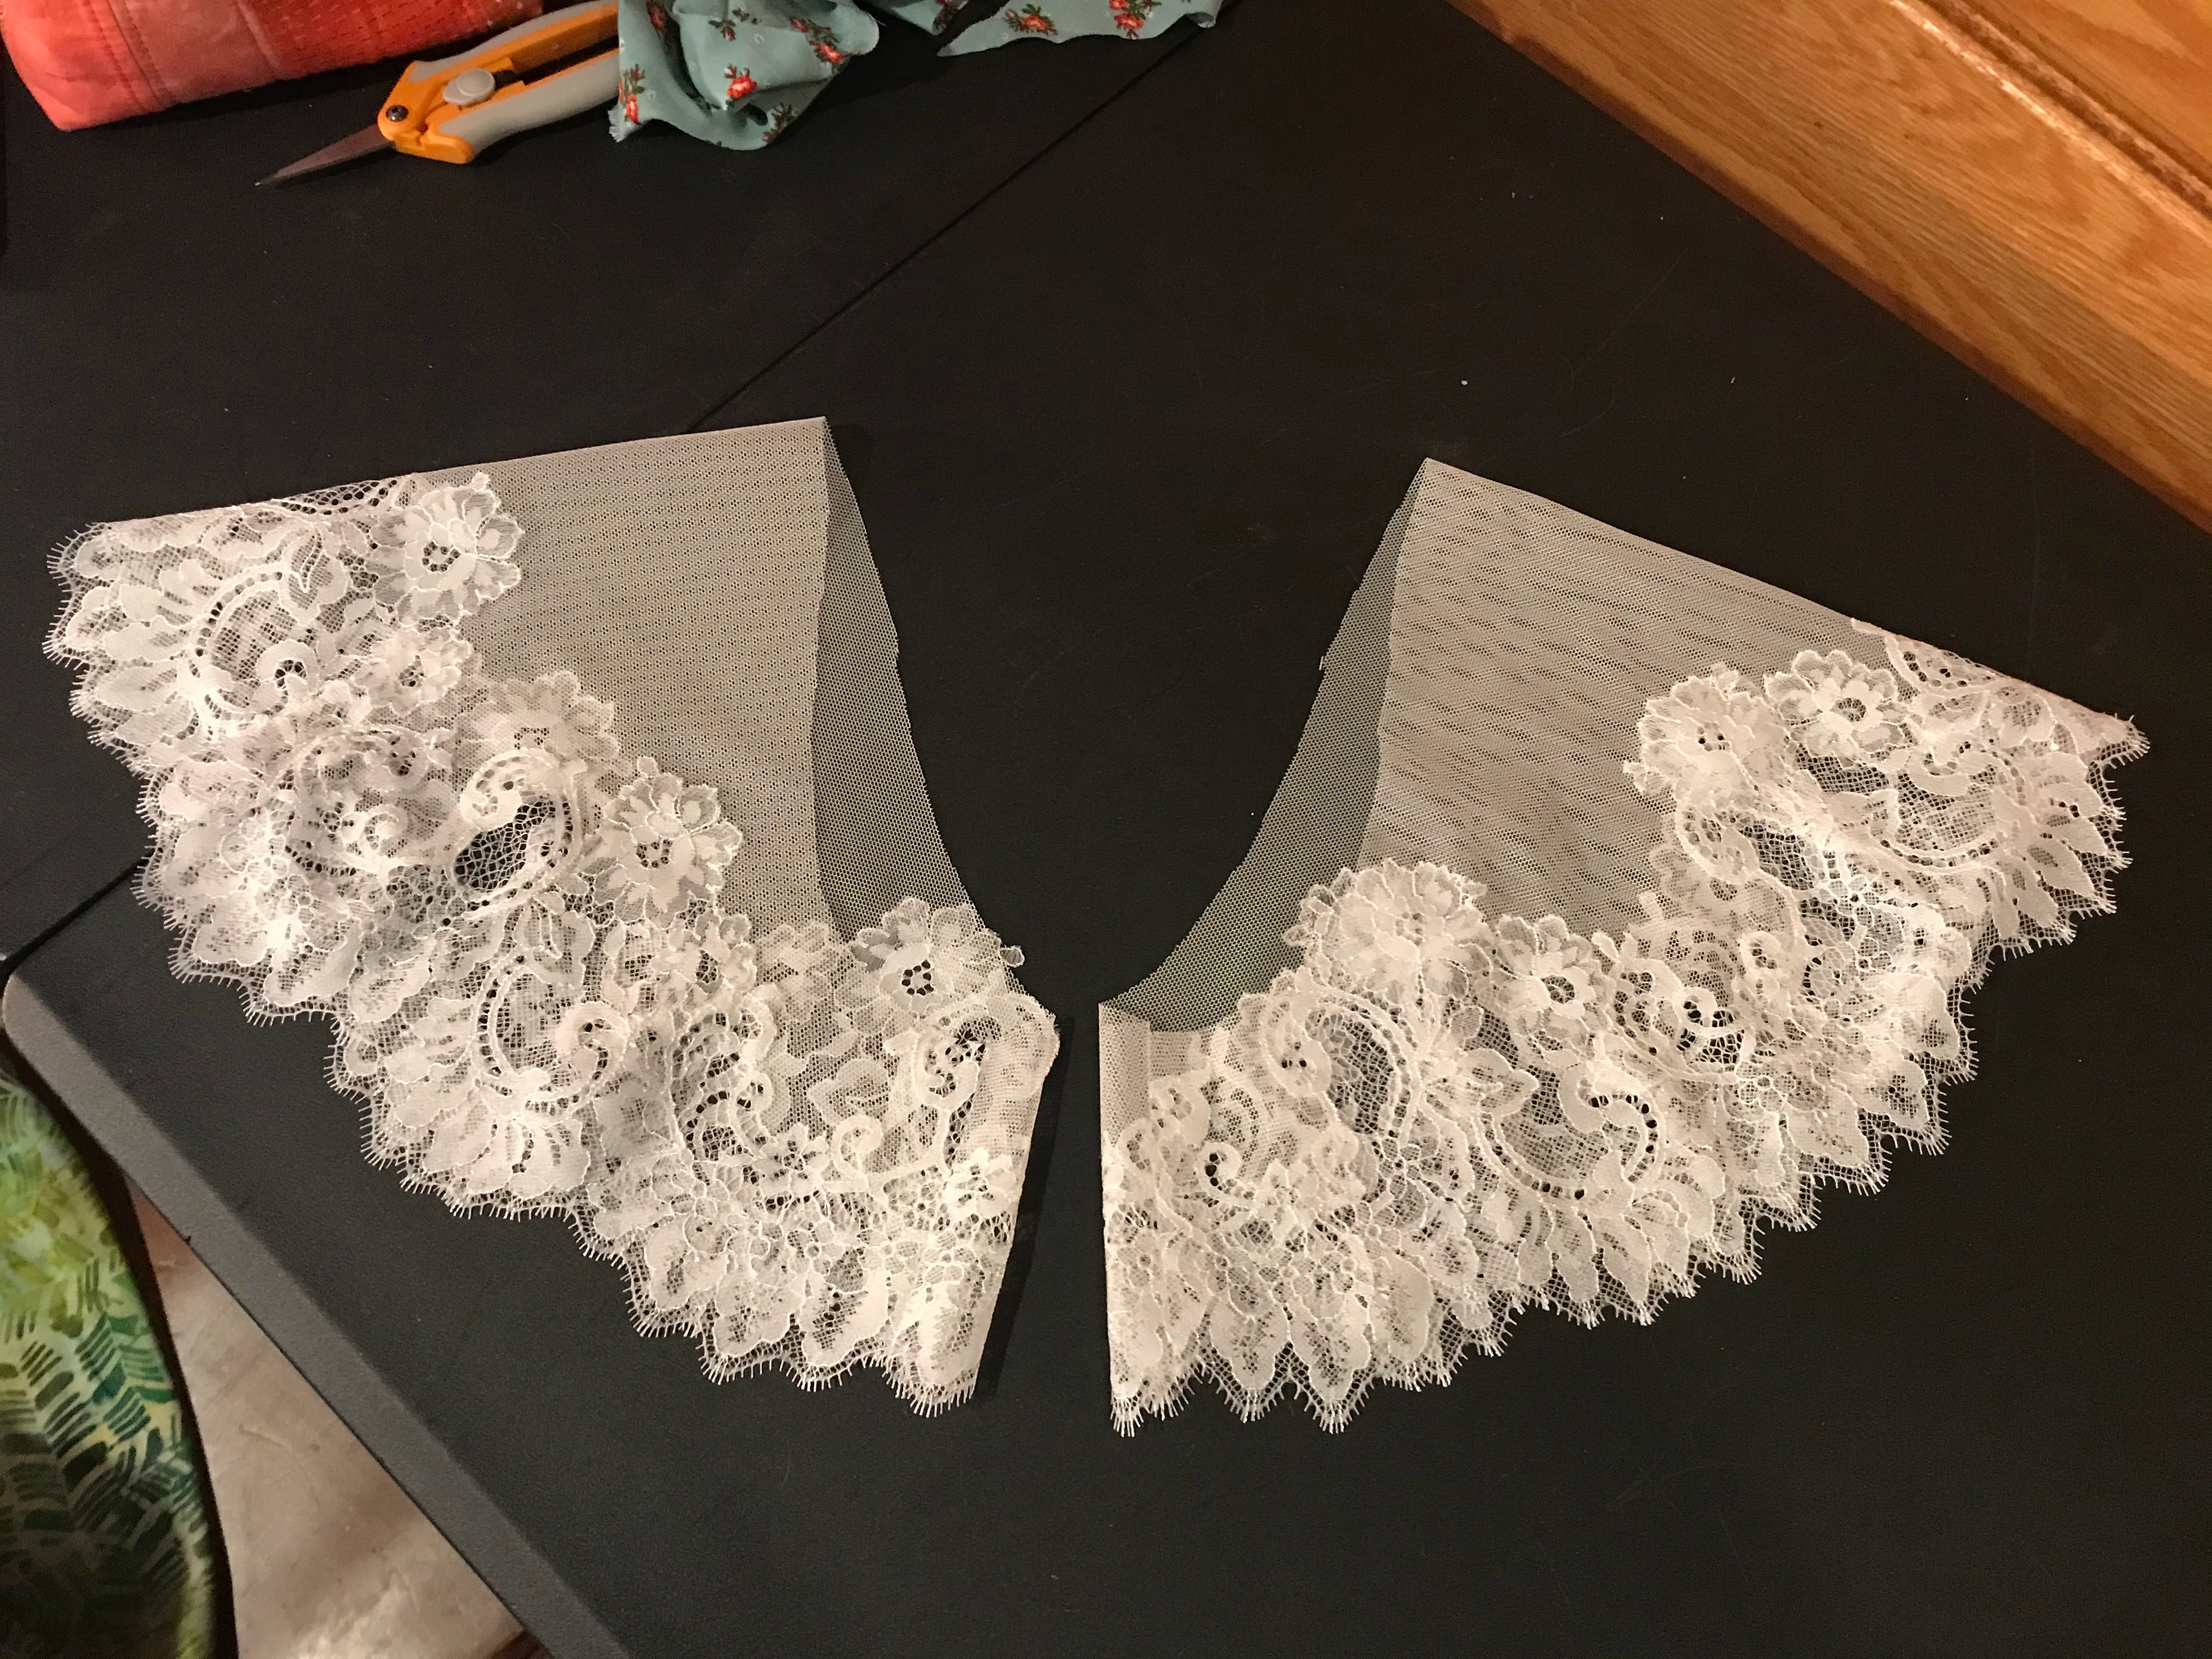
I cut the sleeve out of the netting.
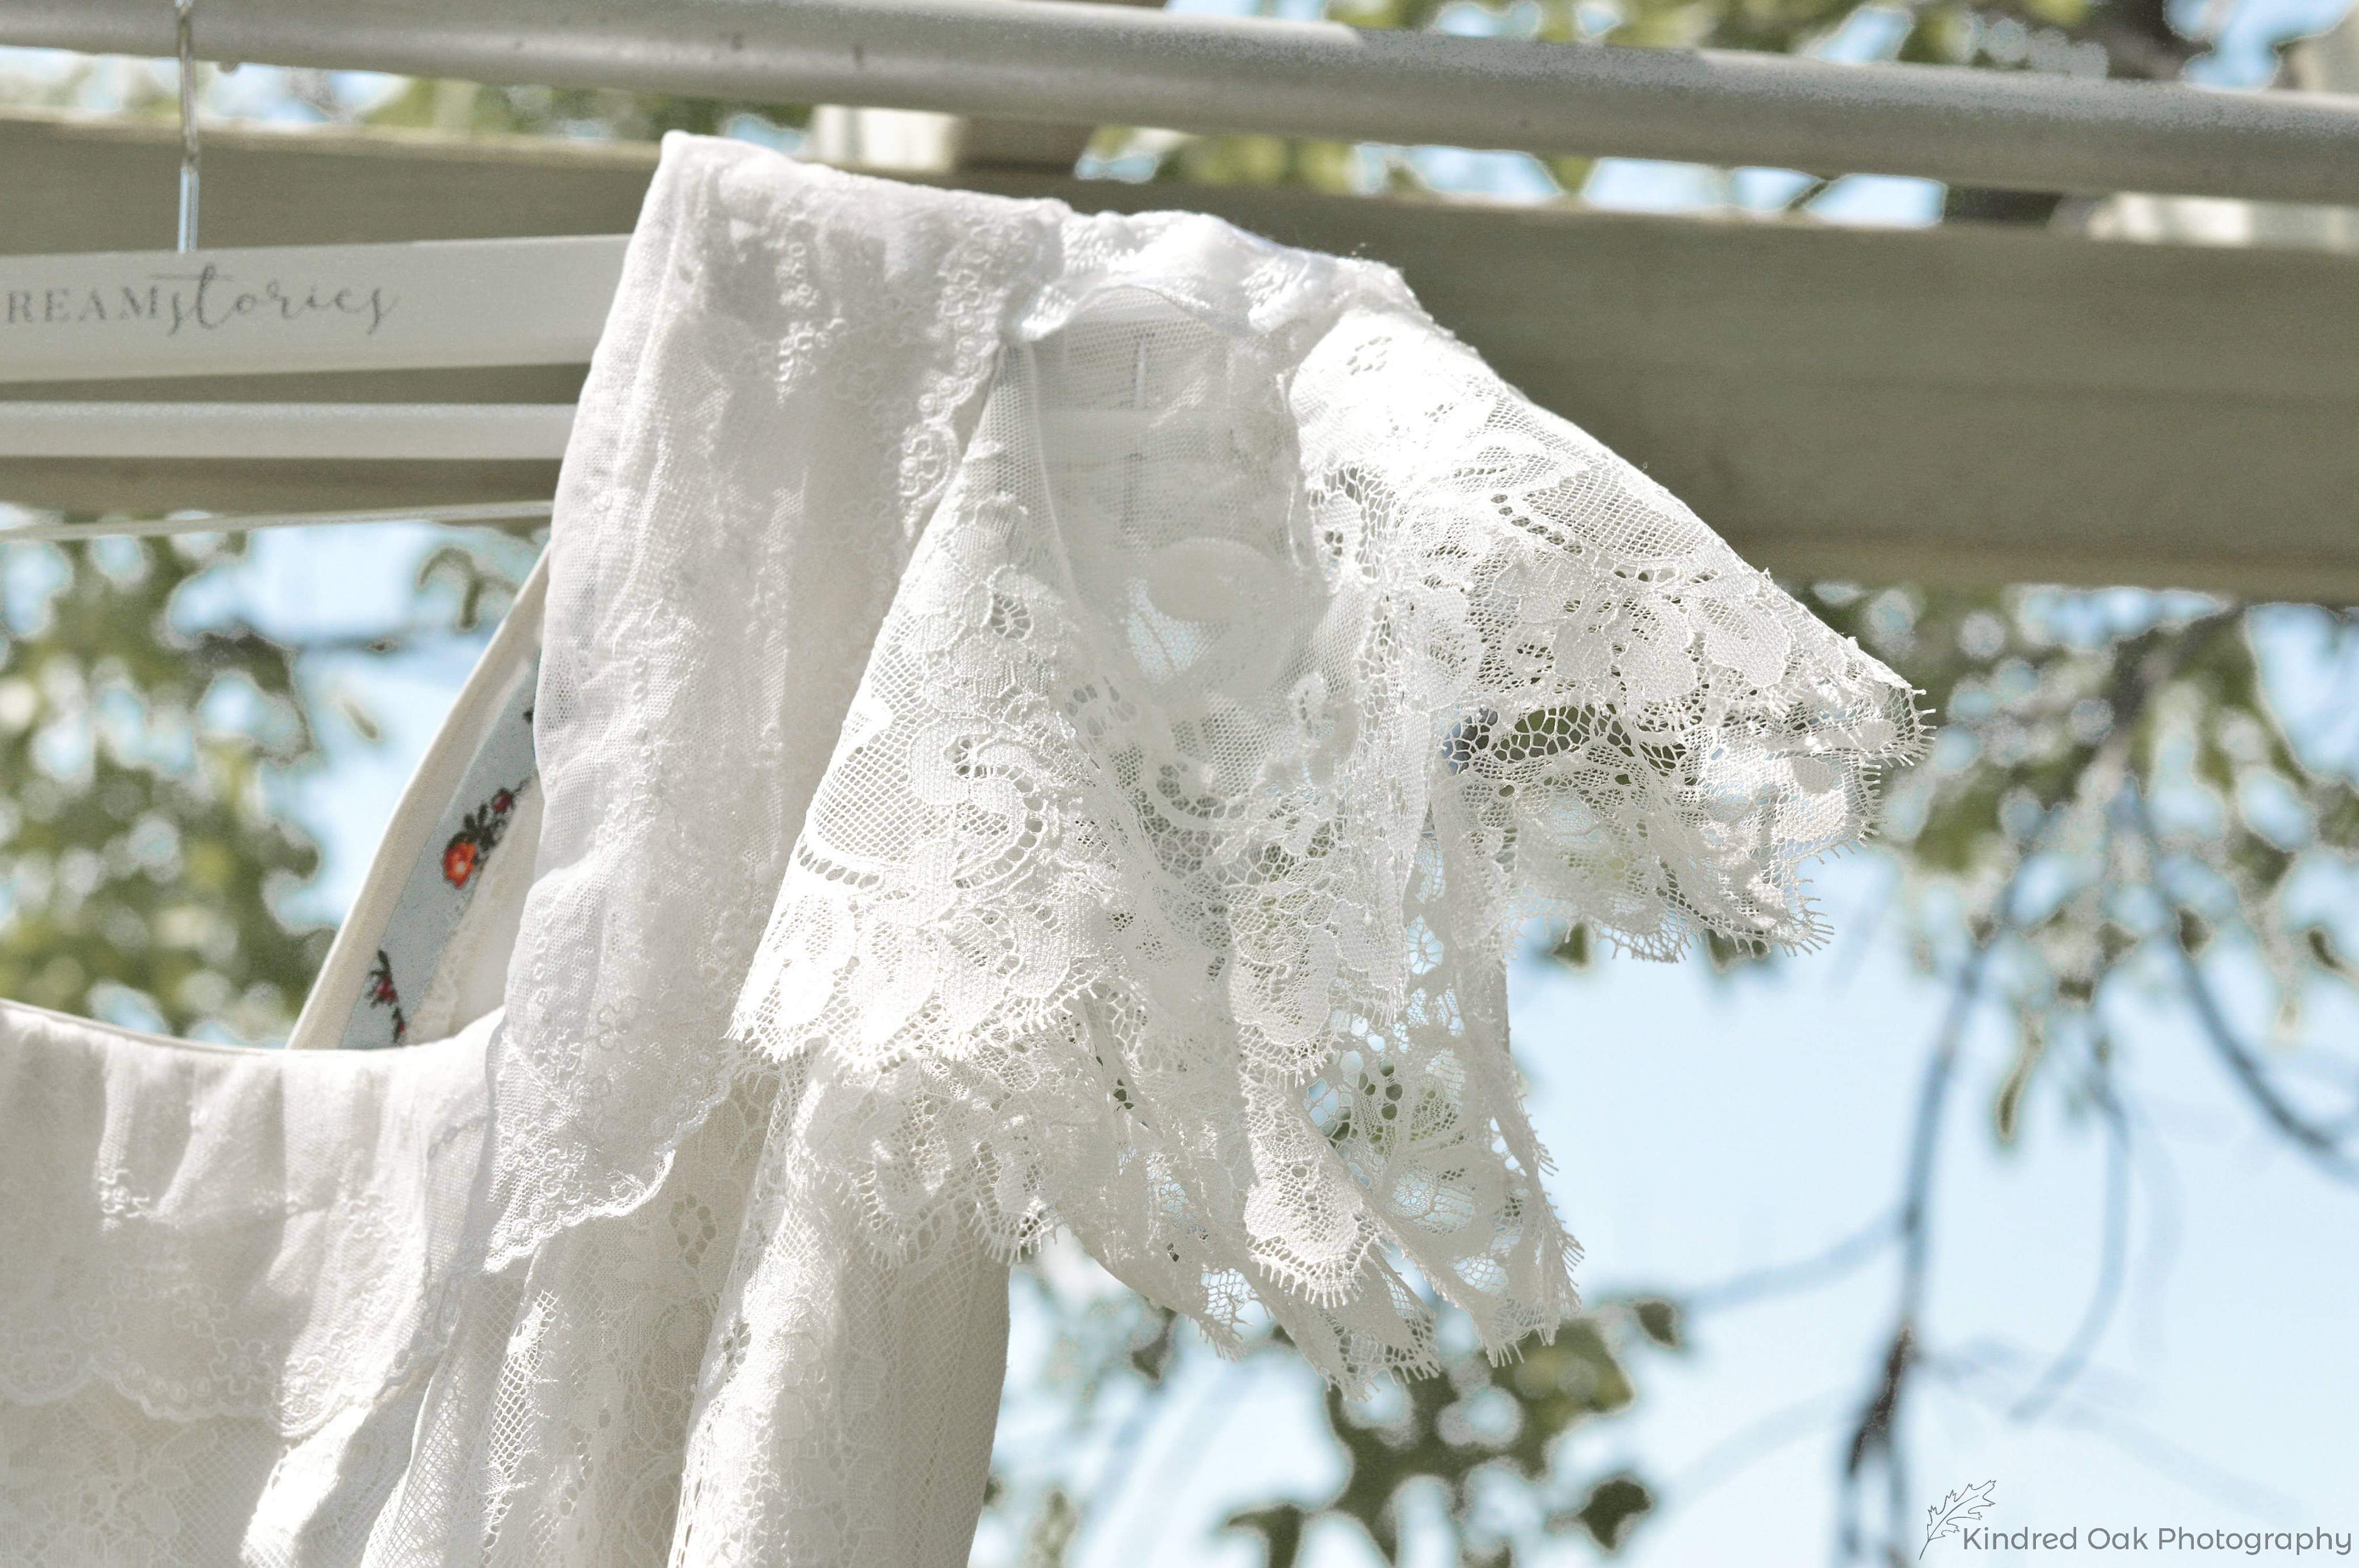
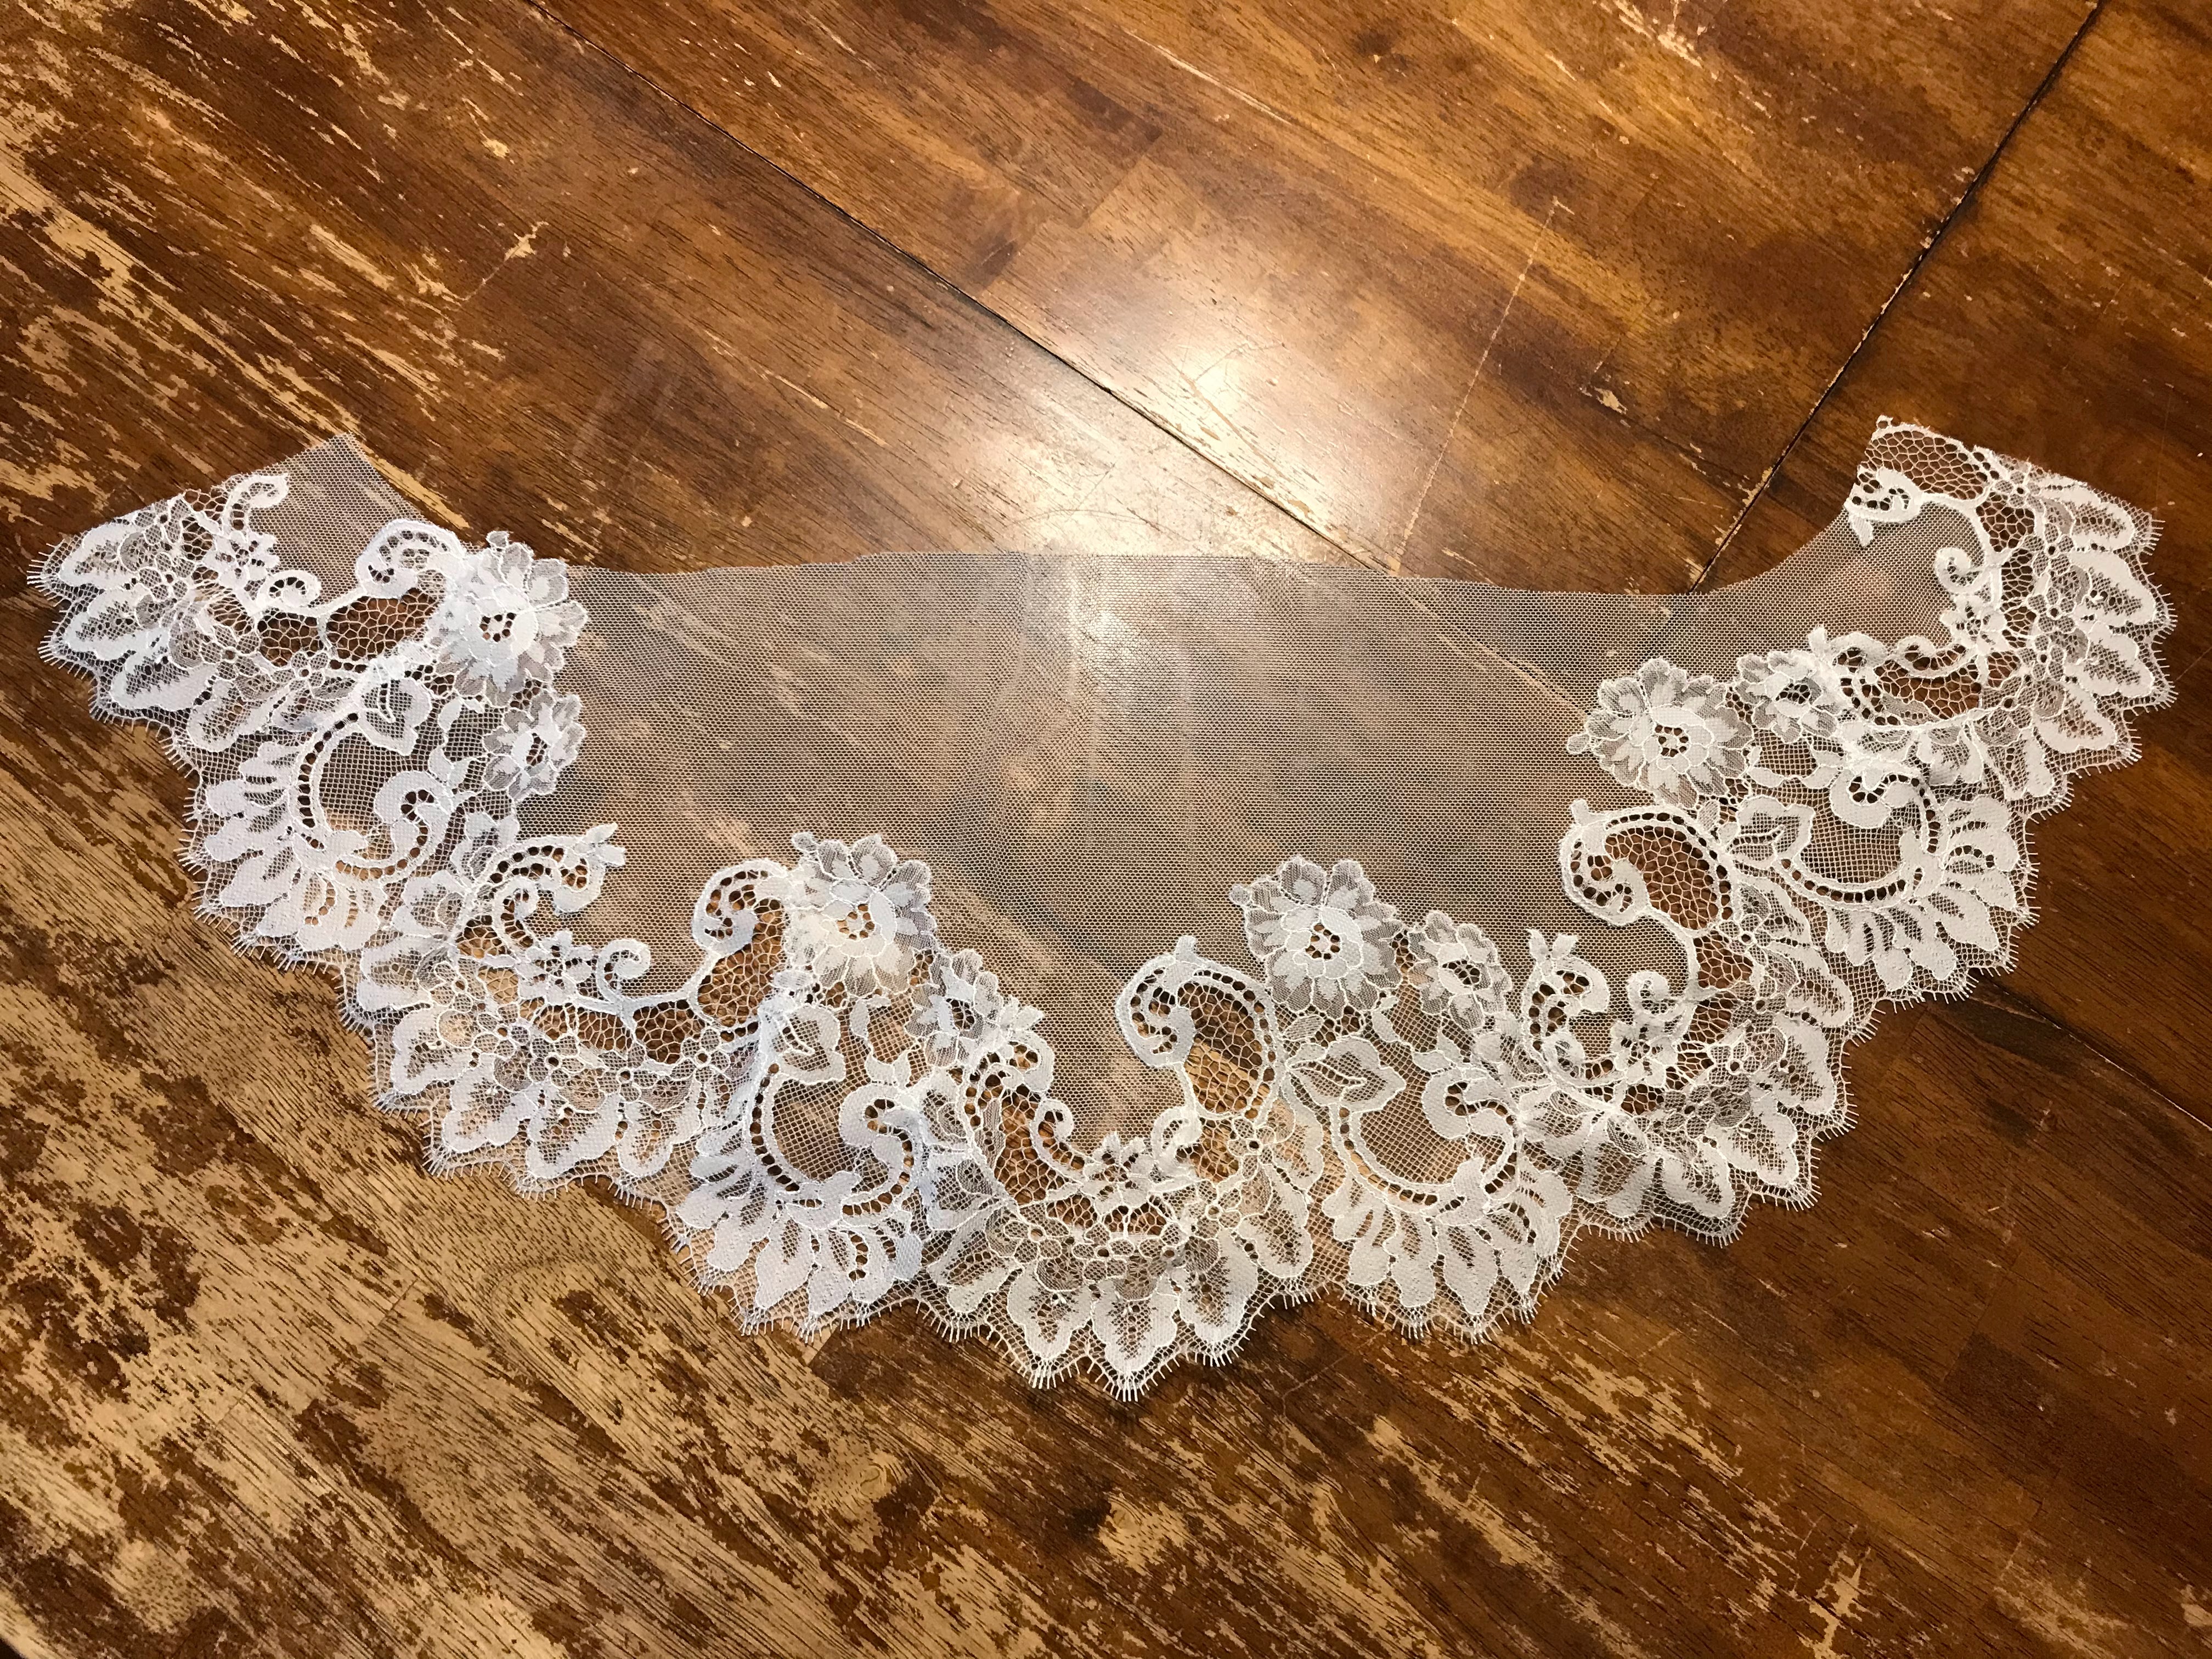
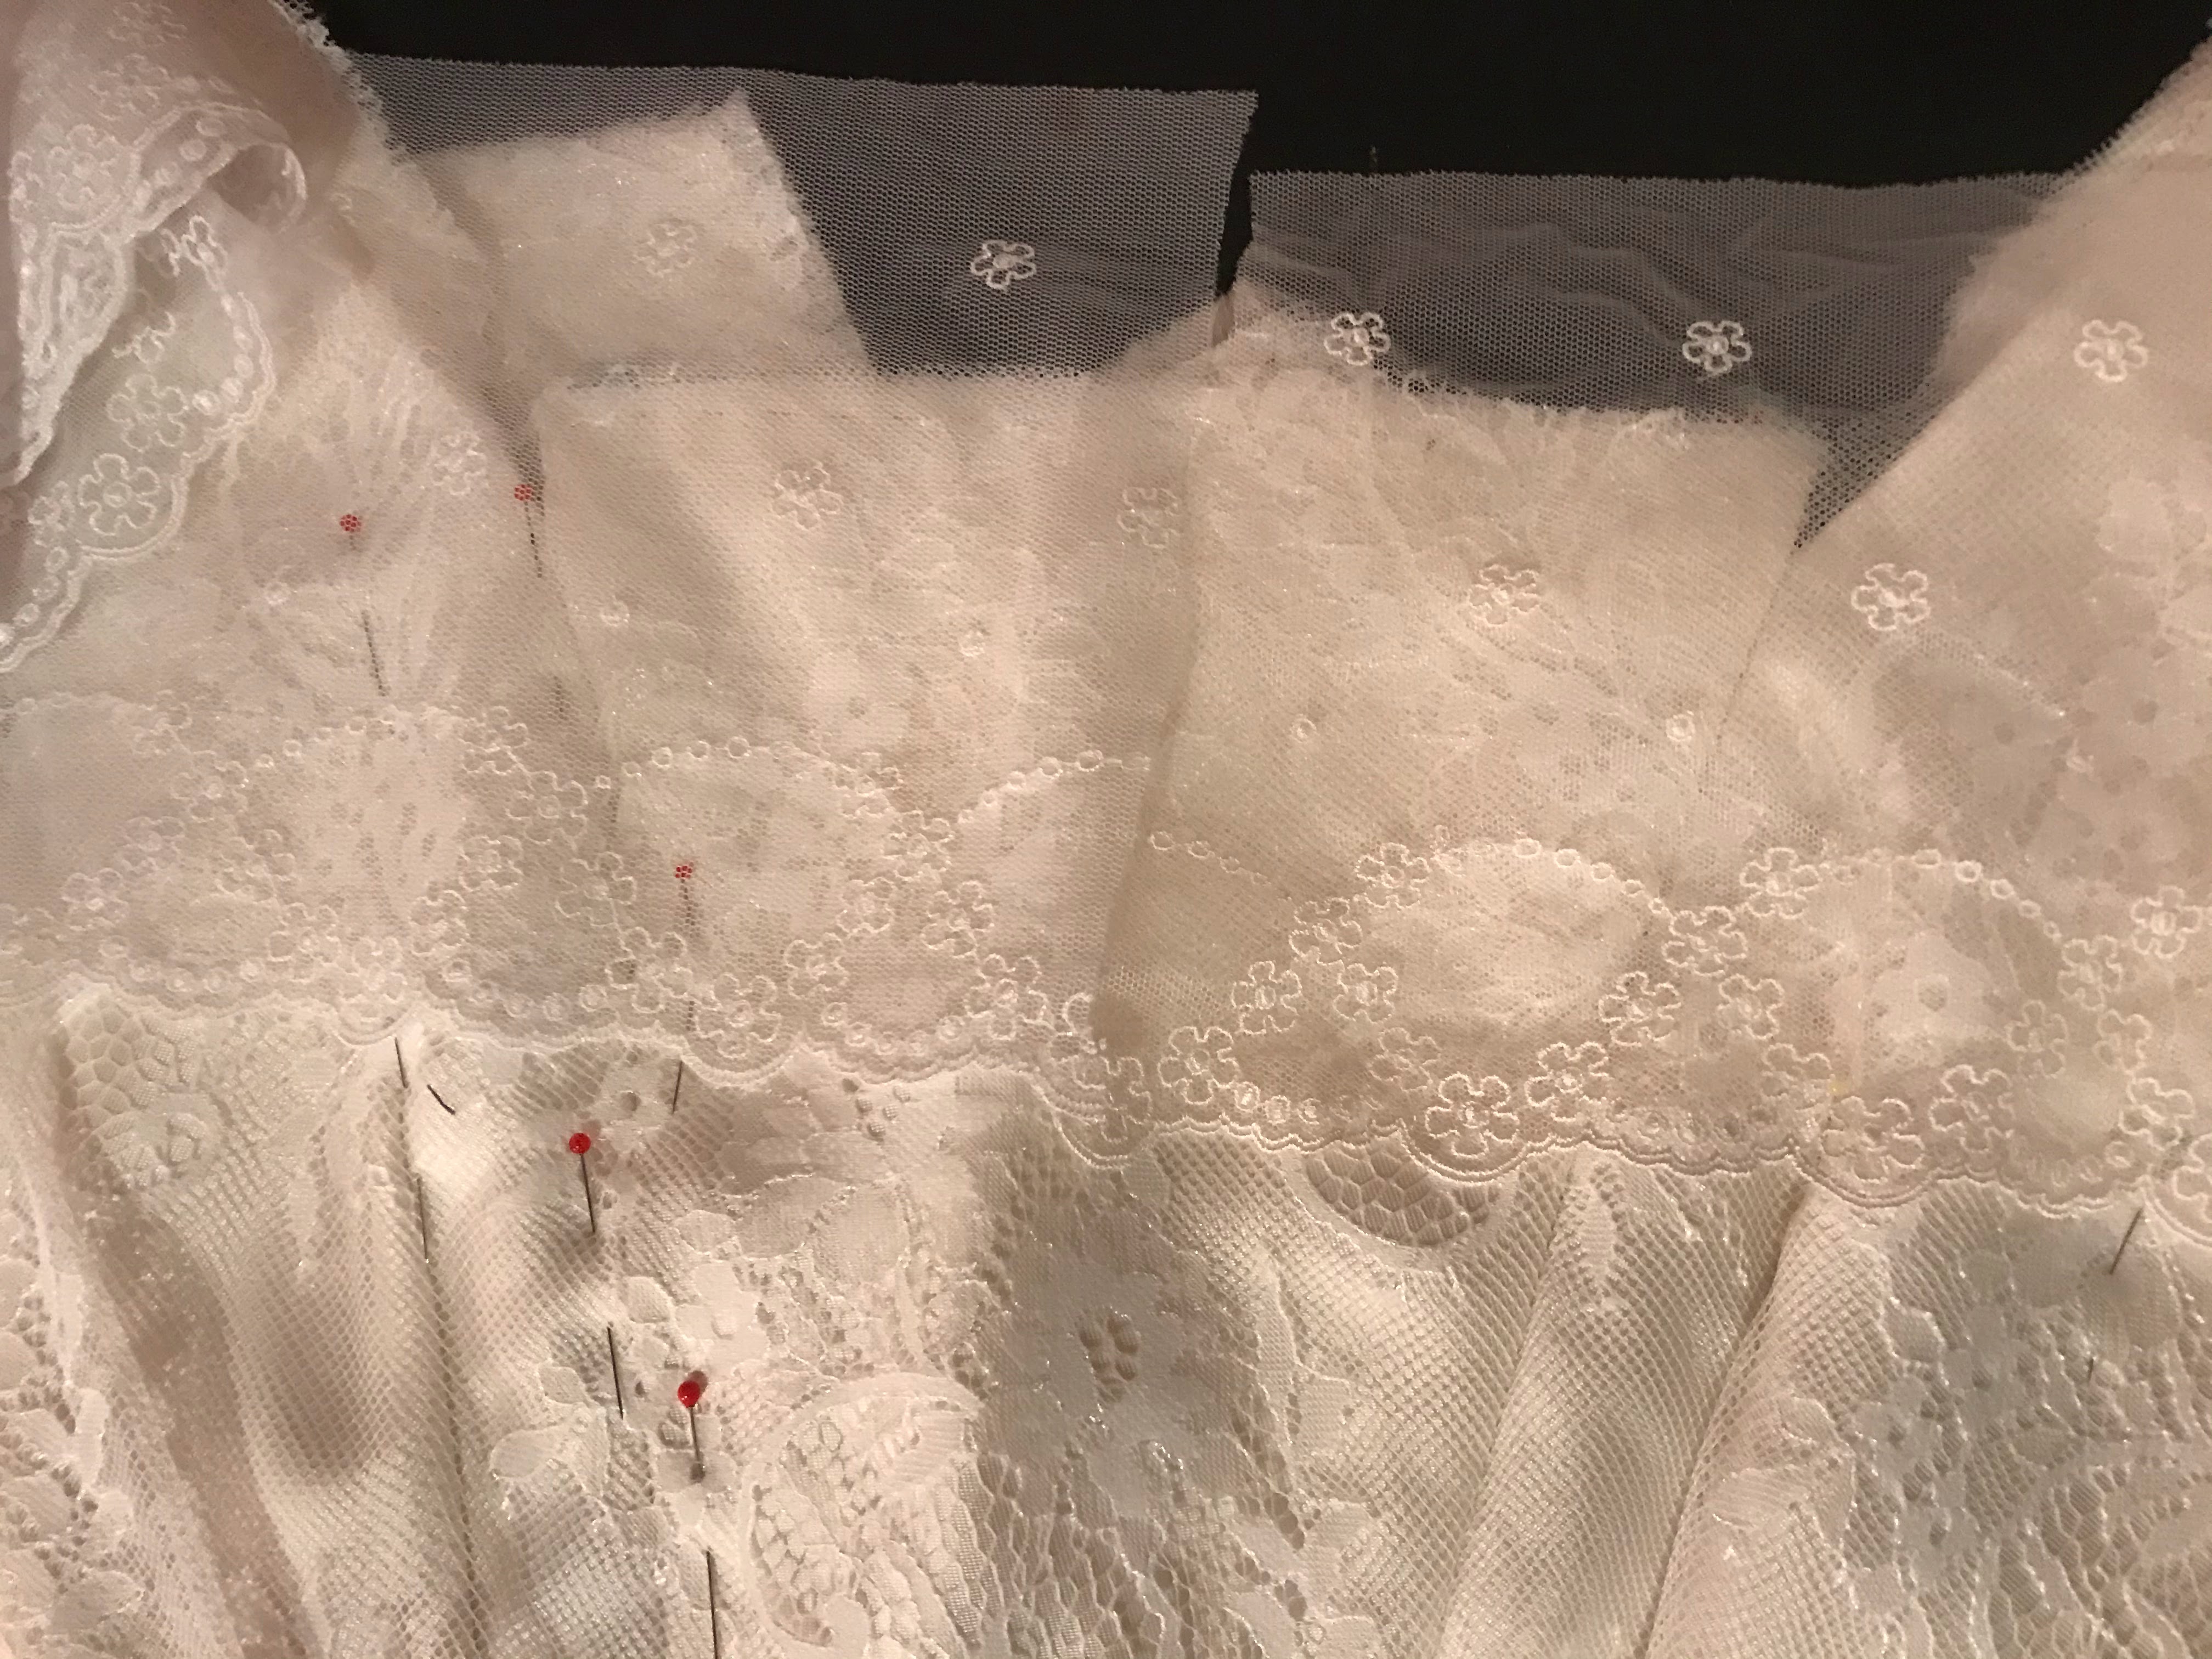
Then I carefully cut out the border from either edge of my lace. One edge for each sleeve!
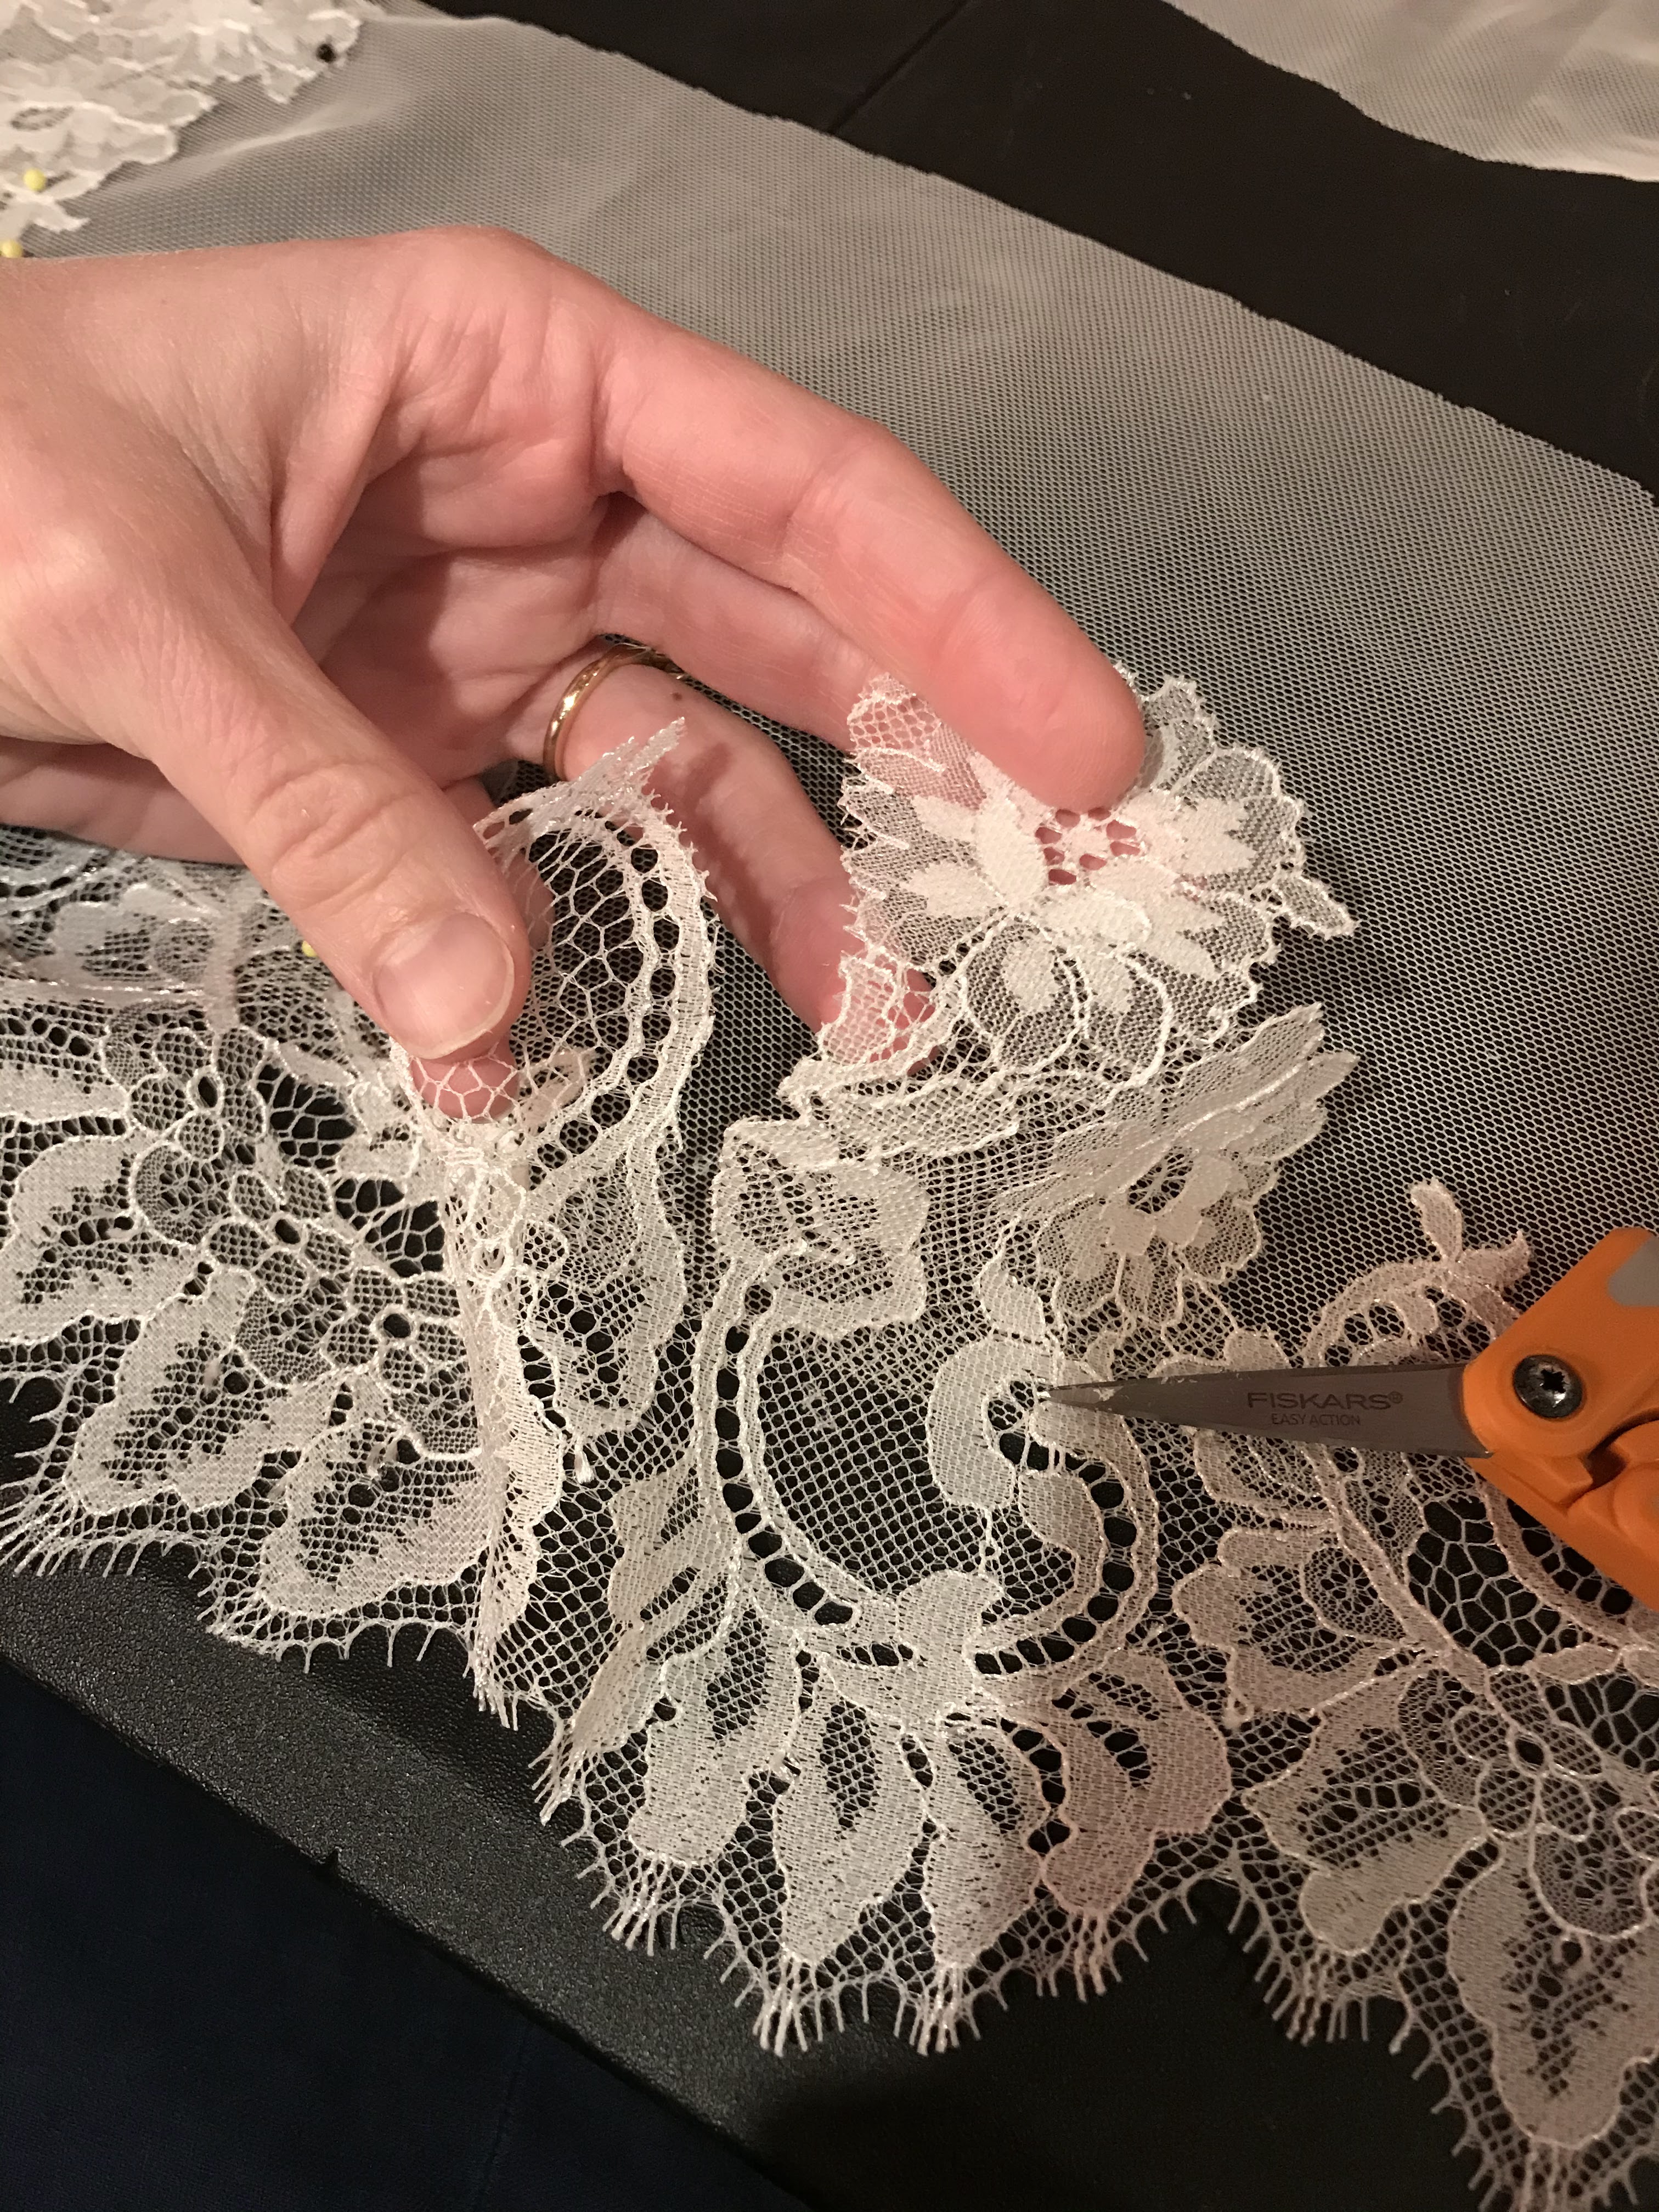
And it was on to shaping the lace to the curved hem of the sleeves!
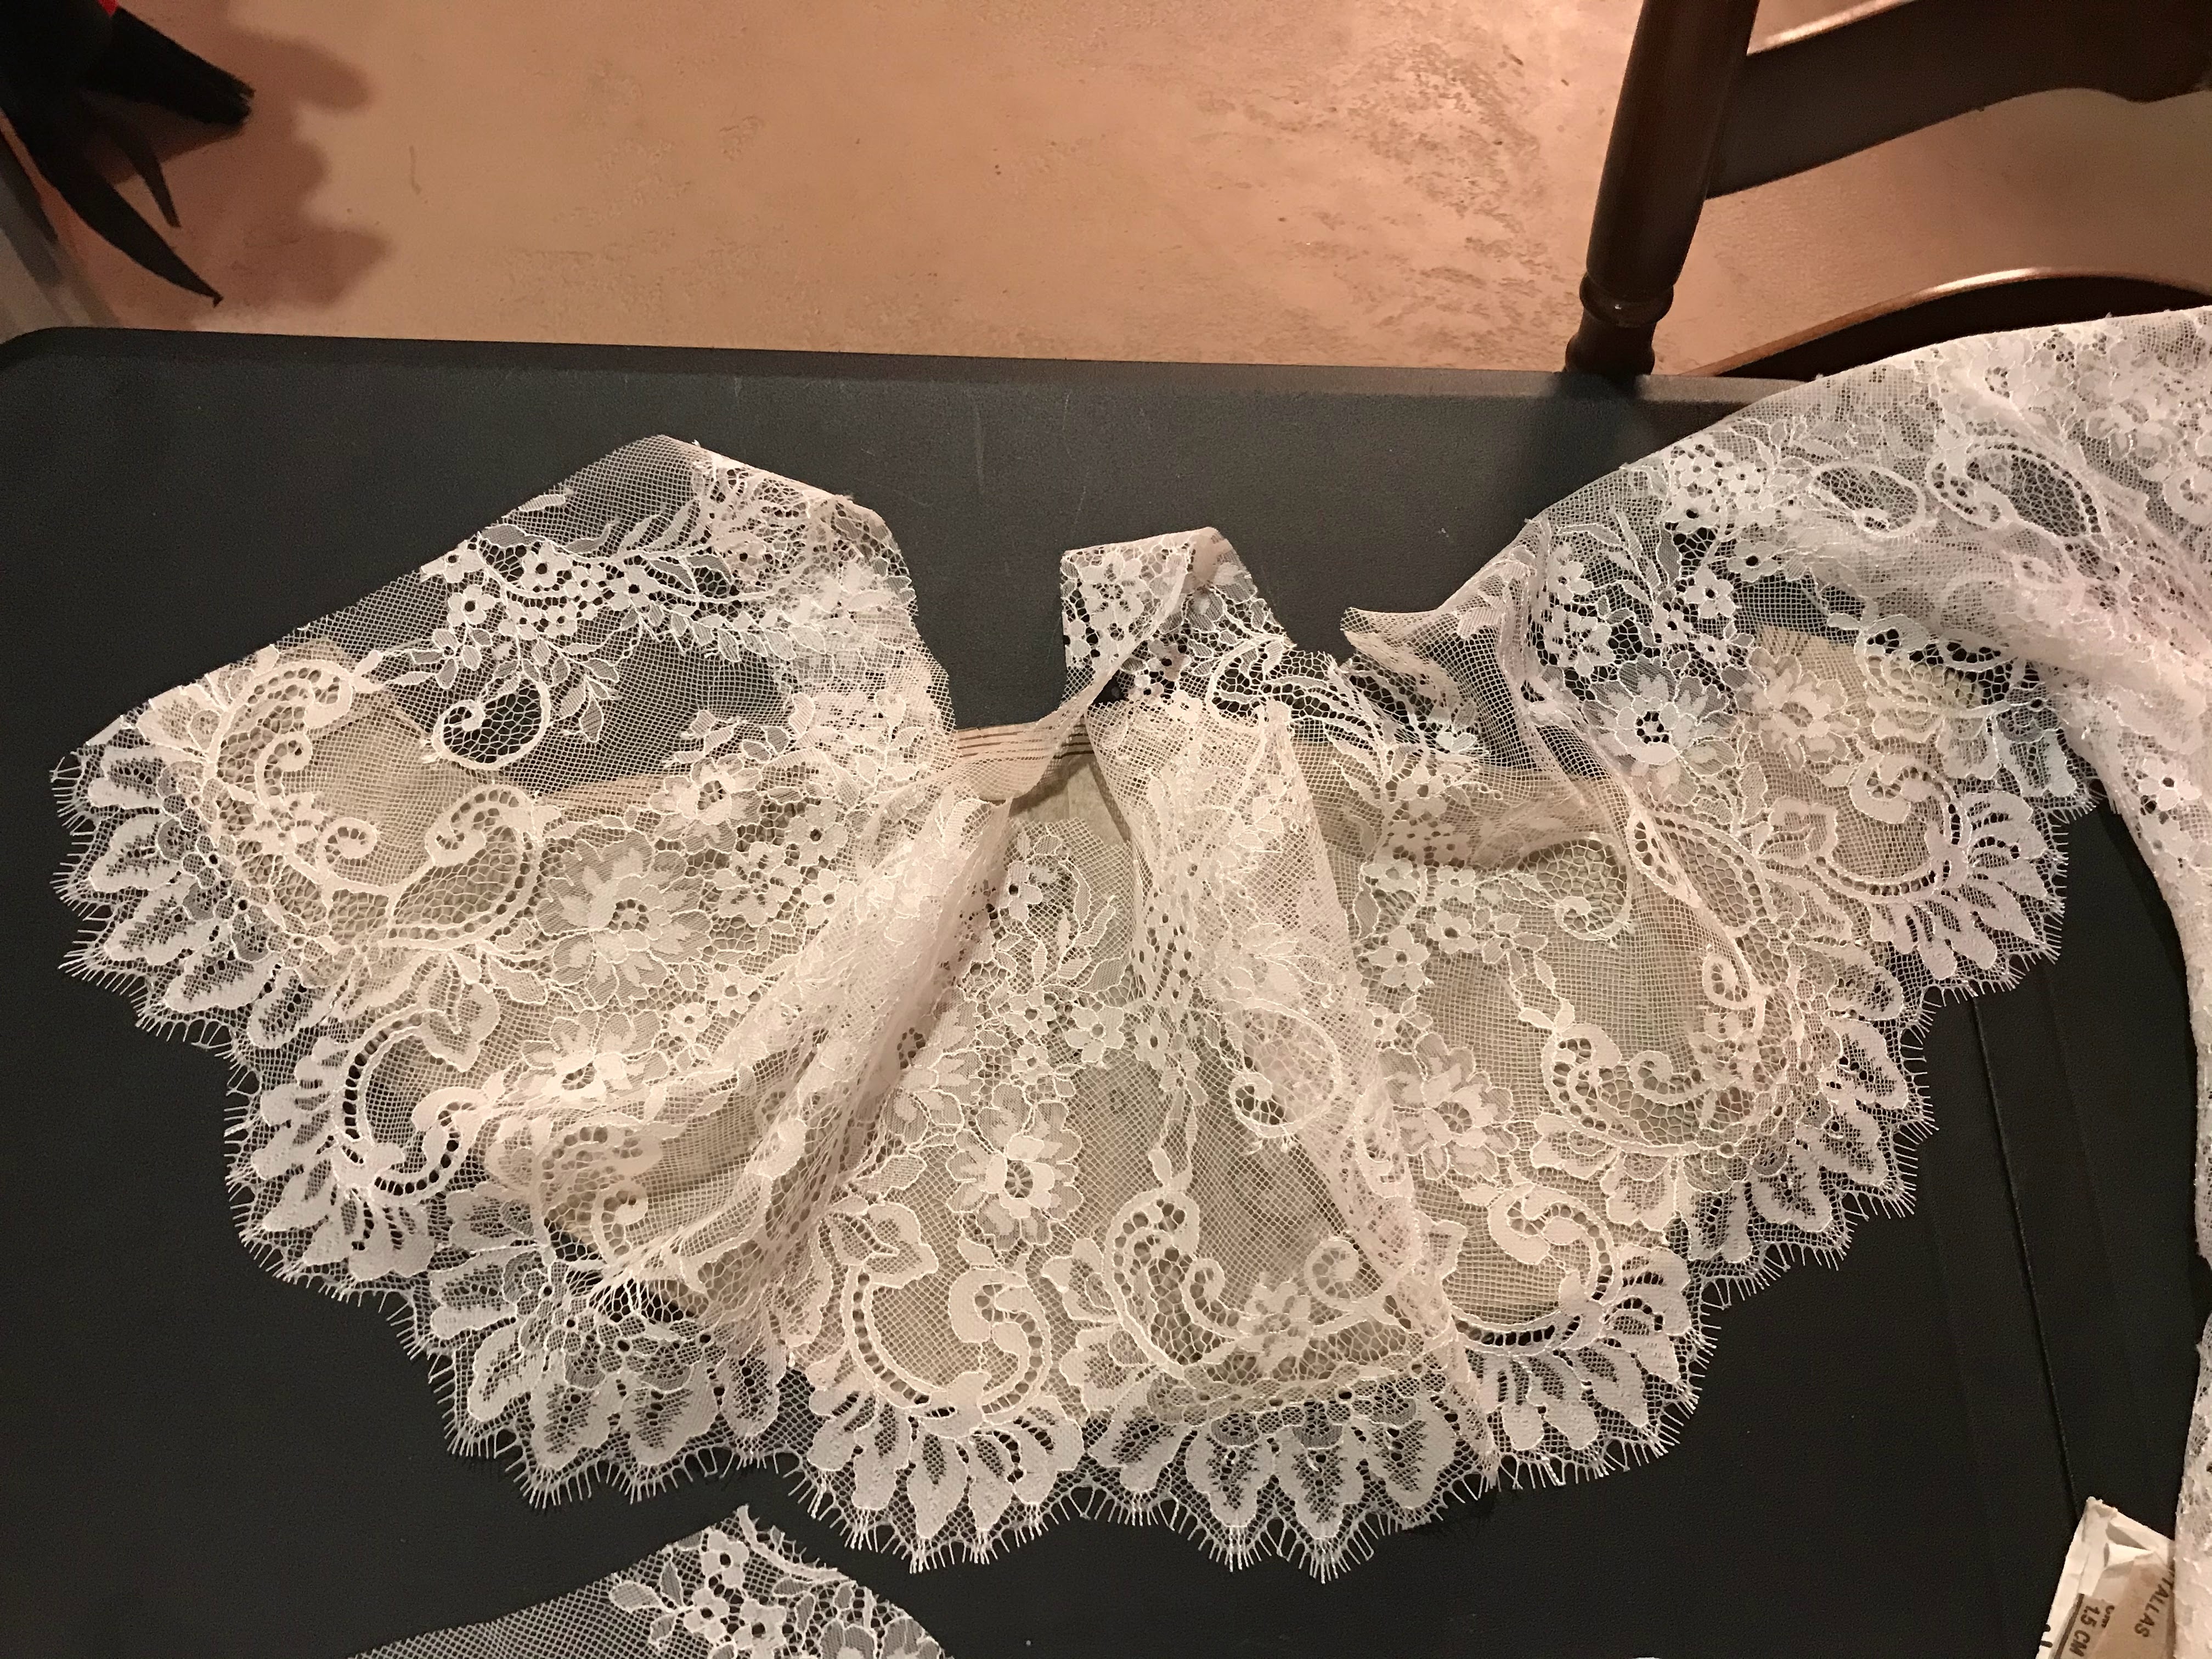
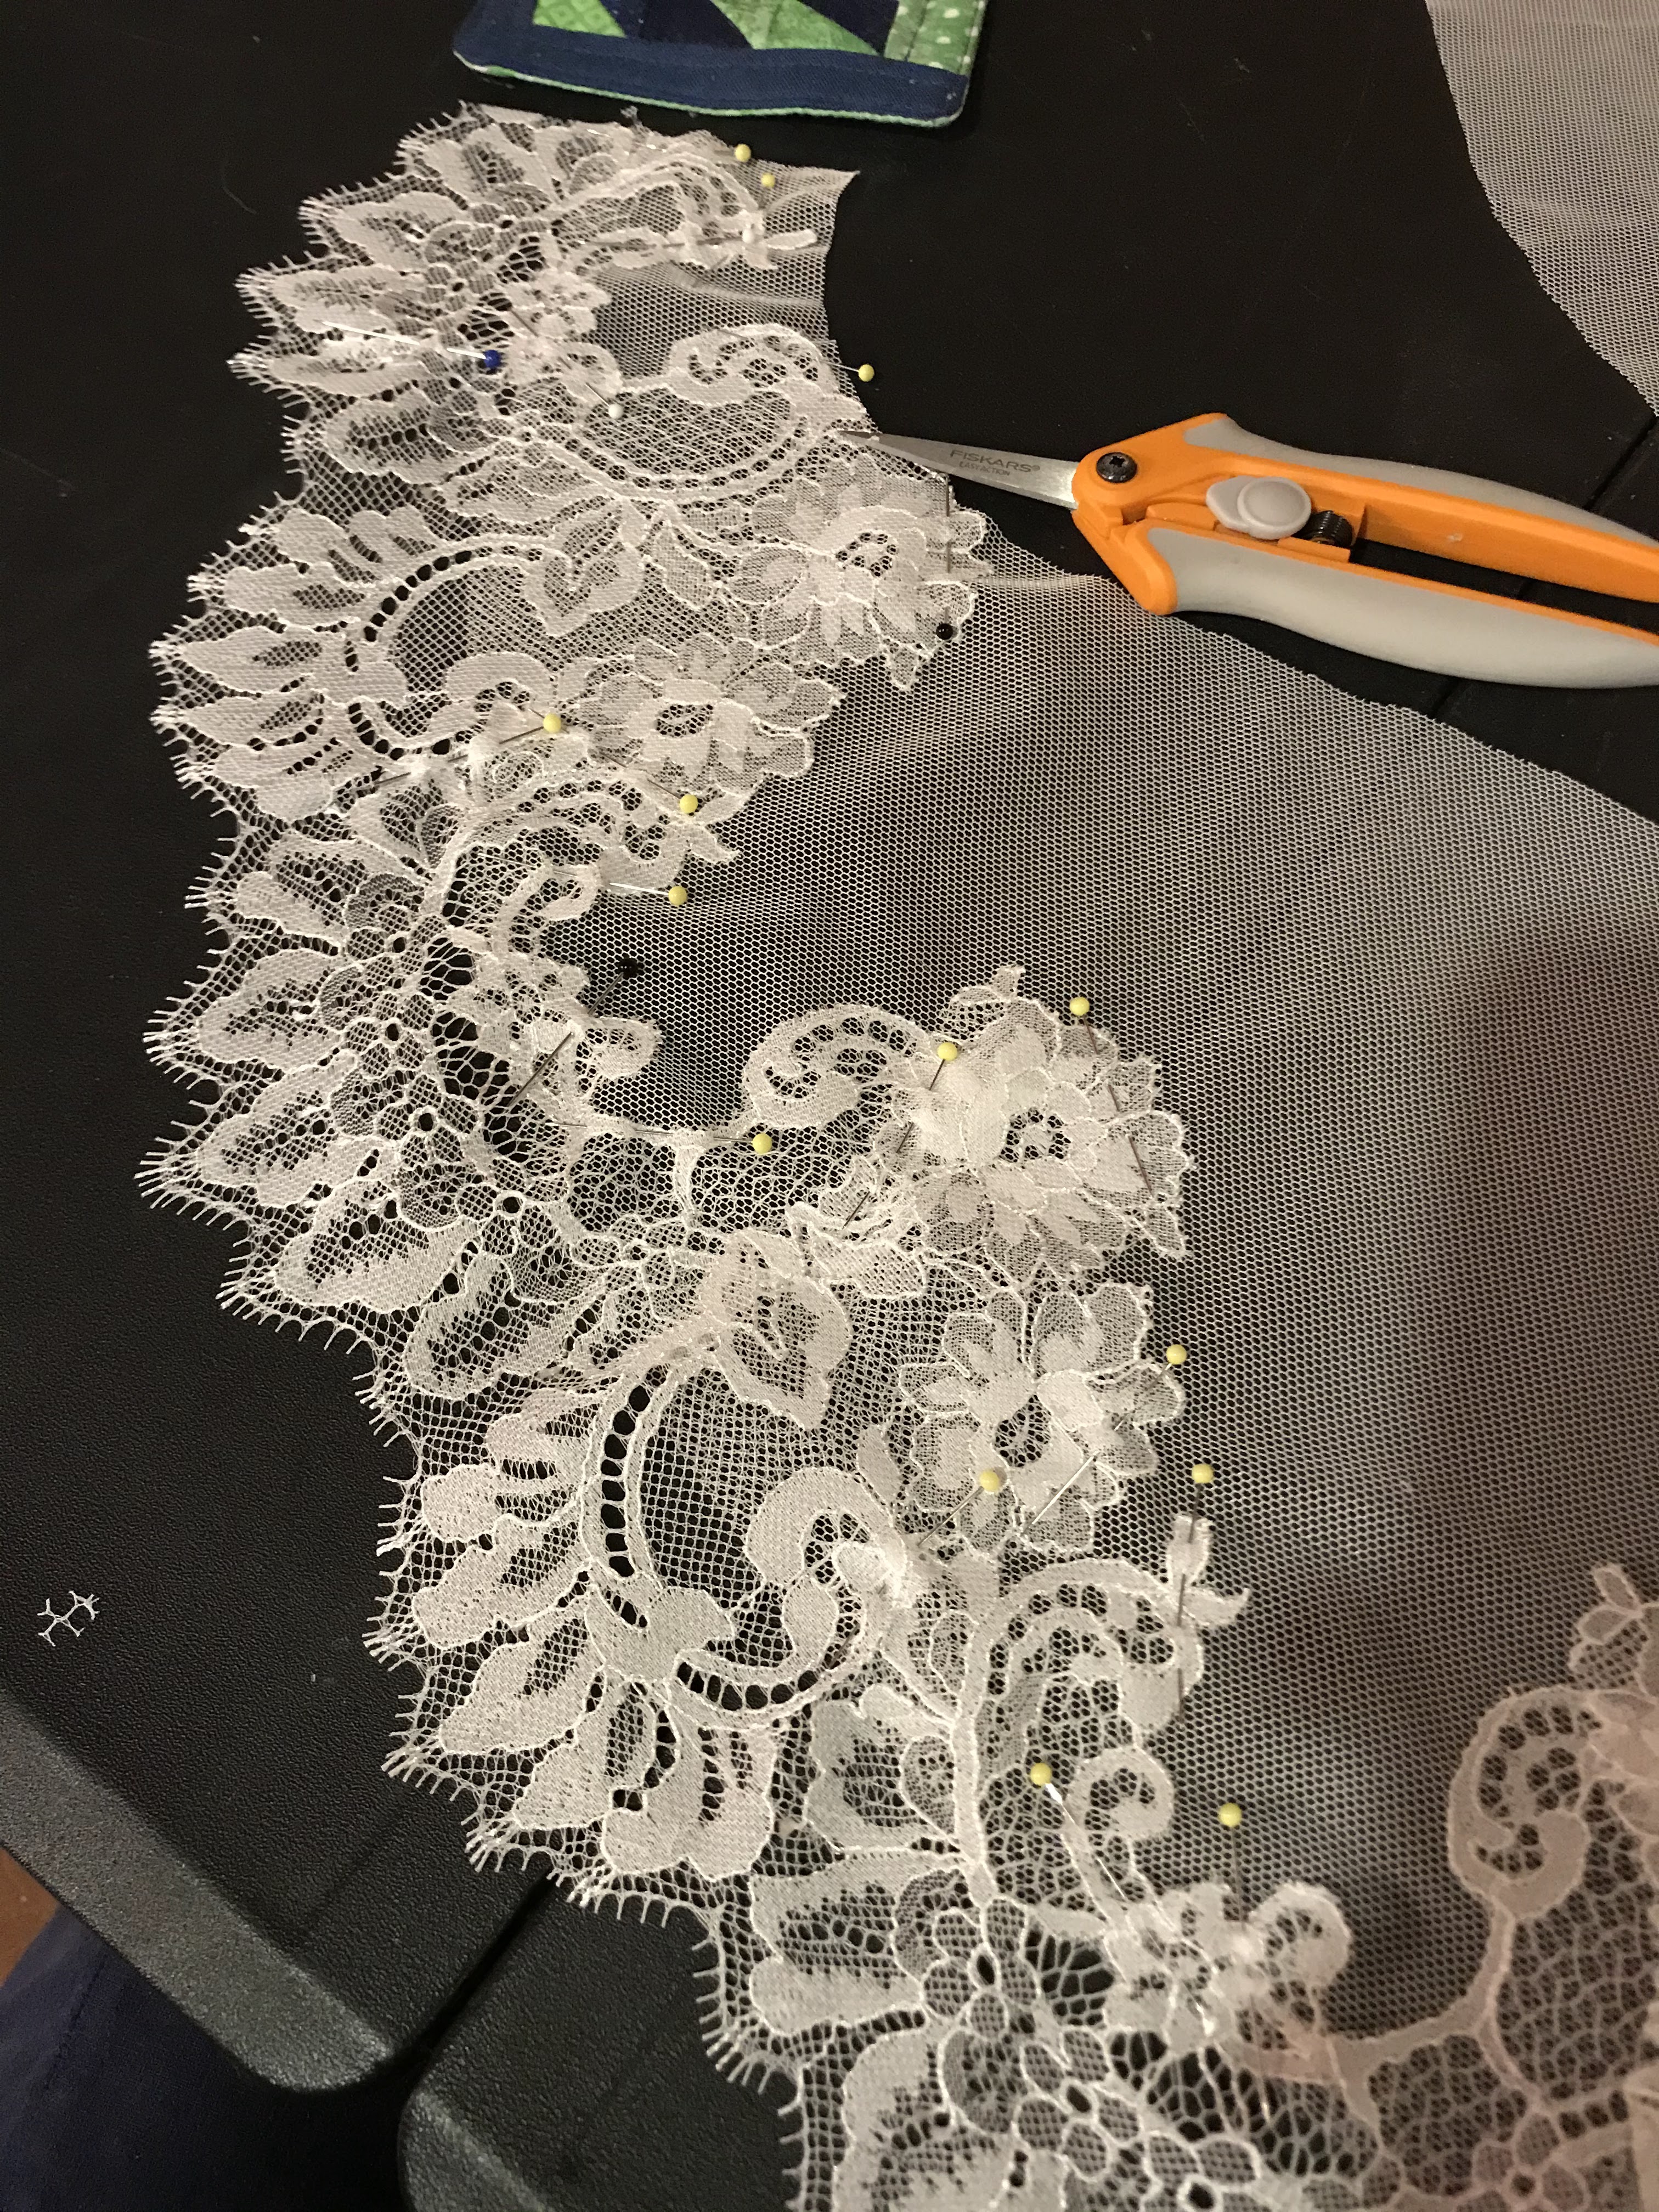
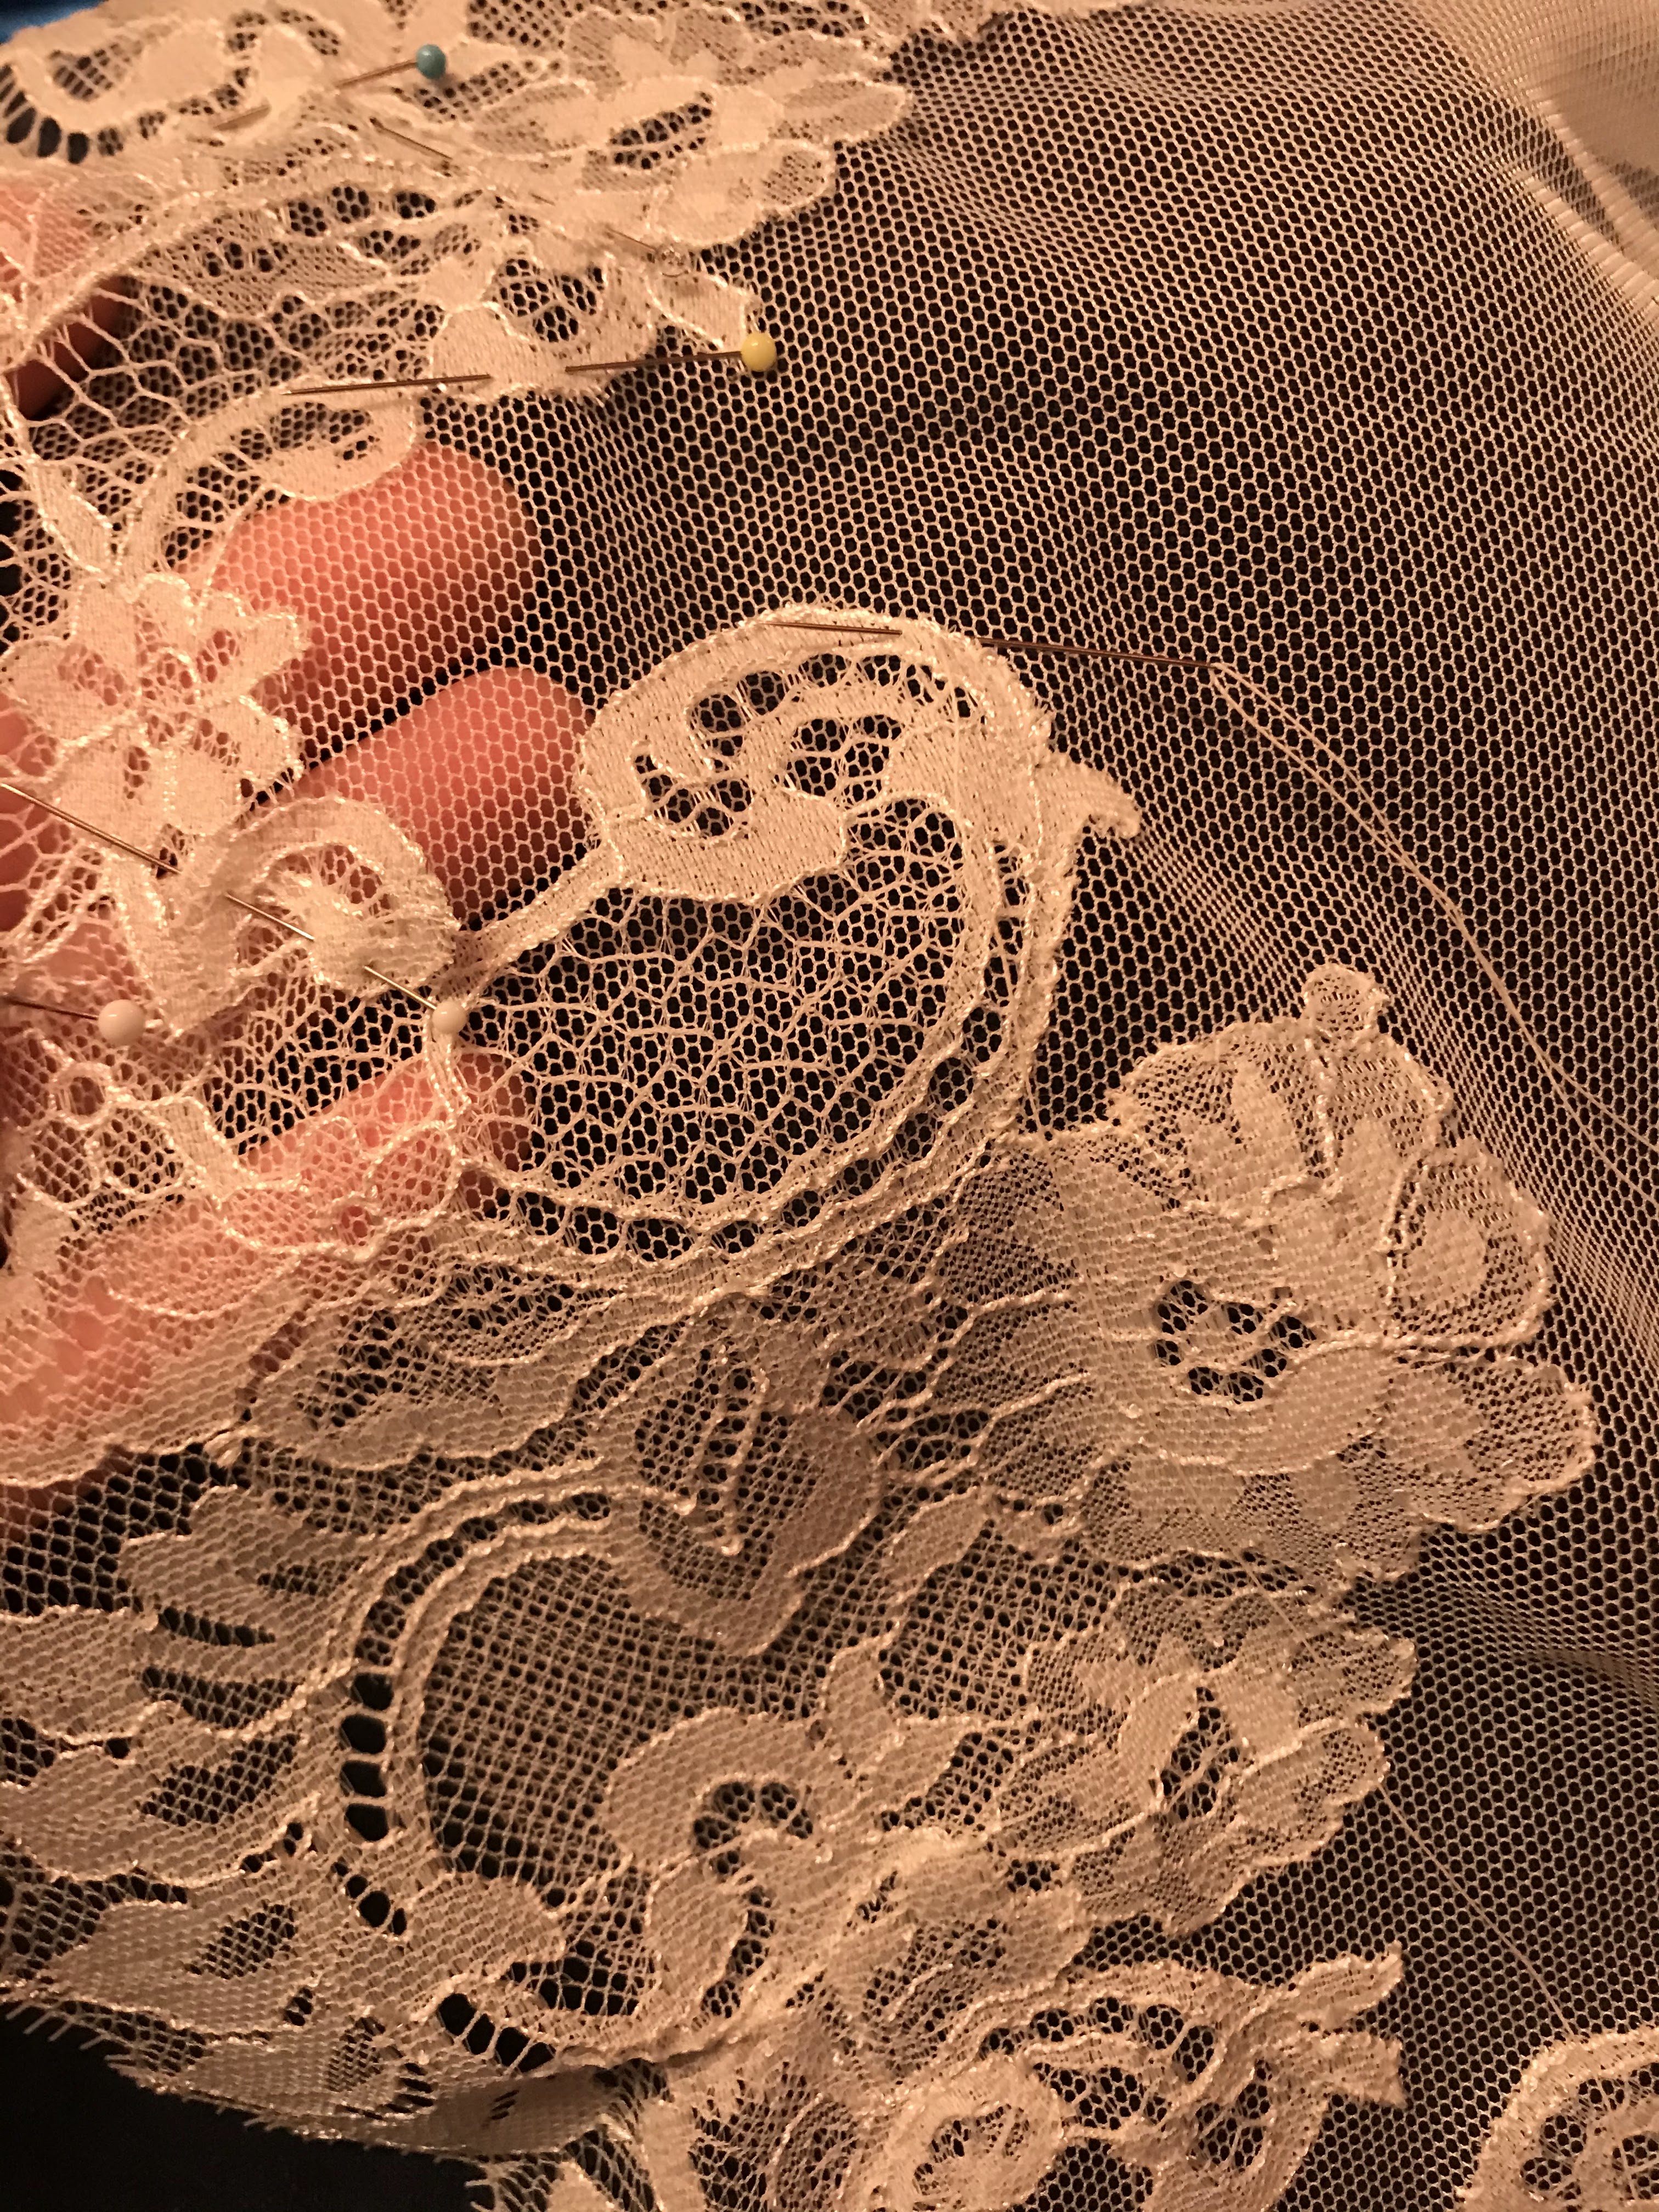
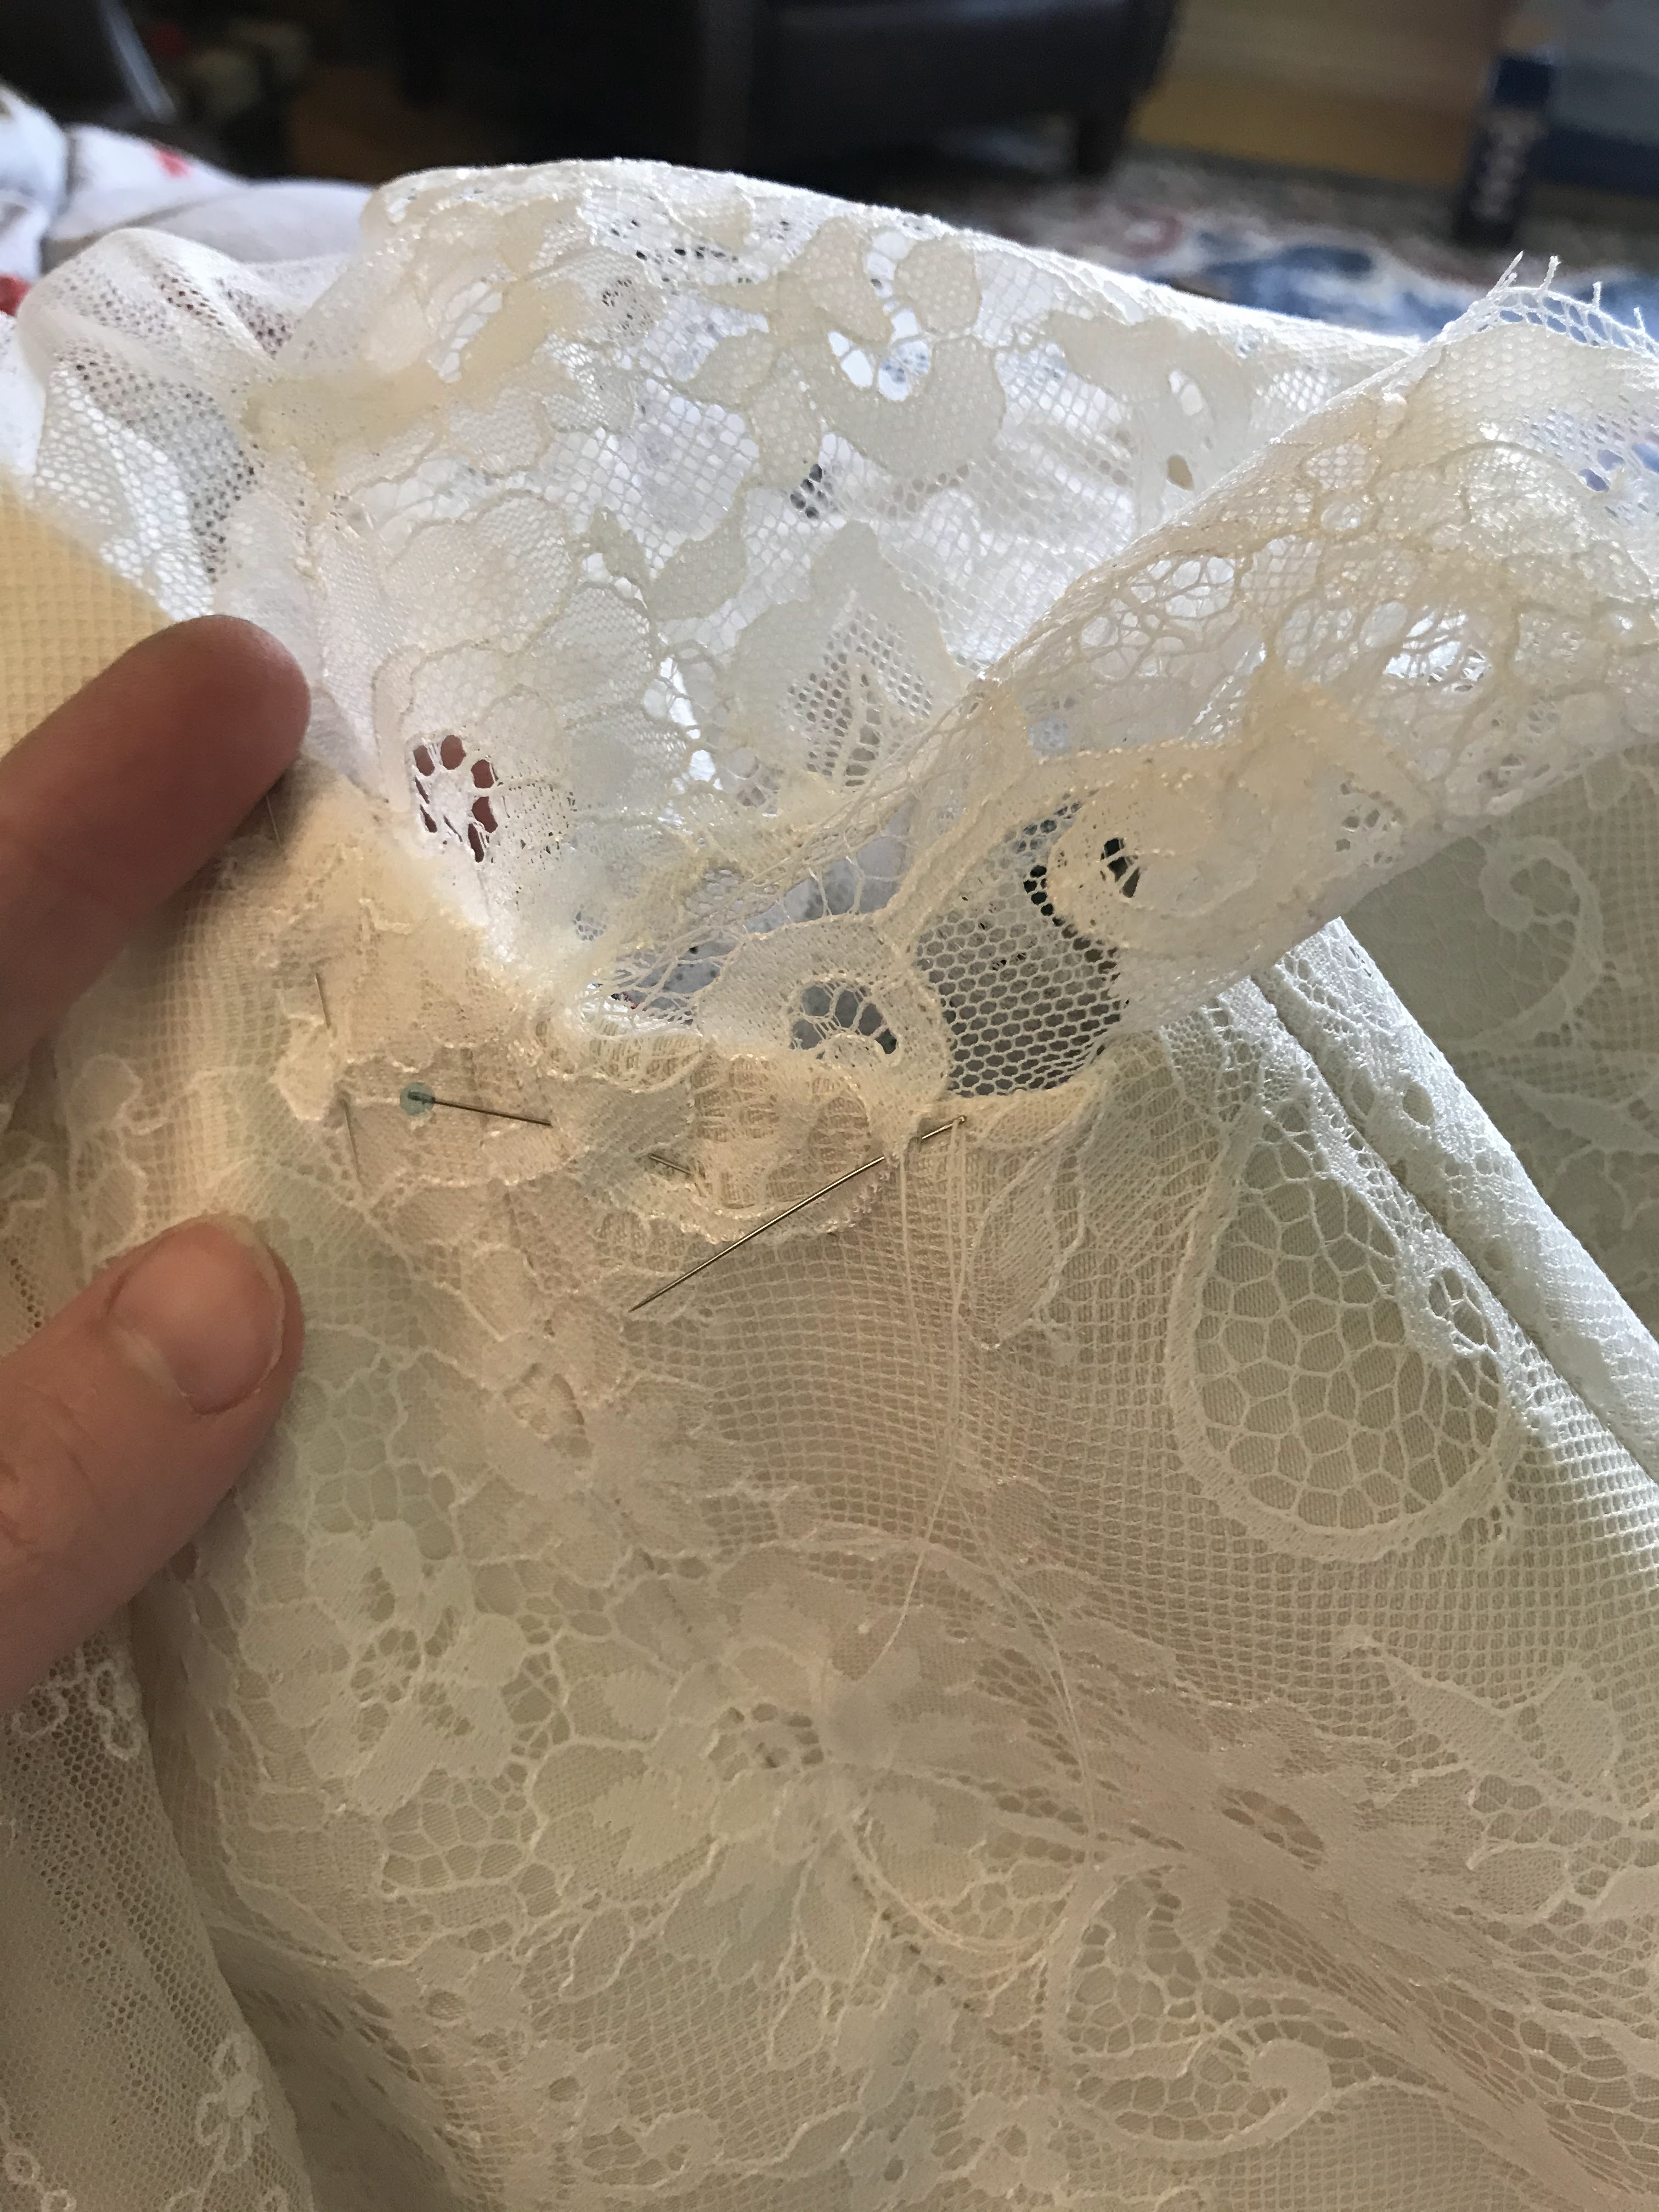
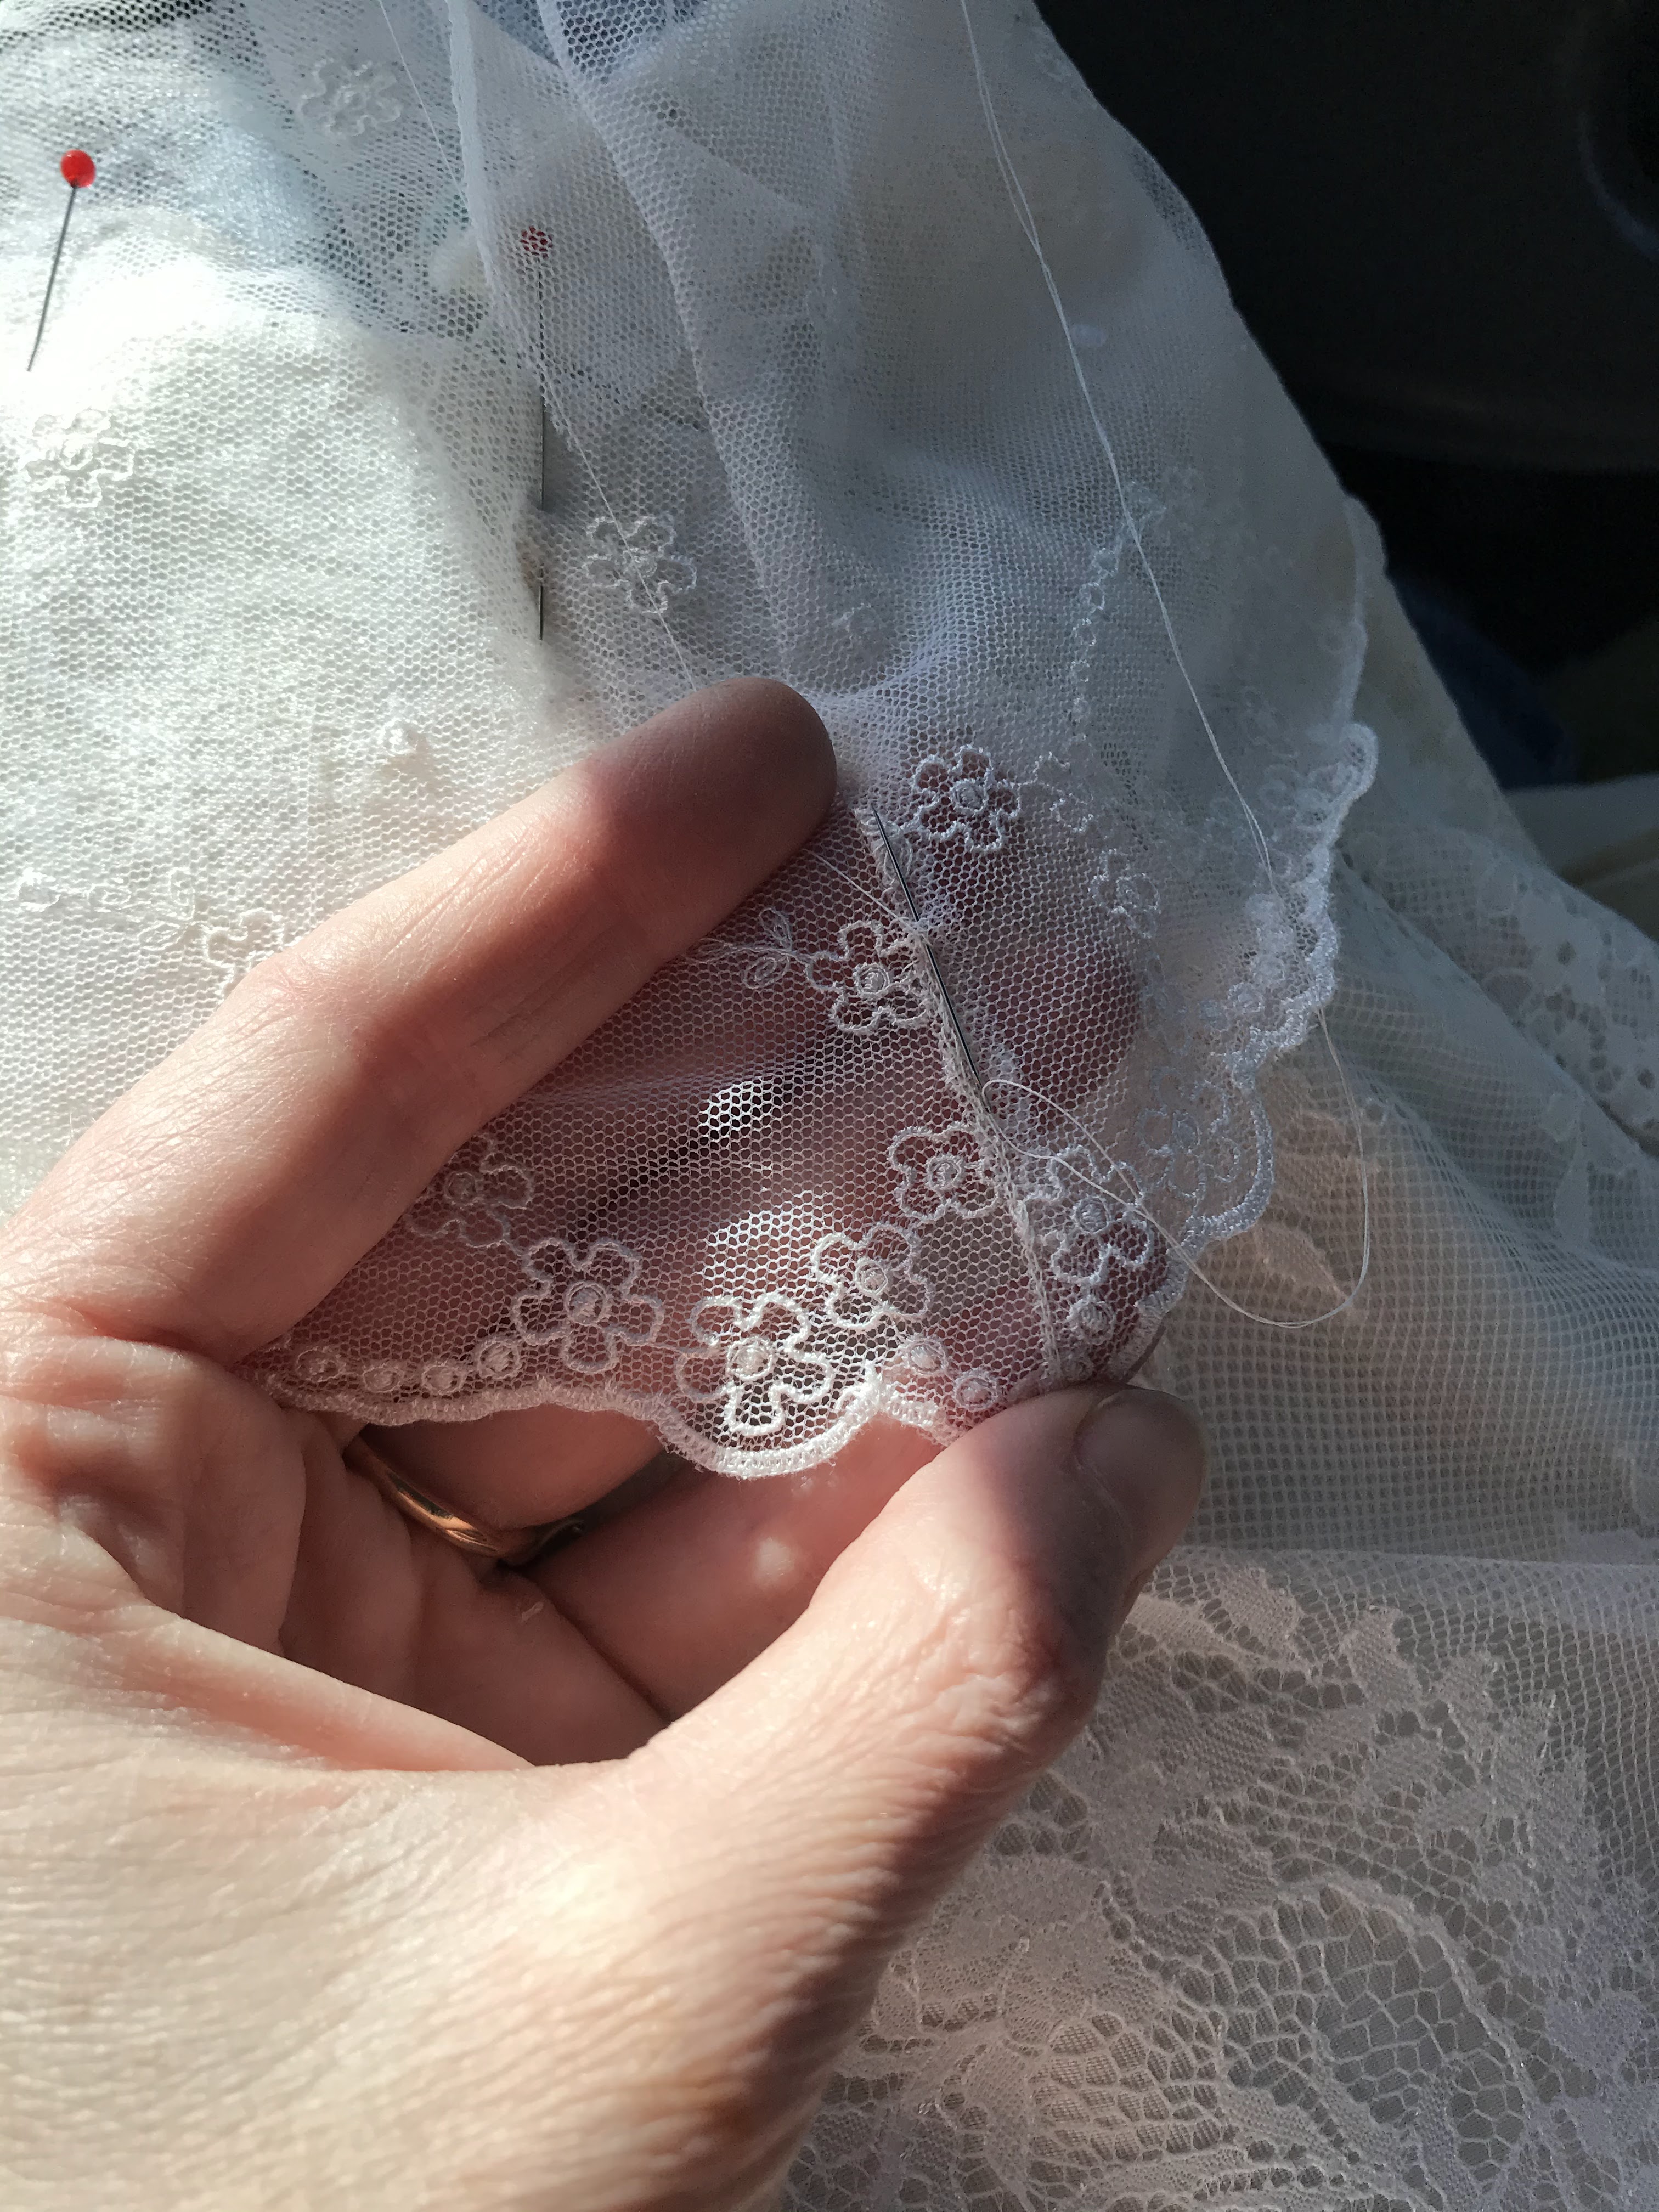
Where the lace naturally wanted buckle around the curve, I cut small slits between motifs and overlapped the pattern.
Each motif got pinned in place as I went along.
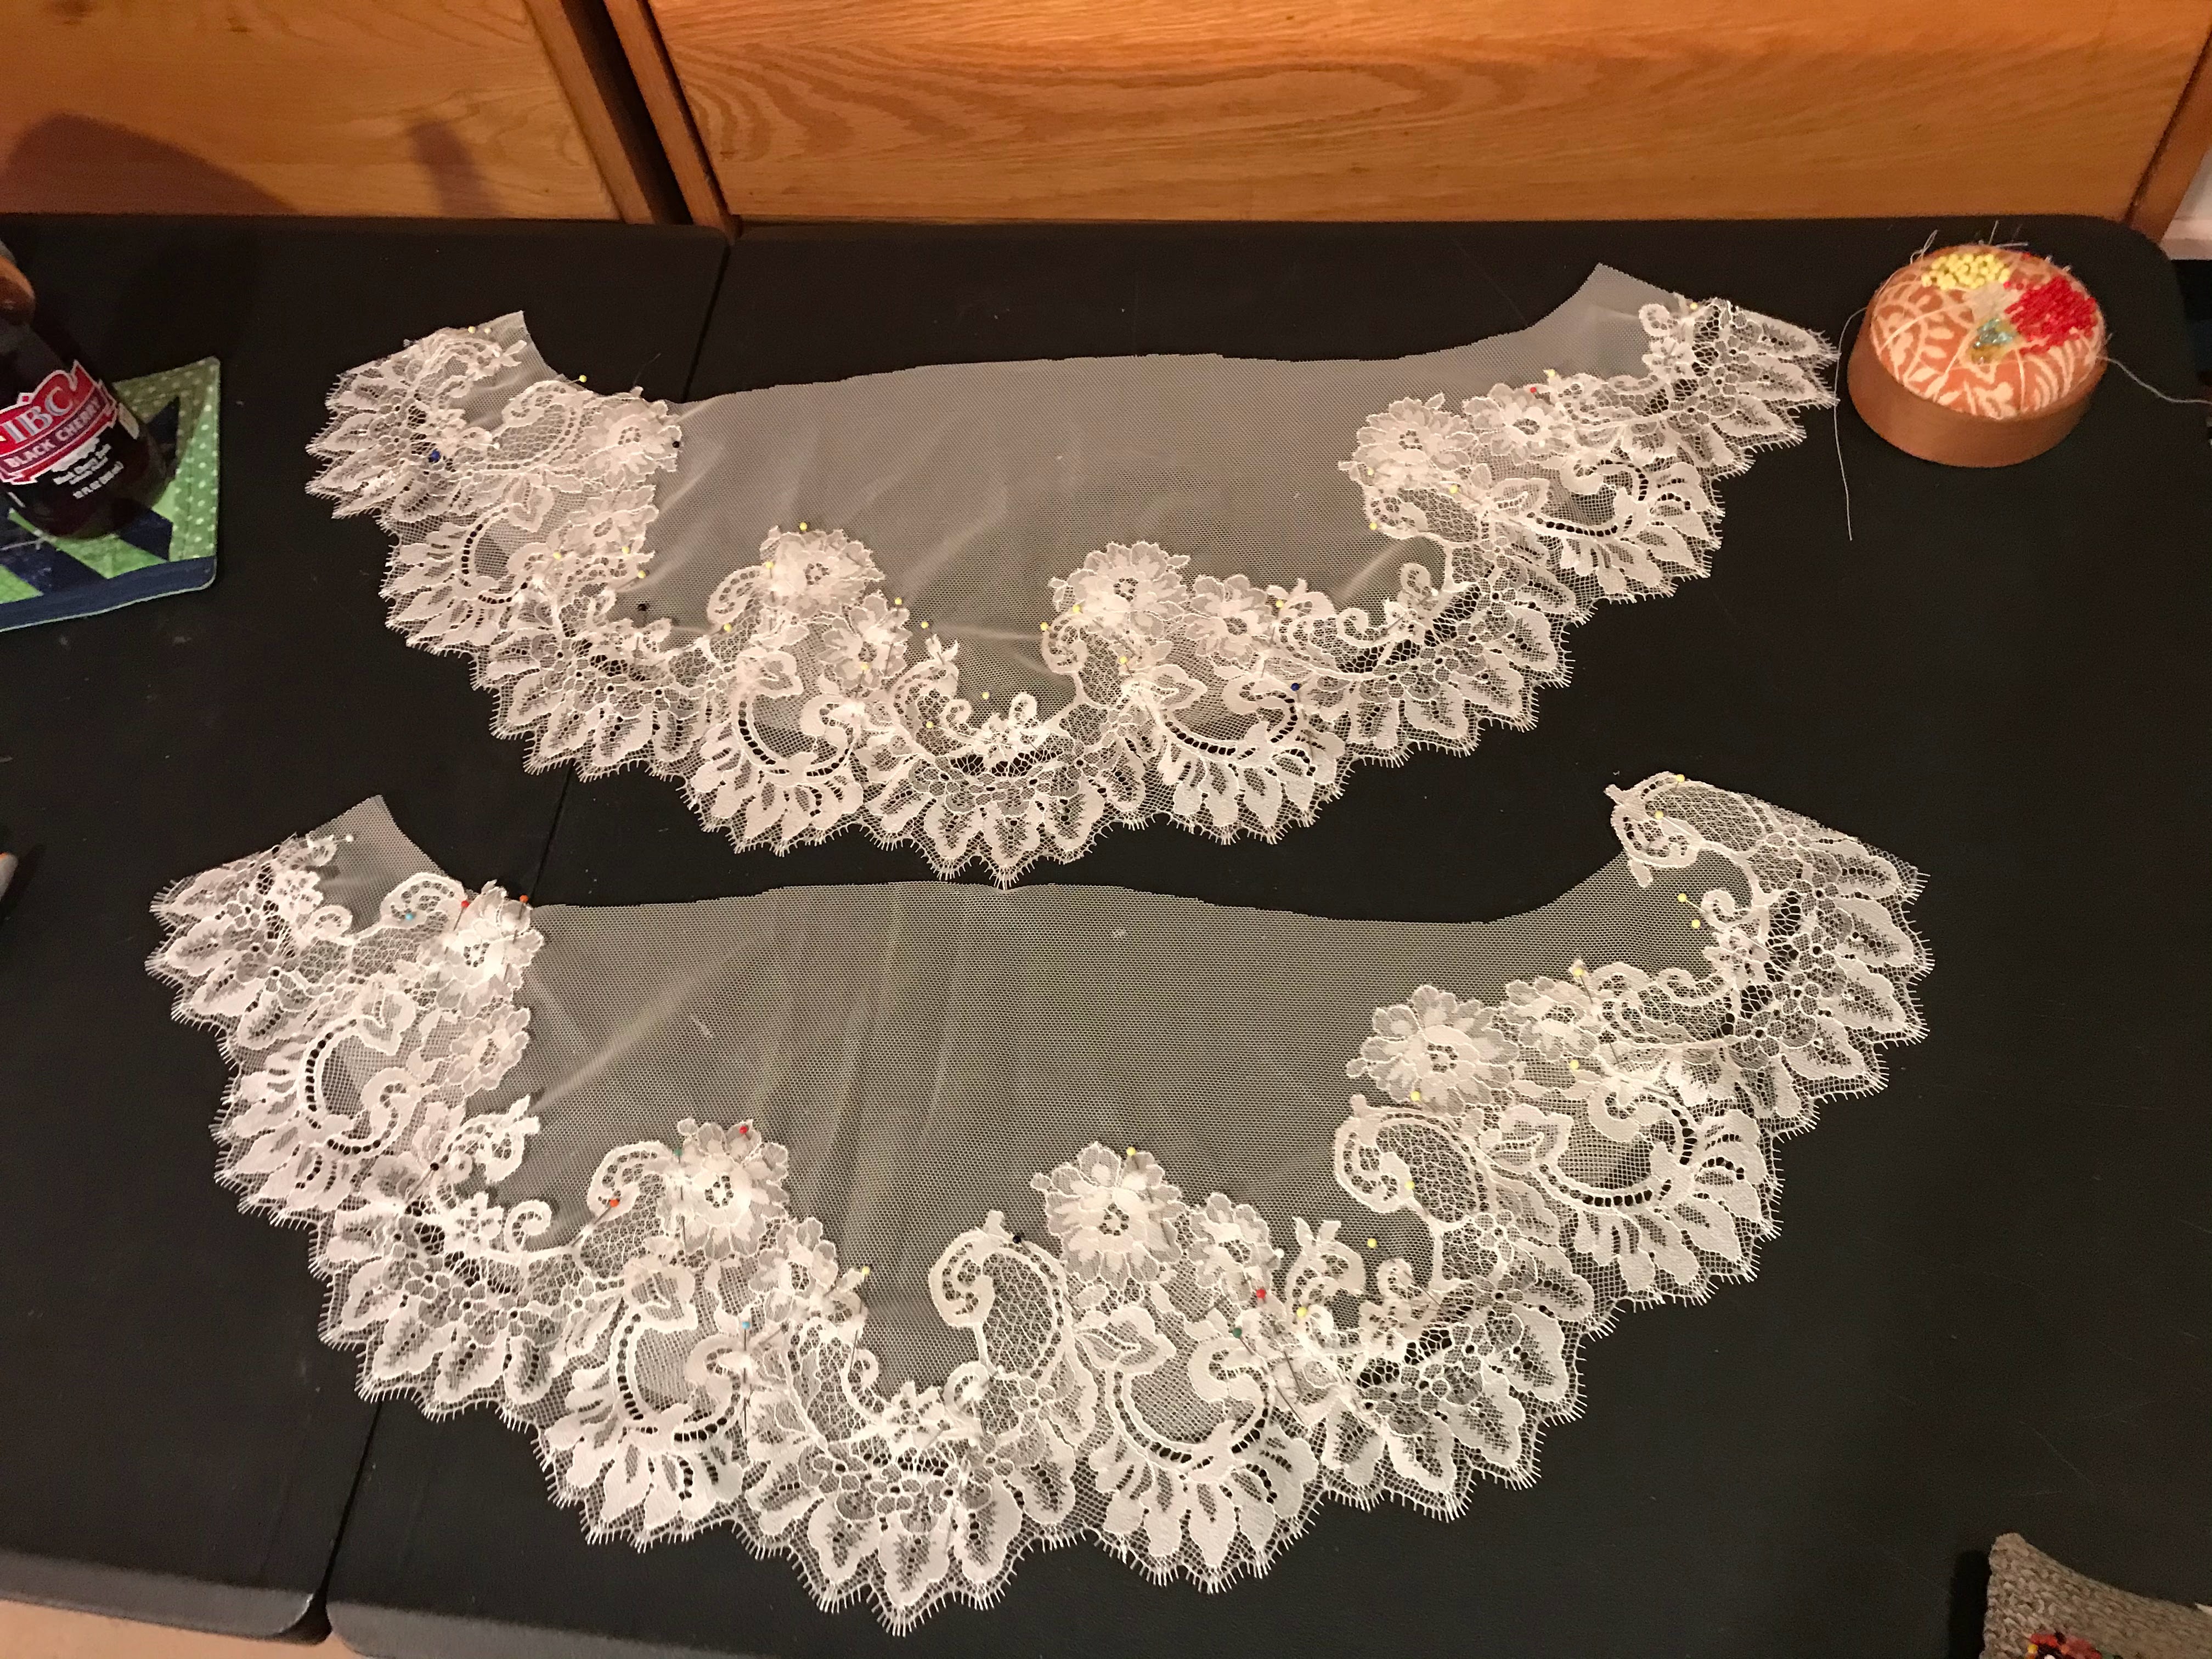
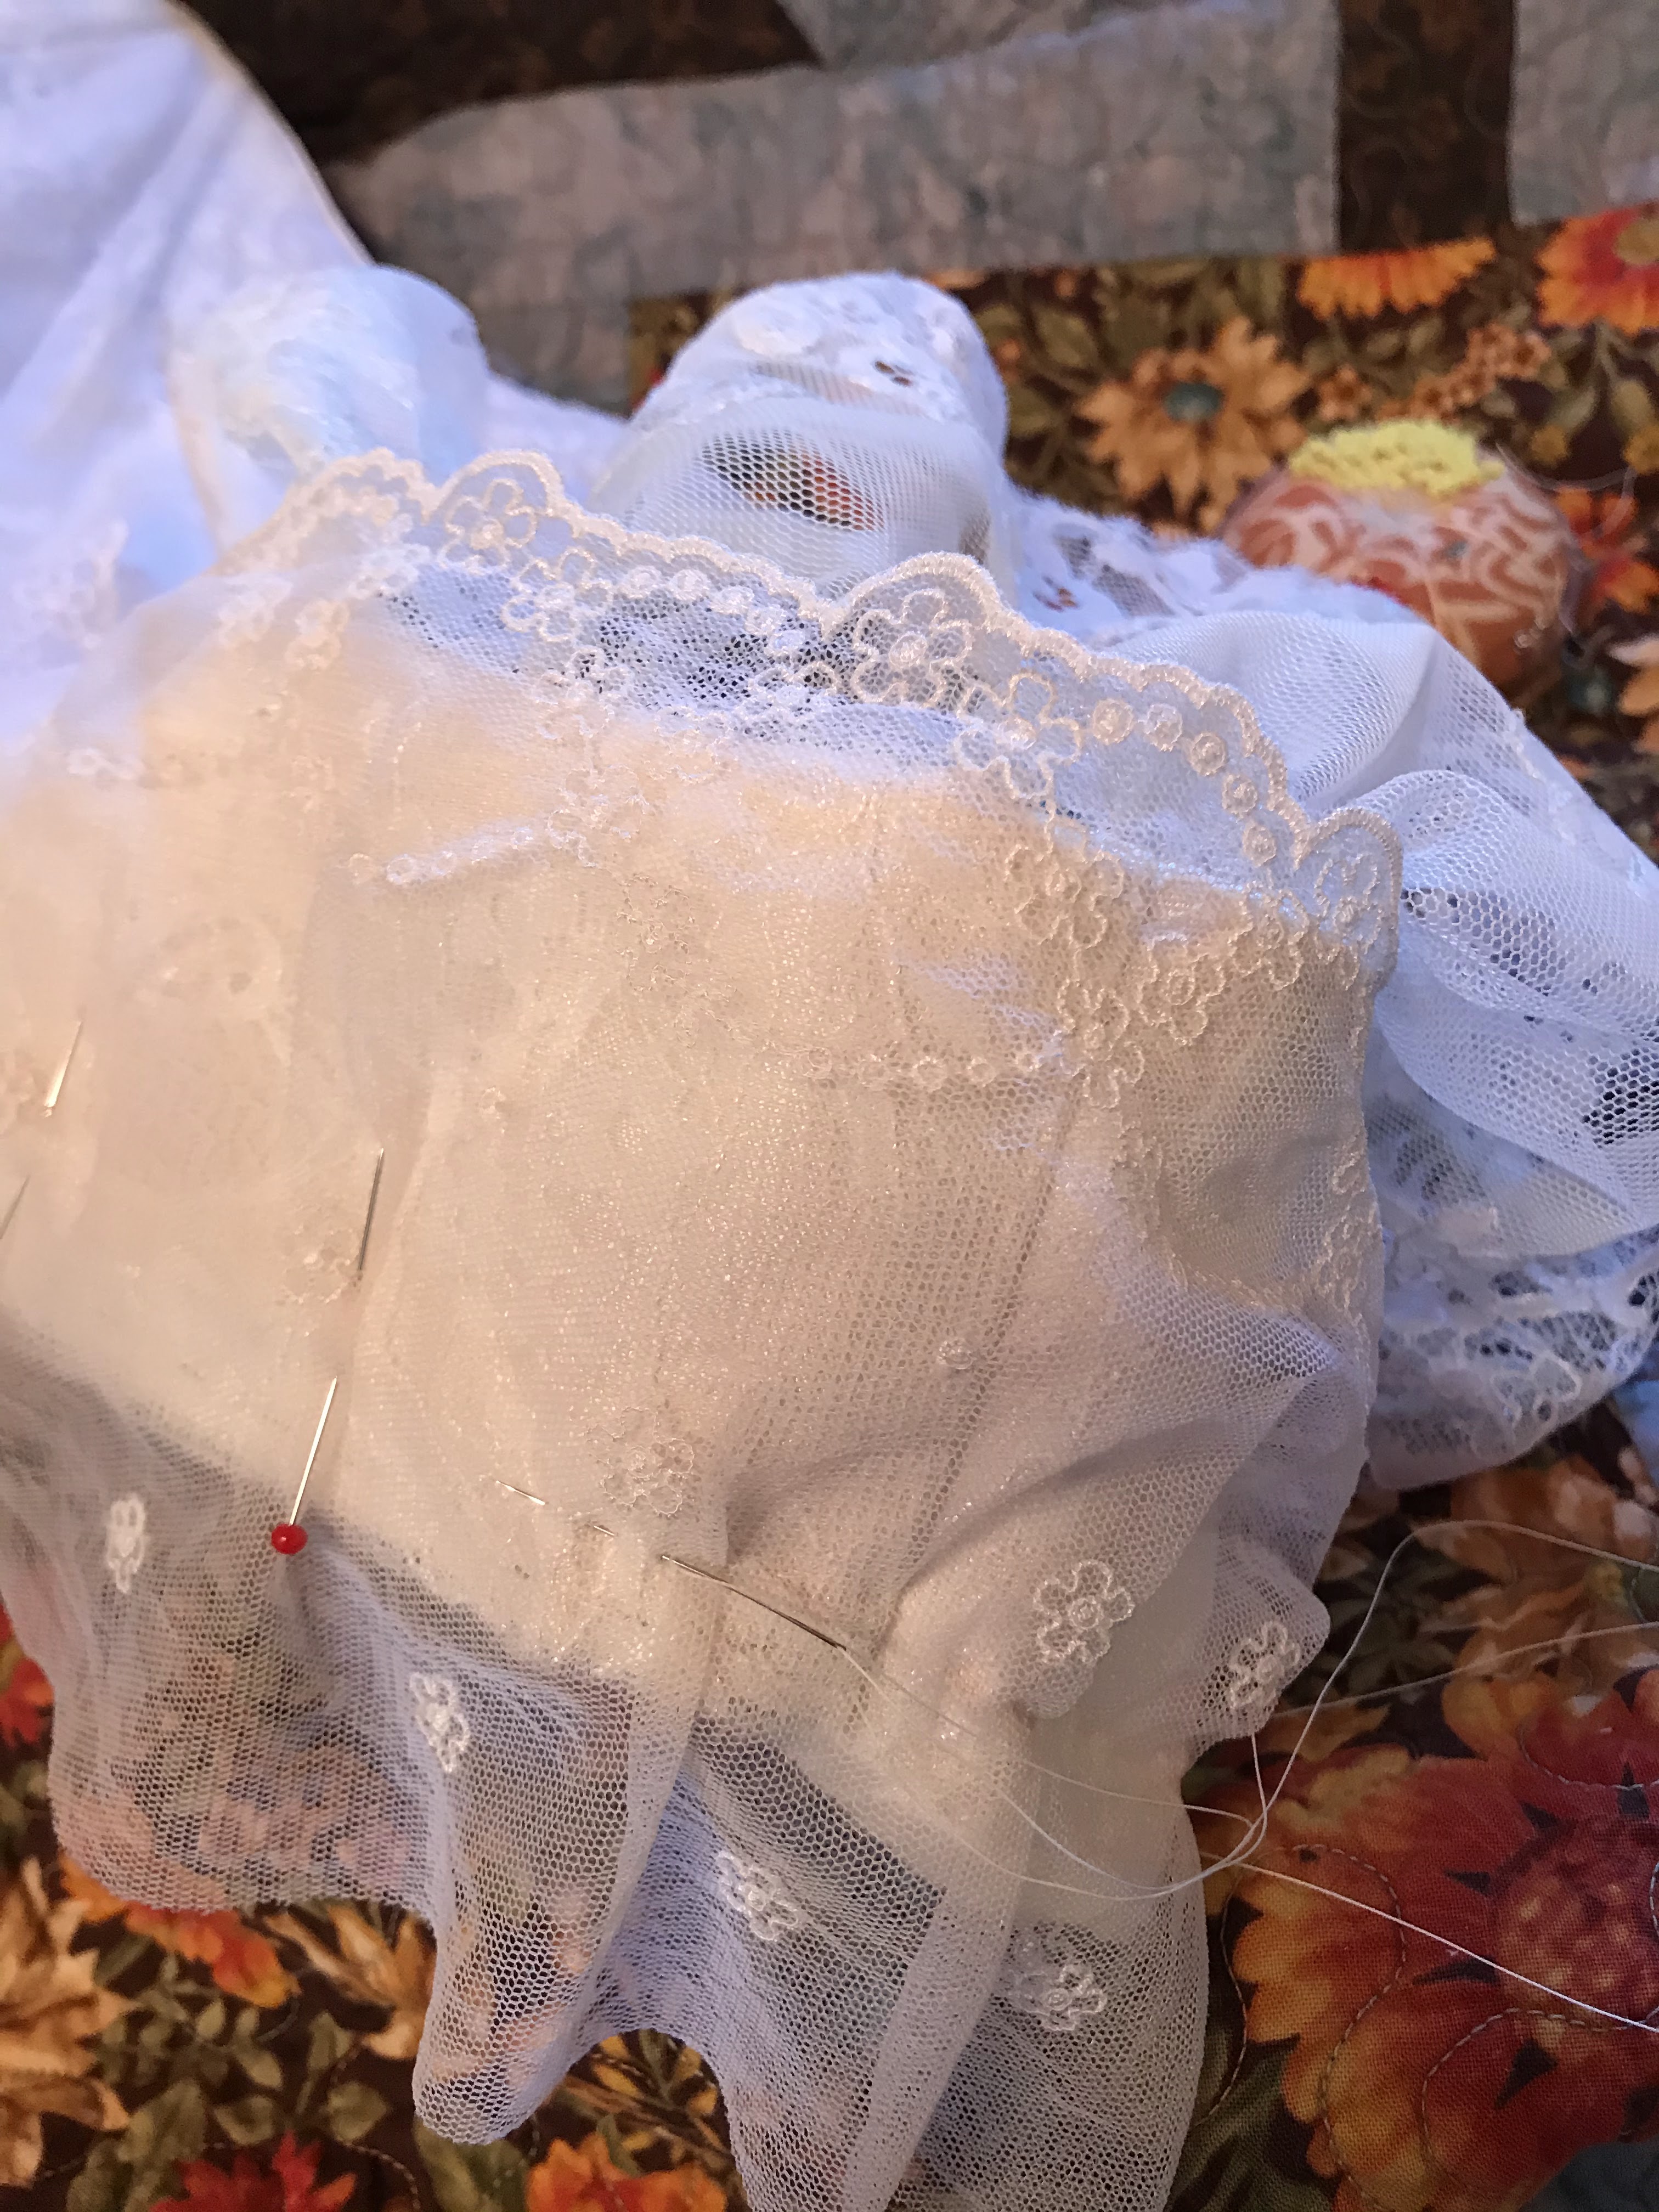
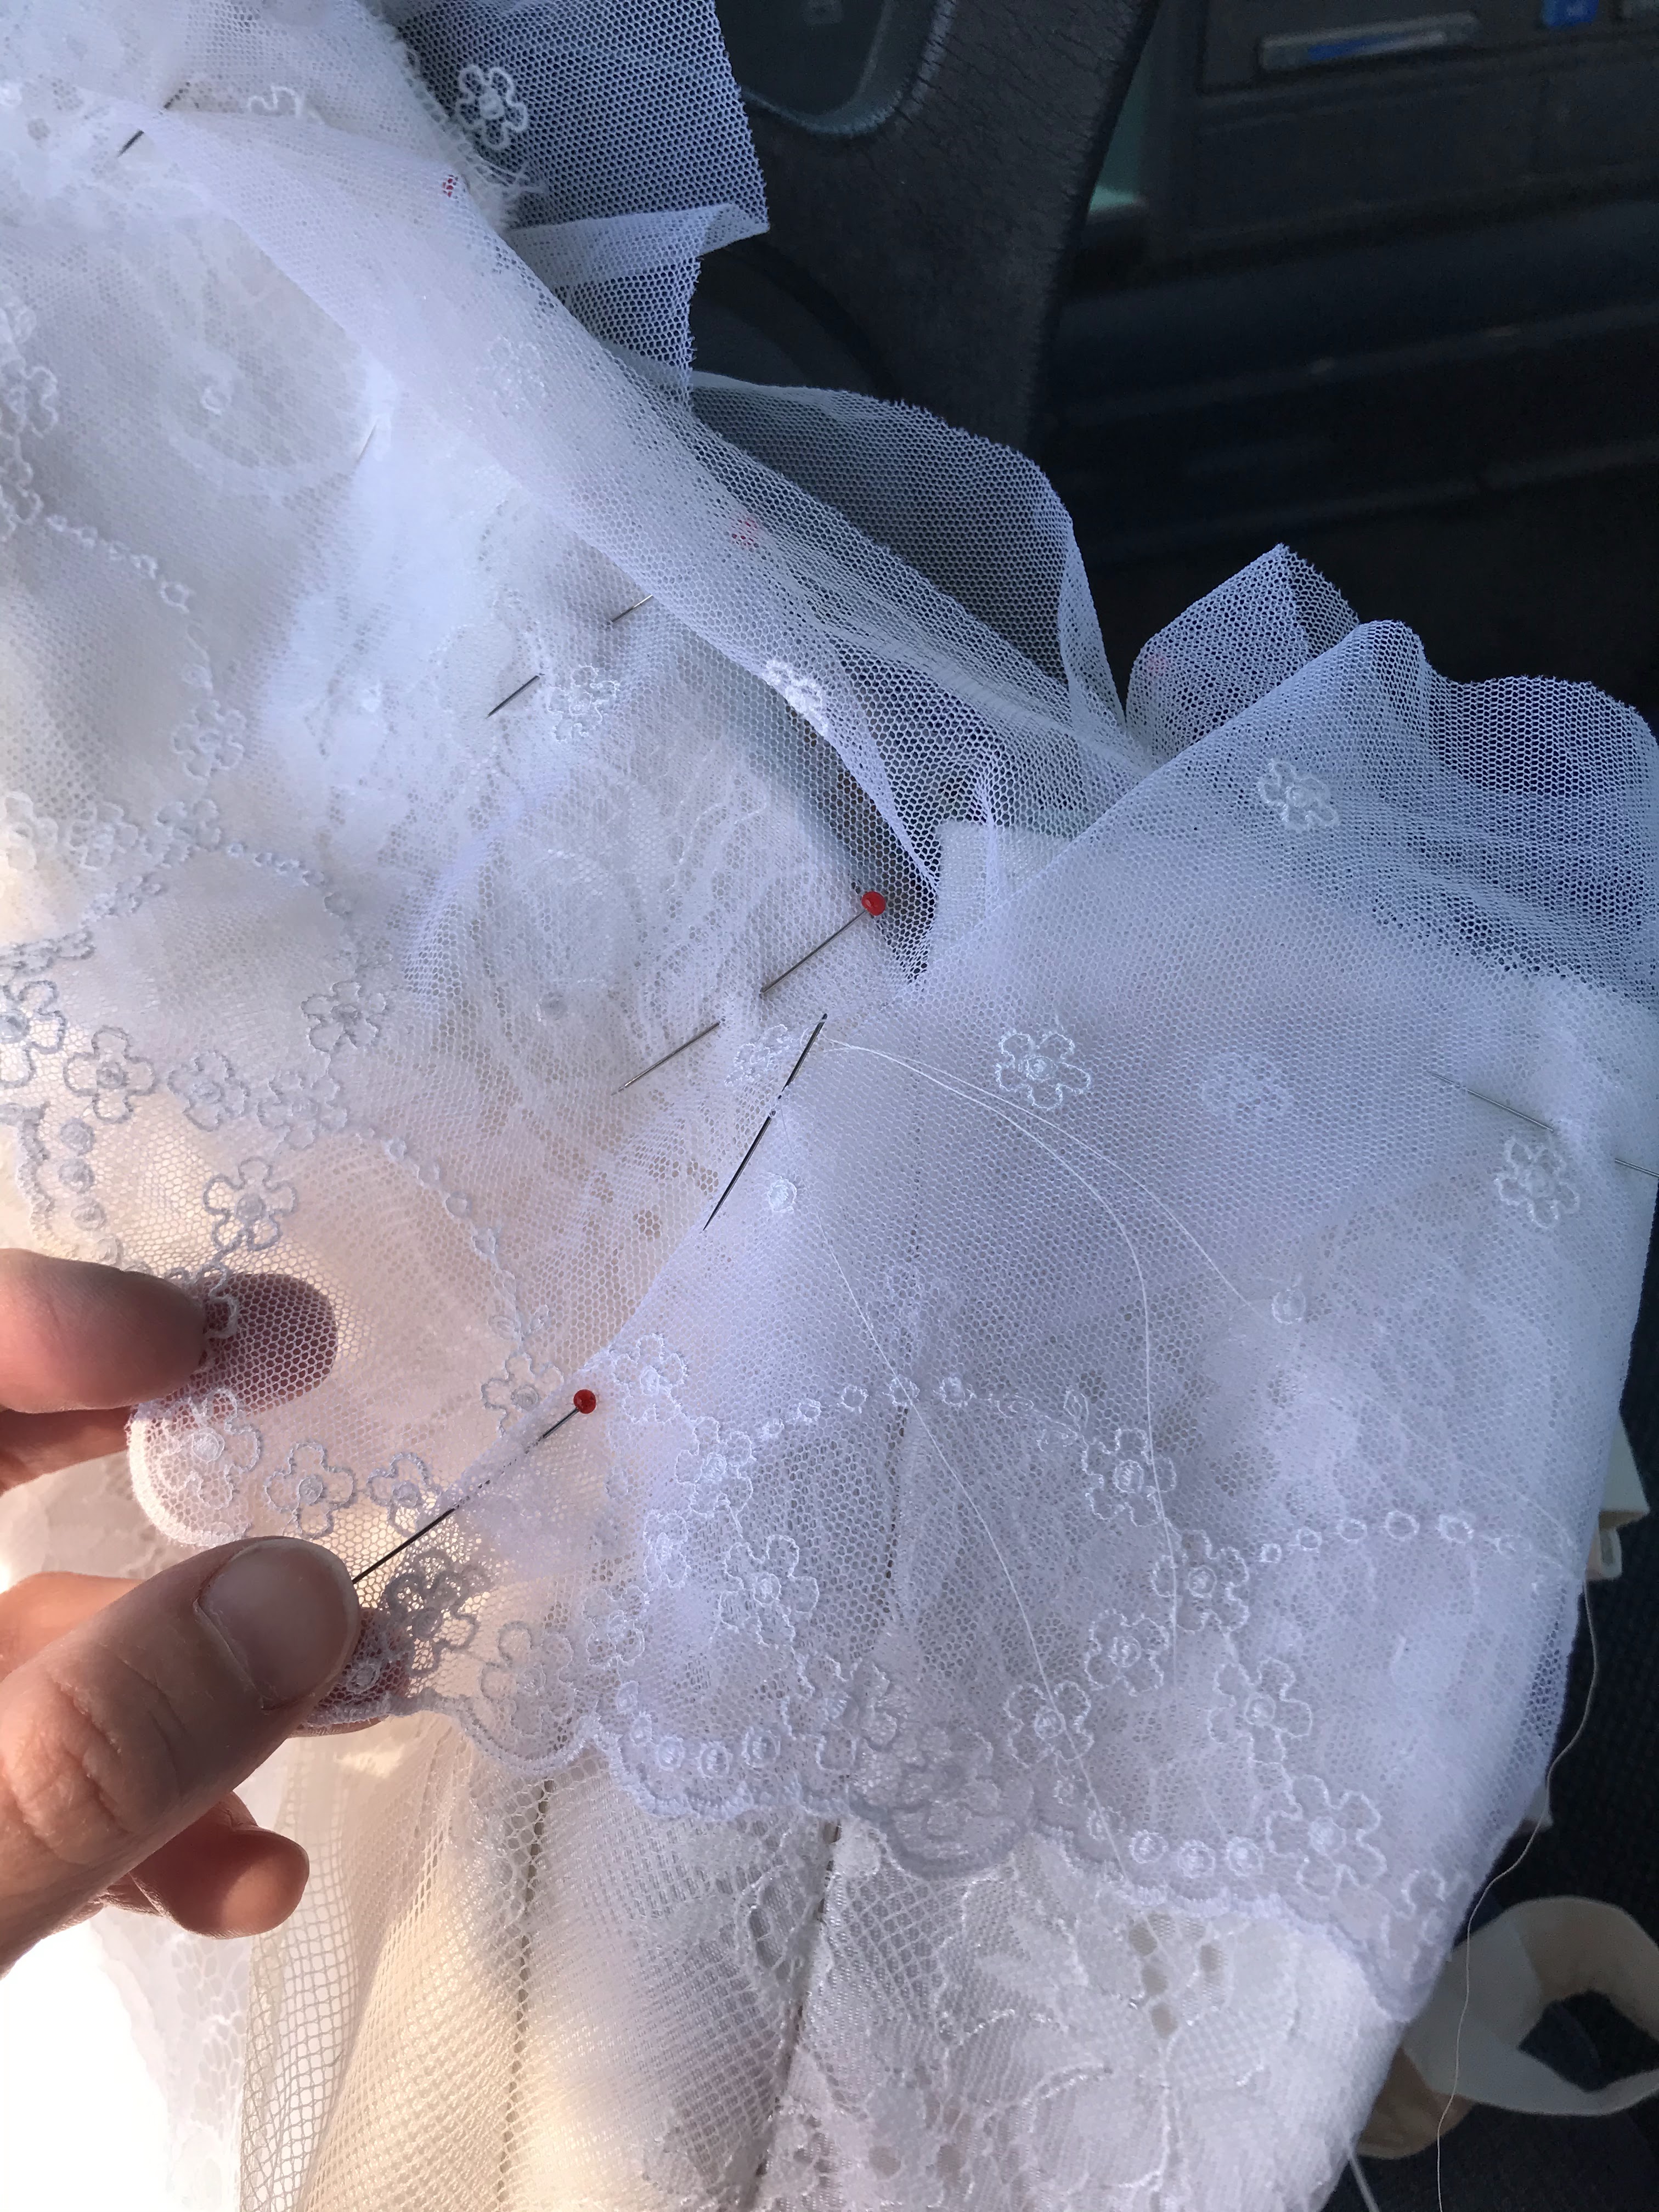
After about an hour or two, per sleeve, my lace was shaped!
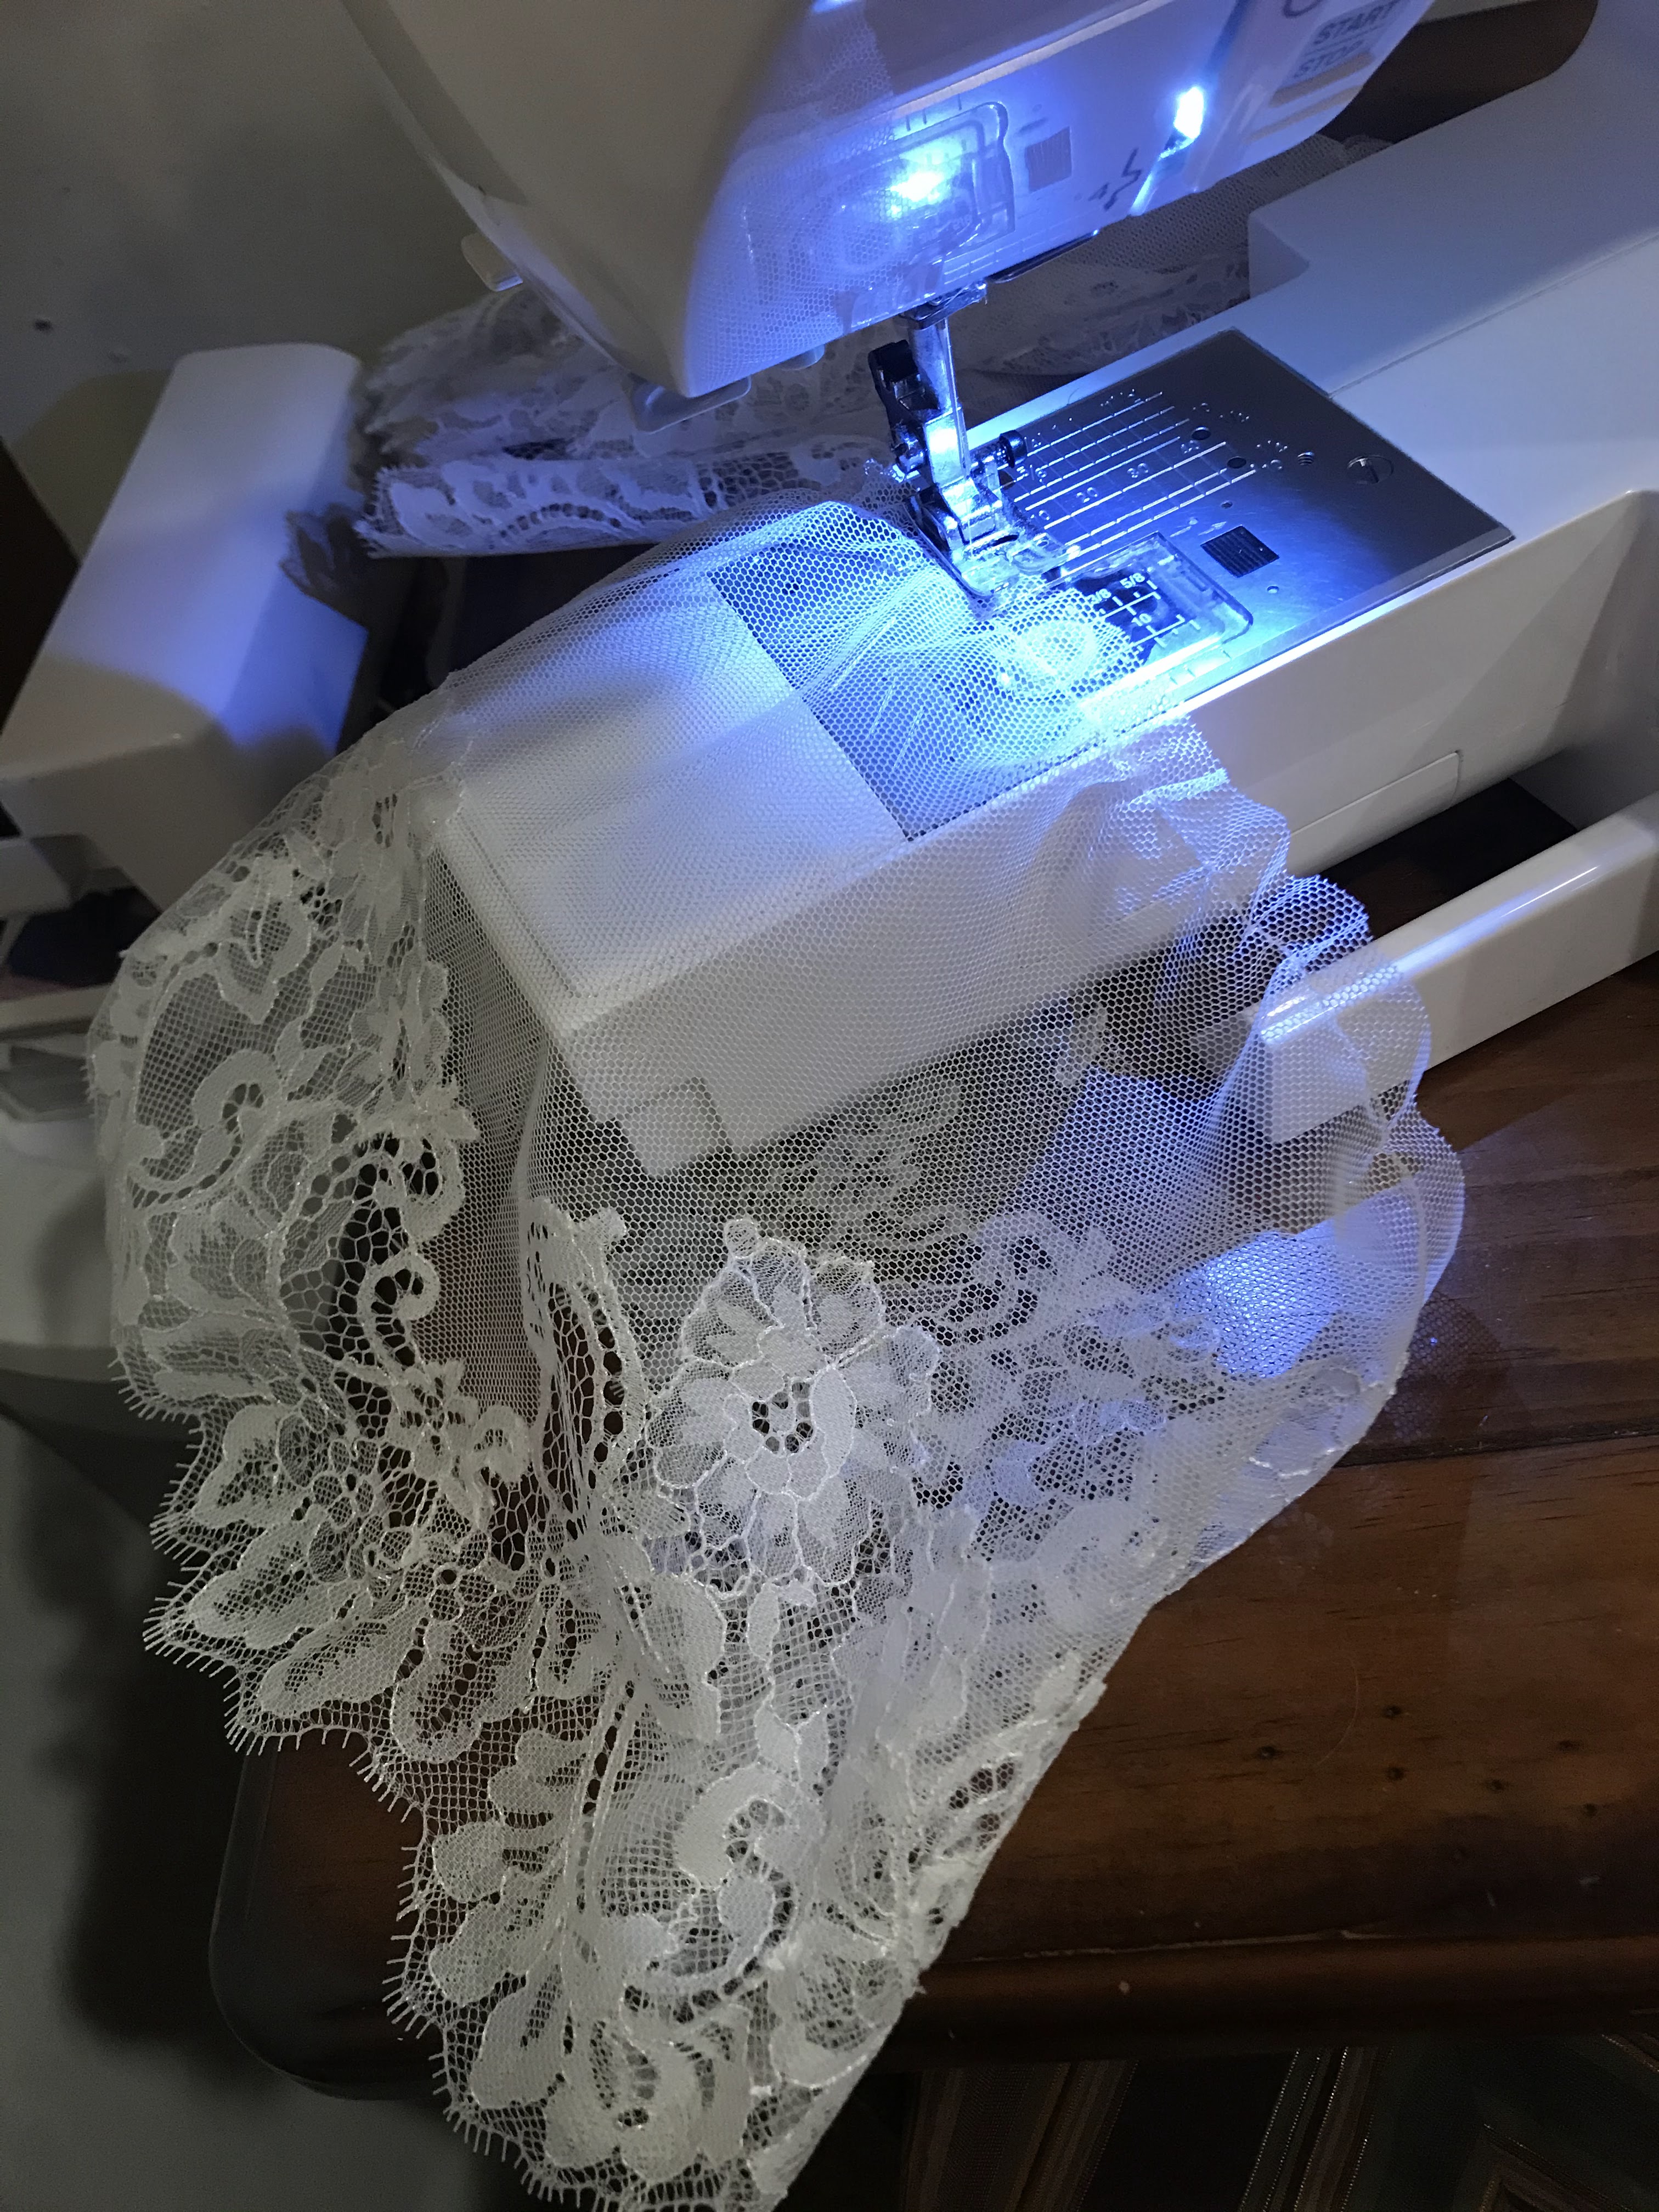
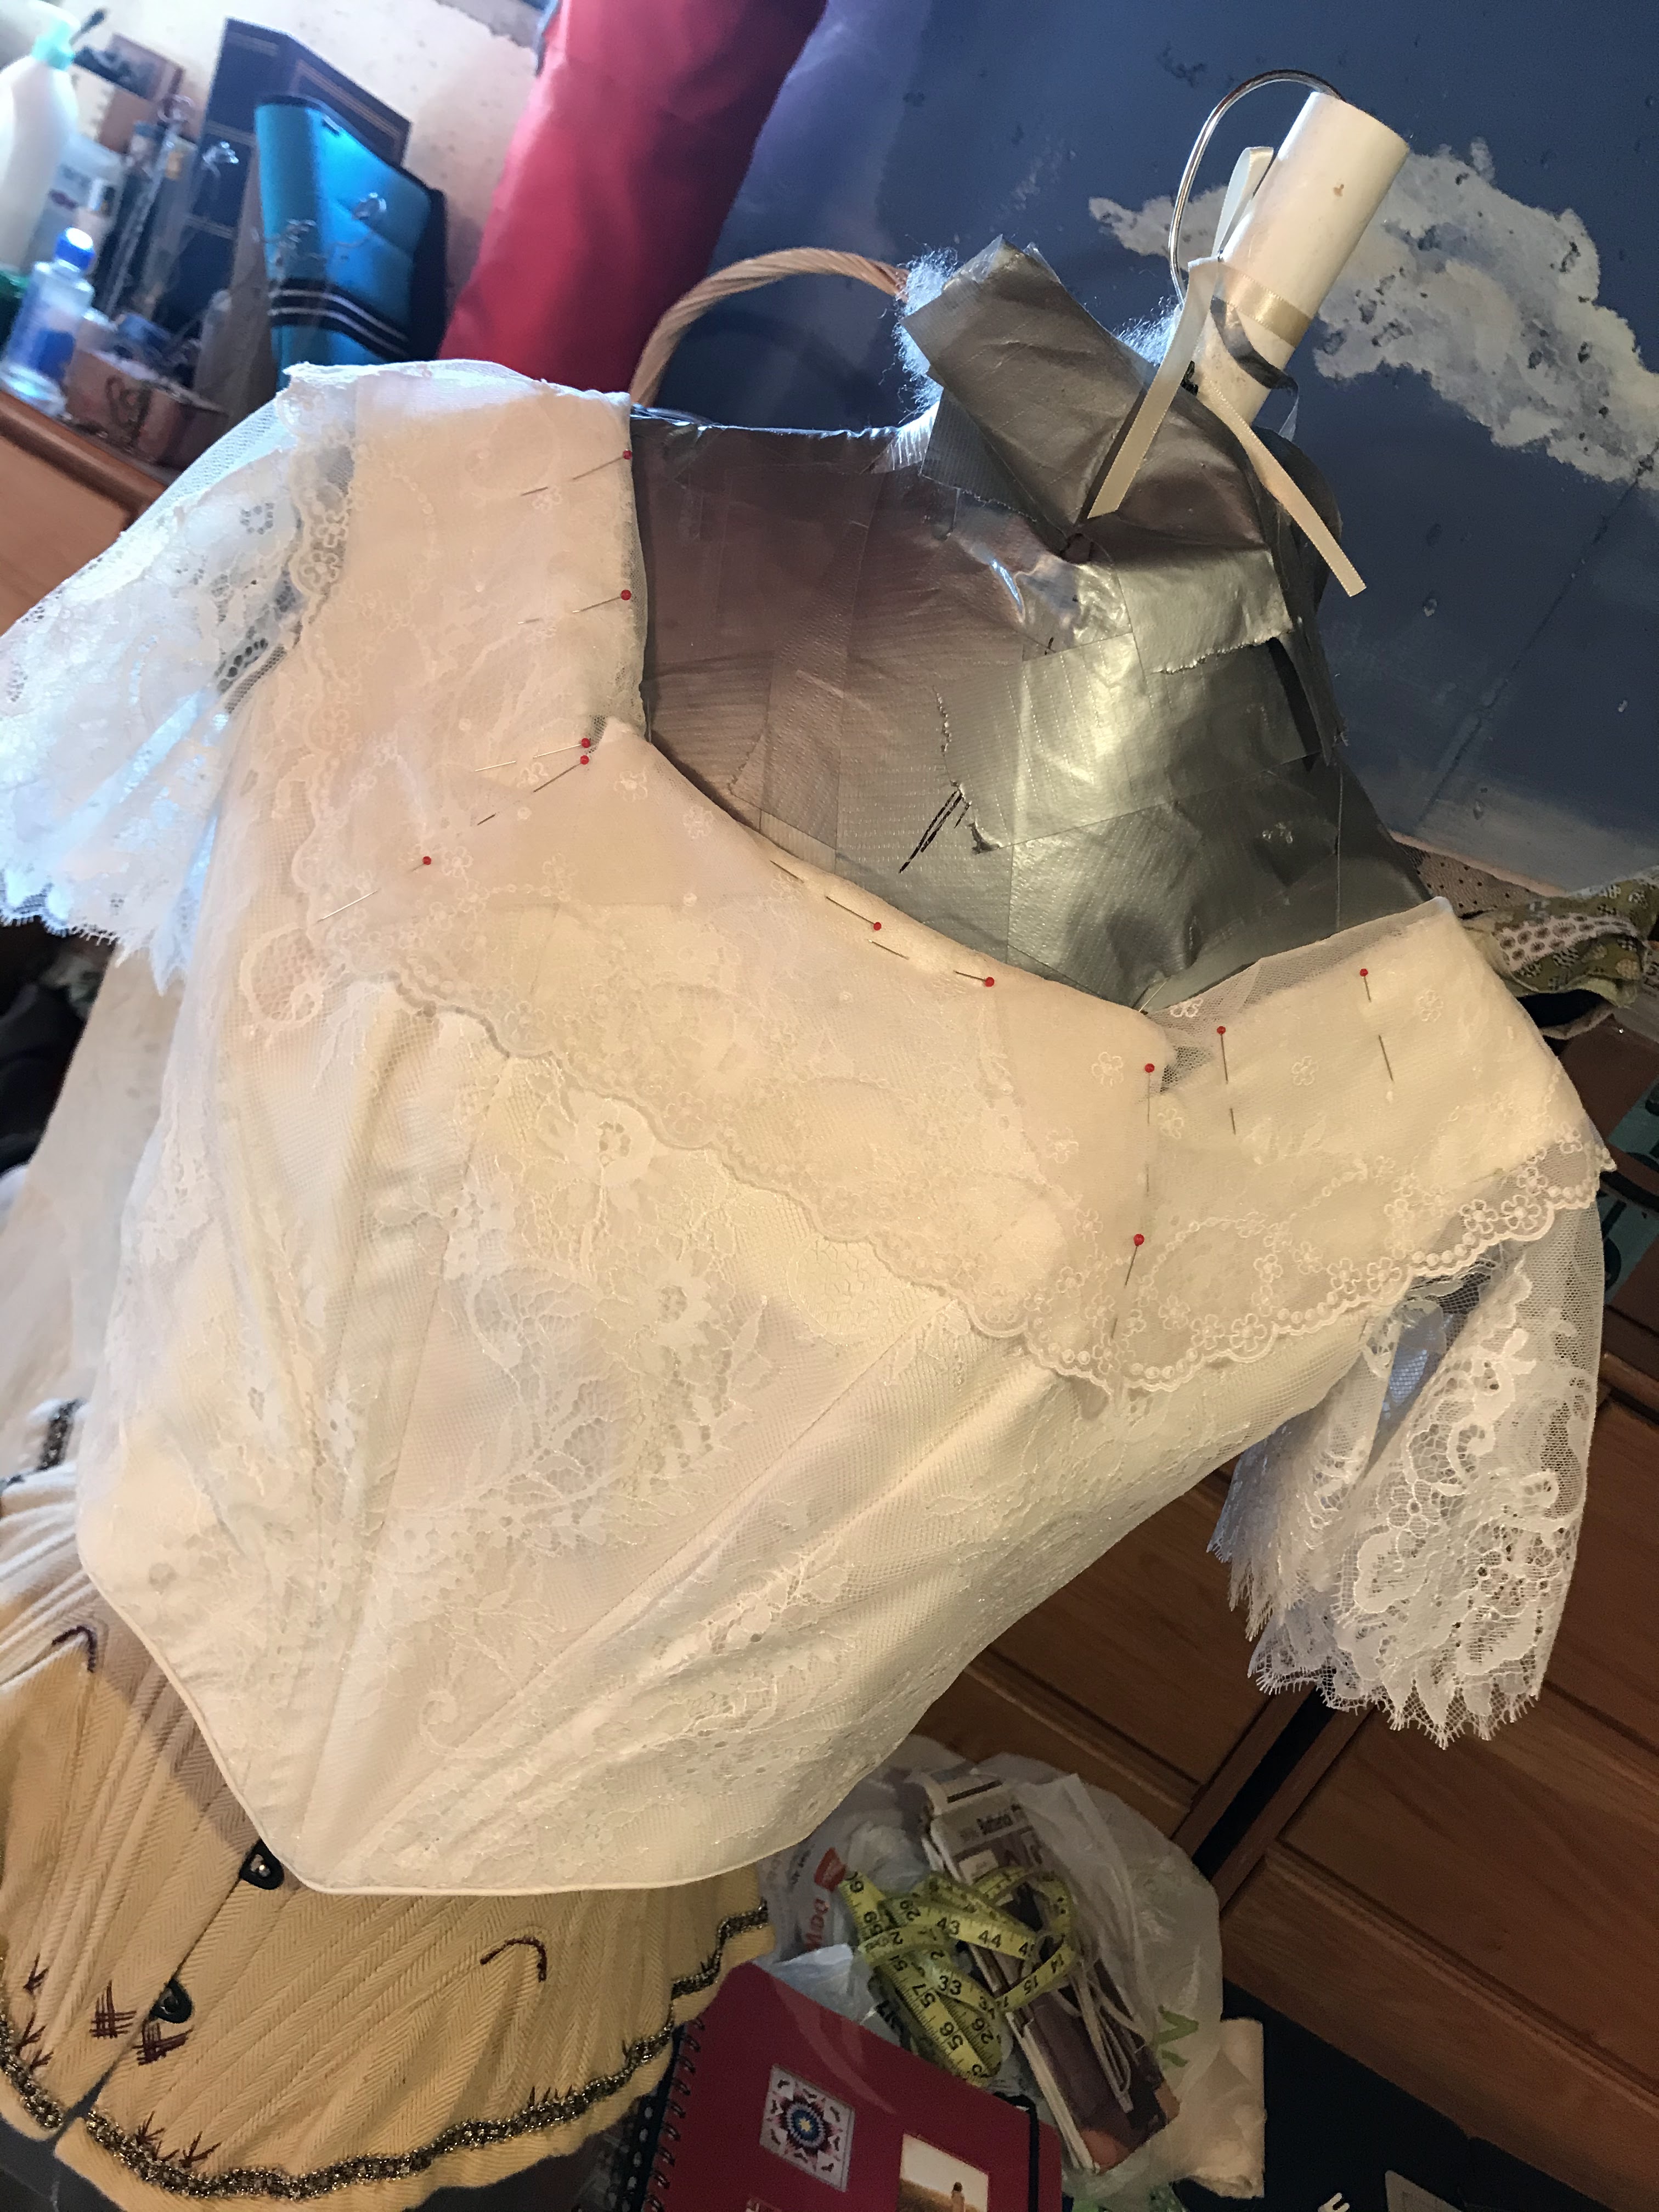
I then spent another 6 to 8 hours per sleeve carefully hand sewing the lace border to the netting with itty-bitty invisible stitches.
Oh yes, there's about 20 hours of labor just in making the sleeves.
That's not counting the time it took to set the sleeves. But we're not there quite yet.
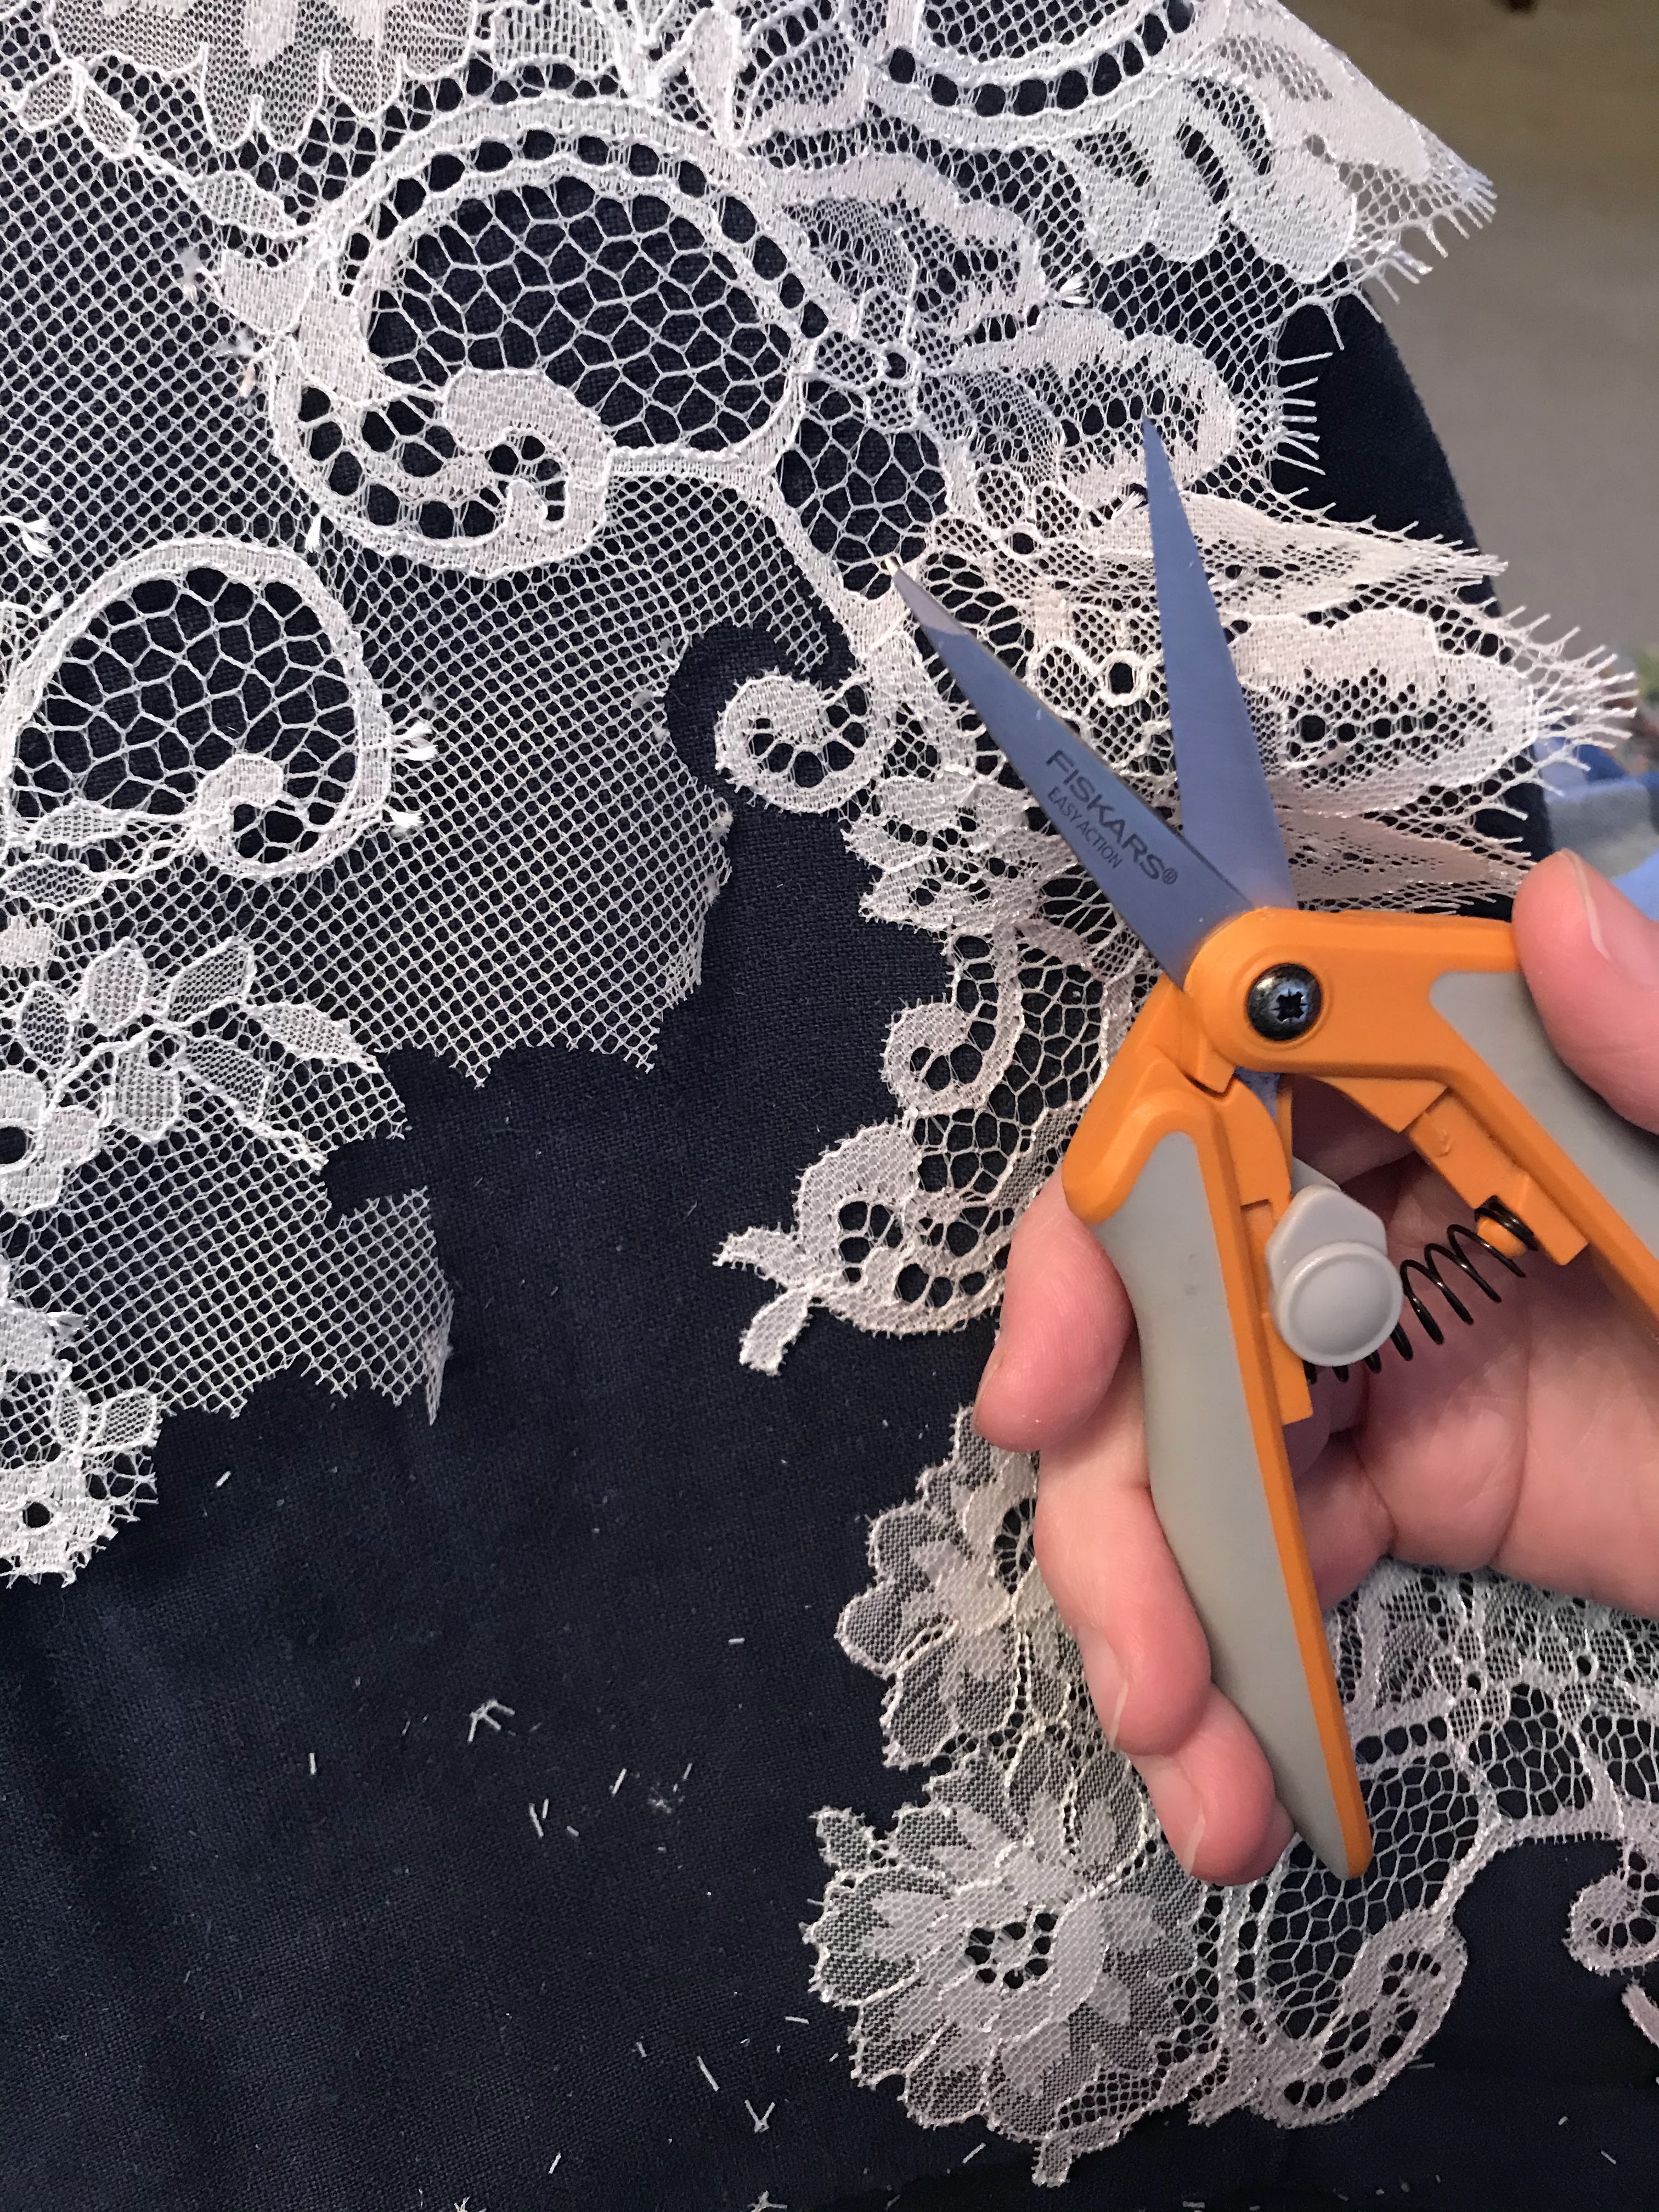
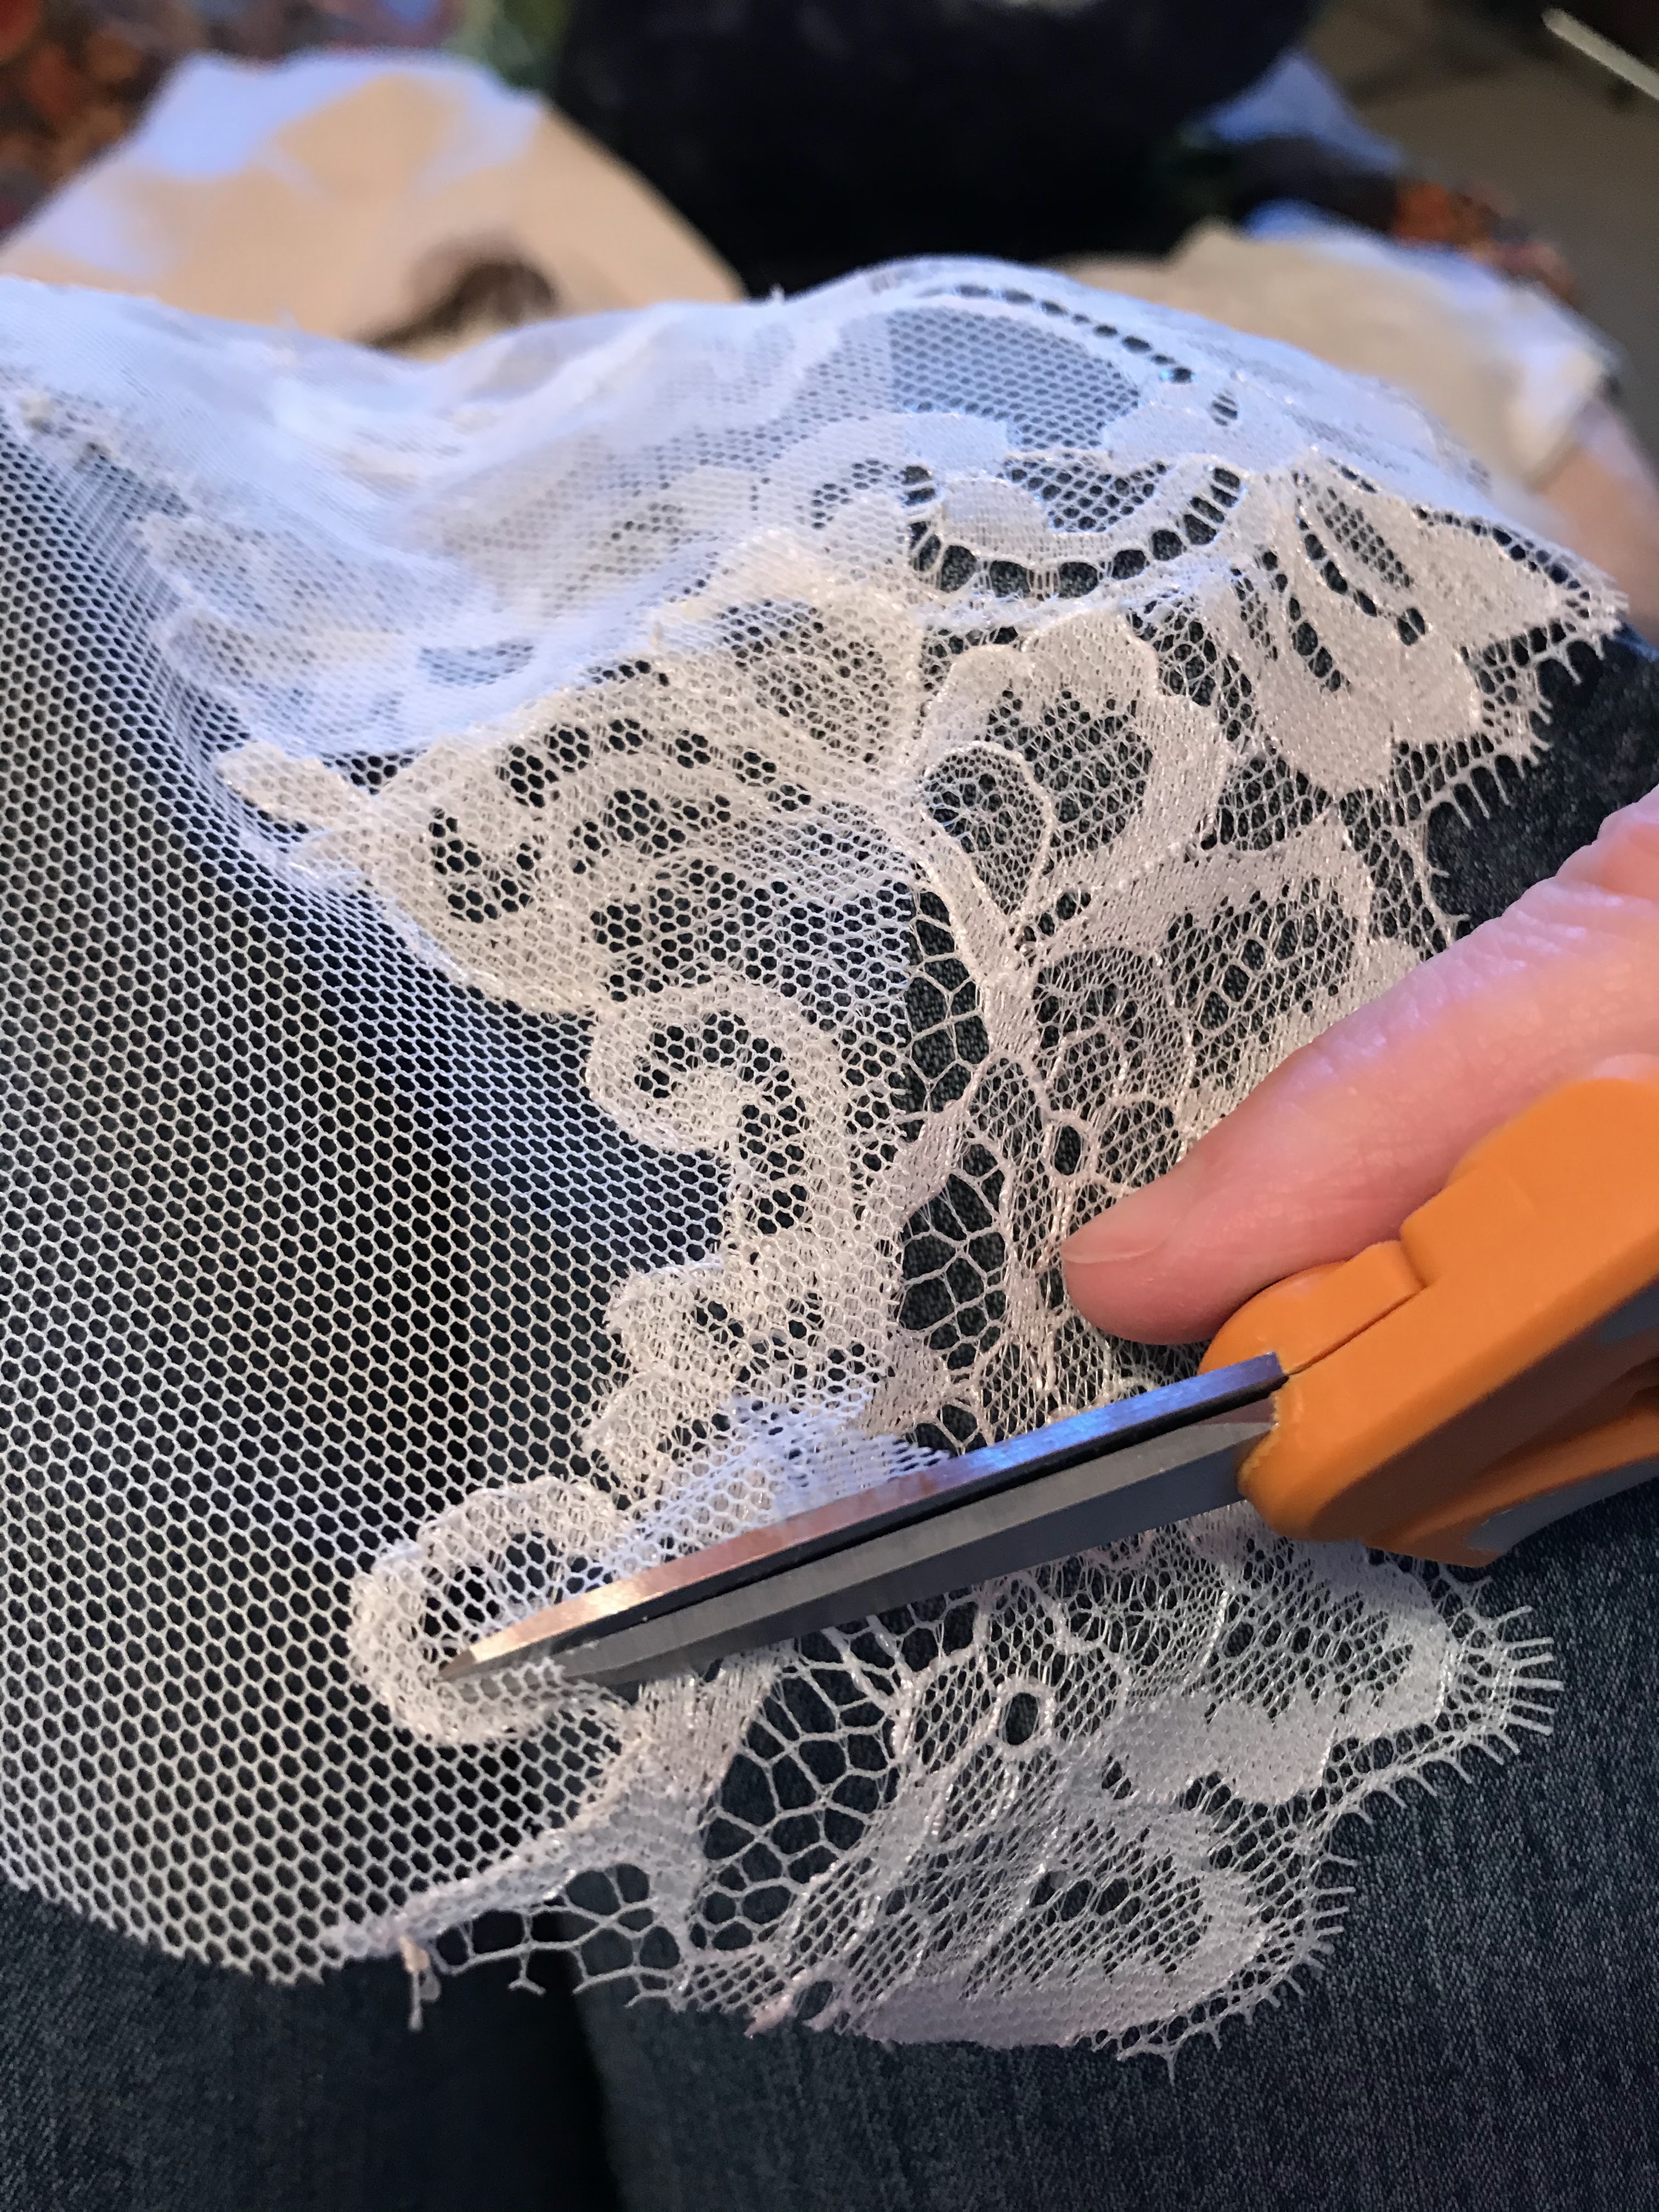
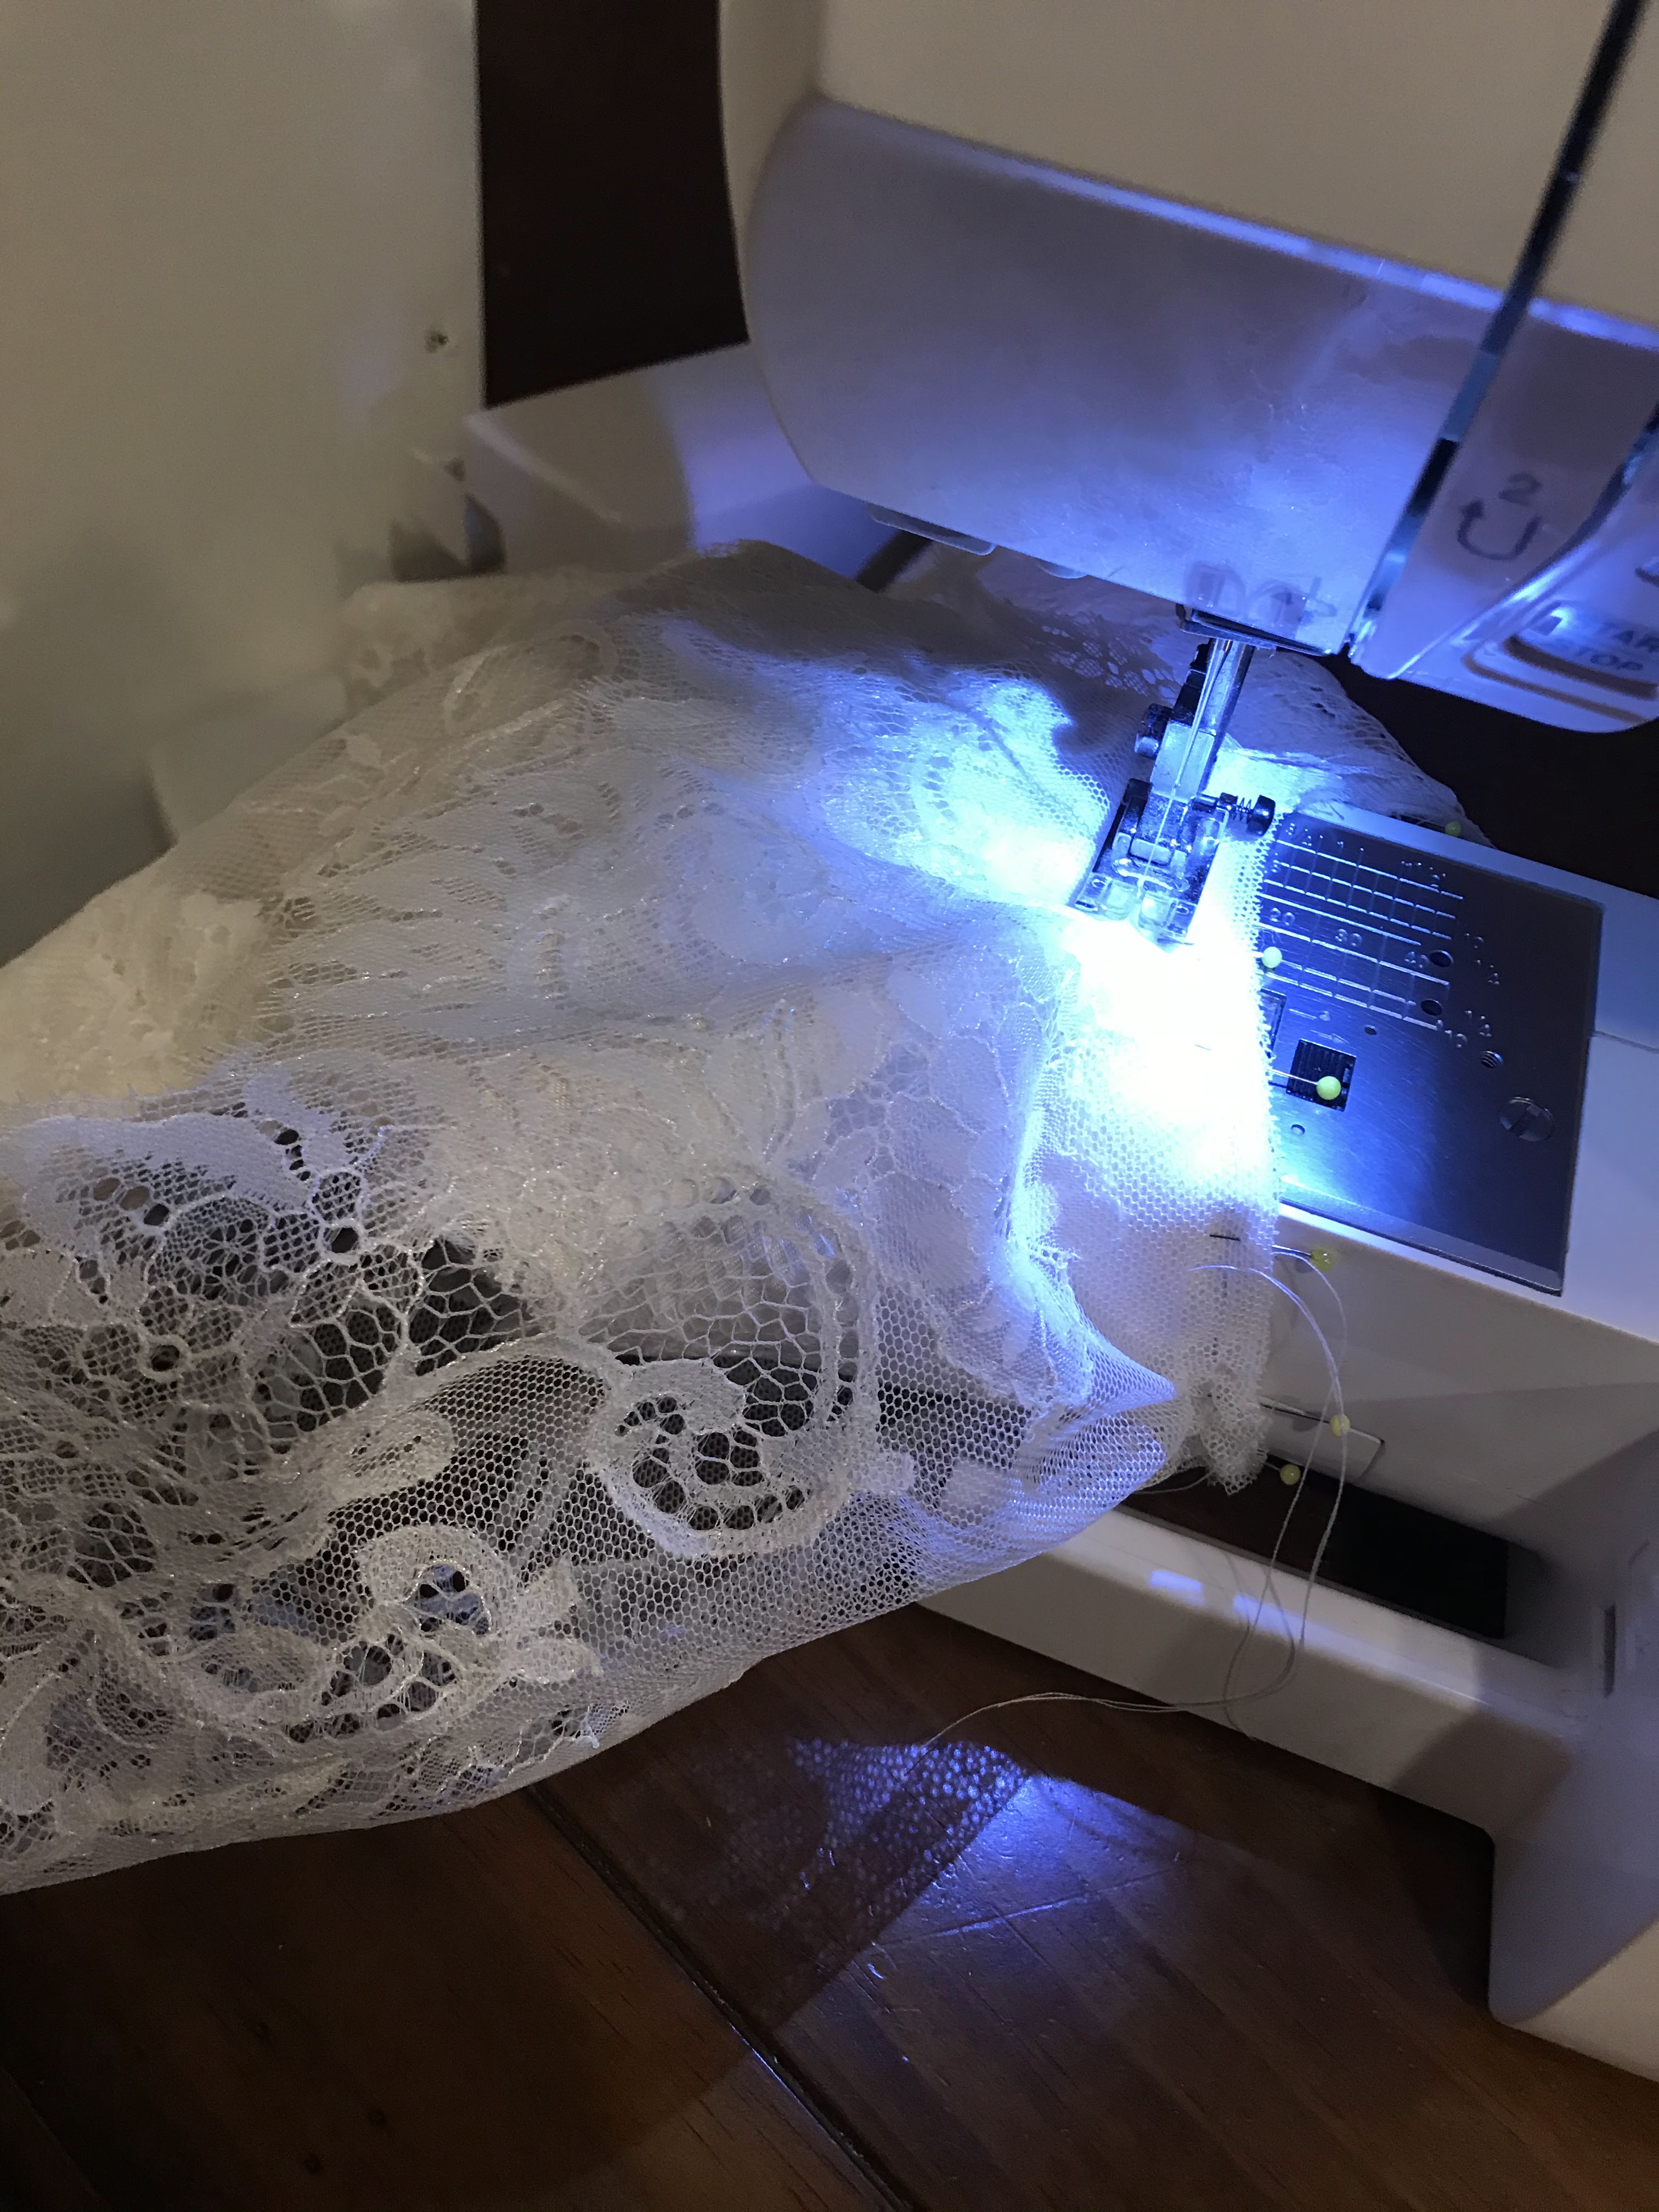
Once the lace was all sewn on, I carefully cut away the netting behind the lace to make the joining of the two fabric look as seamless as possible.
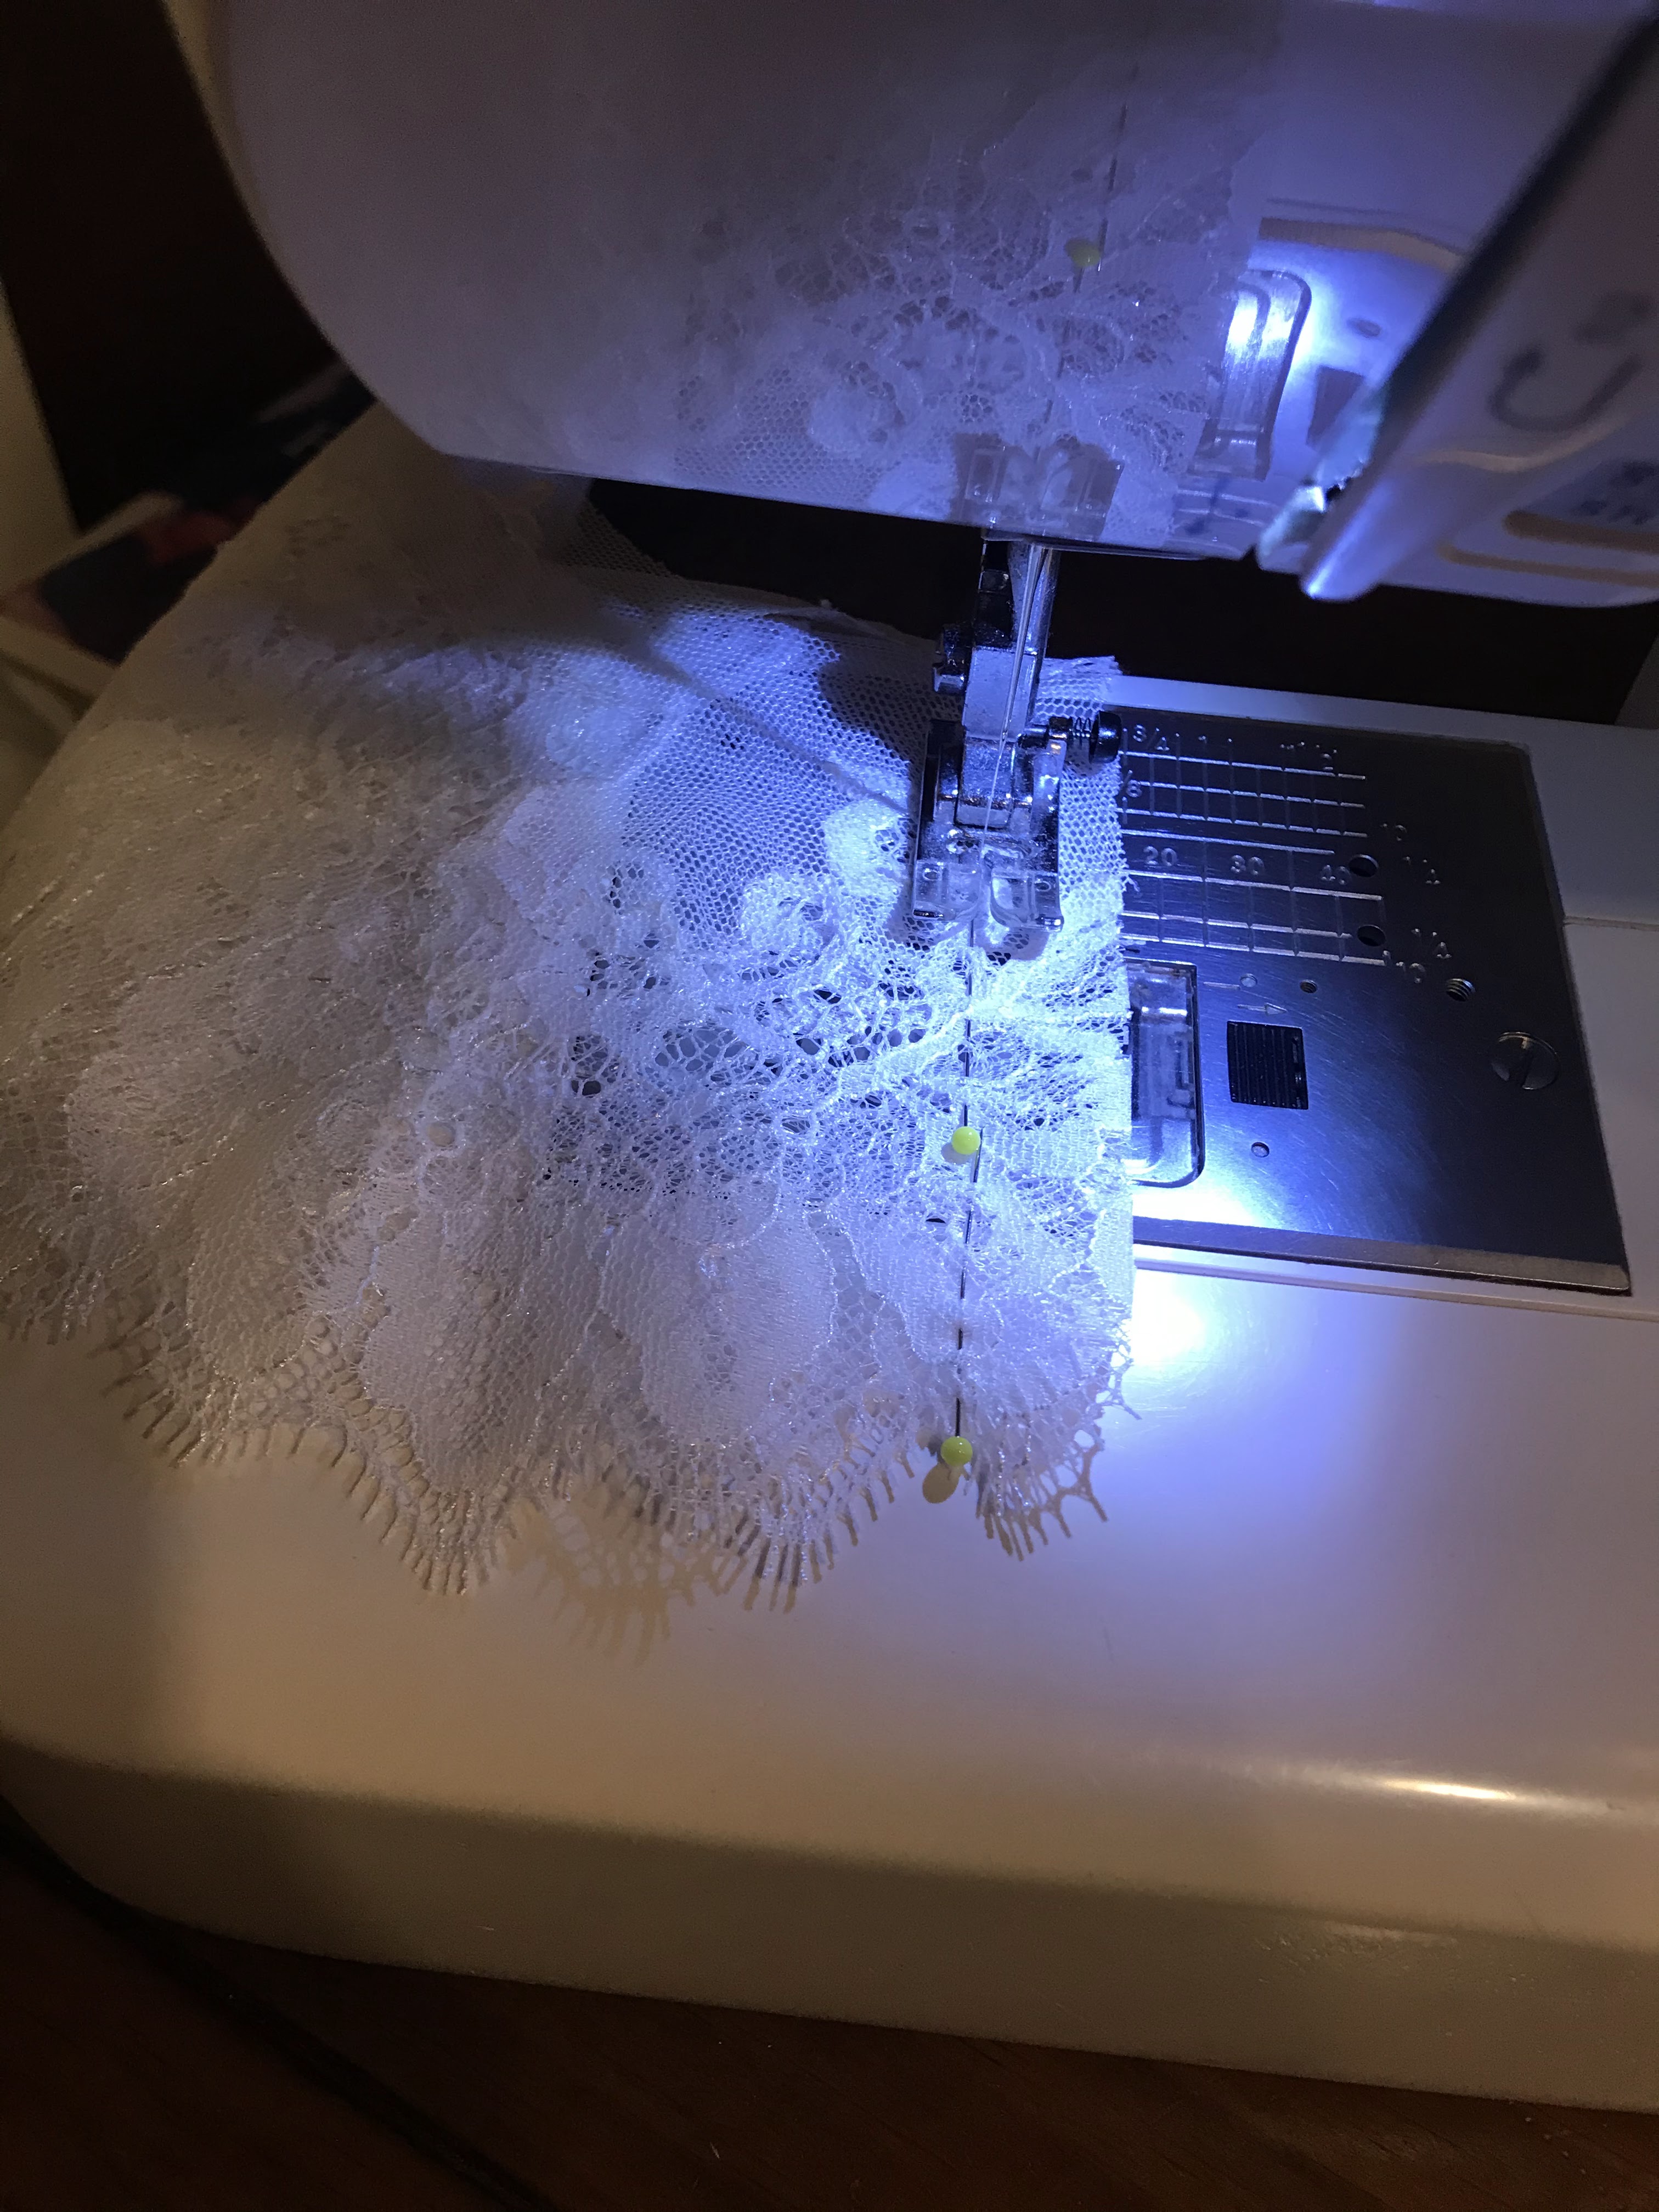
Once that was done I sewed up the underarm seam on each sleeve. Finally some machine sewing on these suckers!
I ran a couple rows of gathering stitches across the sleeve heads.
Then I set the sleeves.
With the amount of time it took to make each sleeve, setting them was quick and easy!
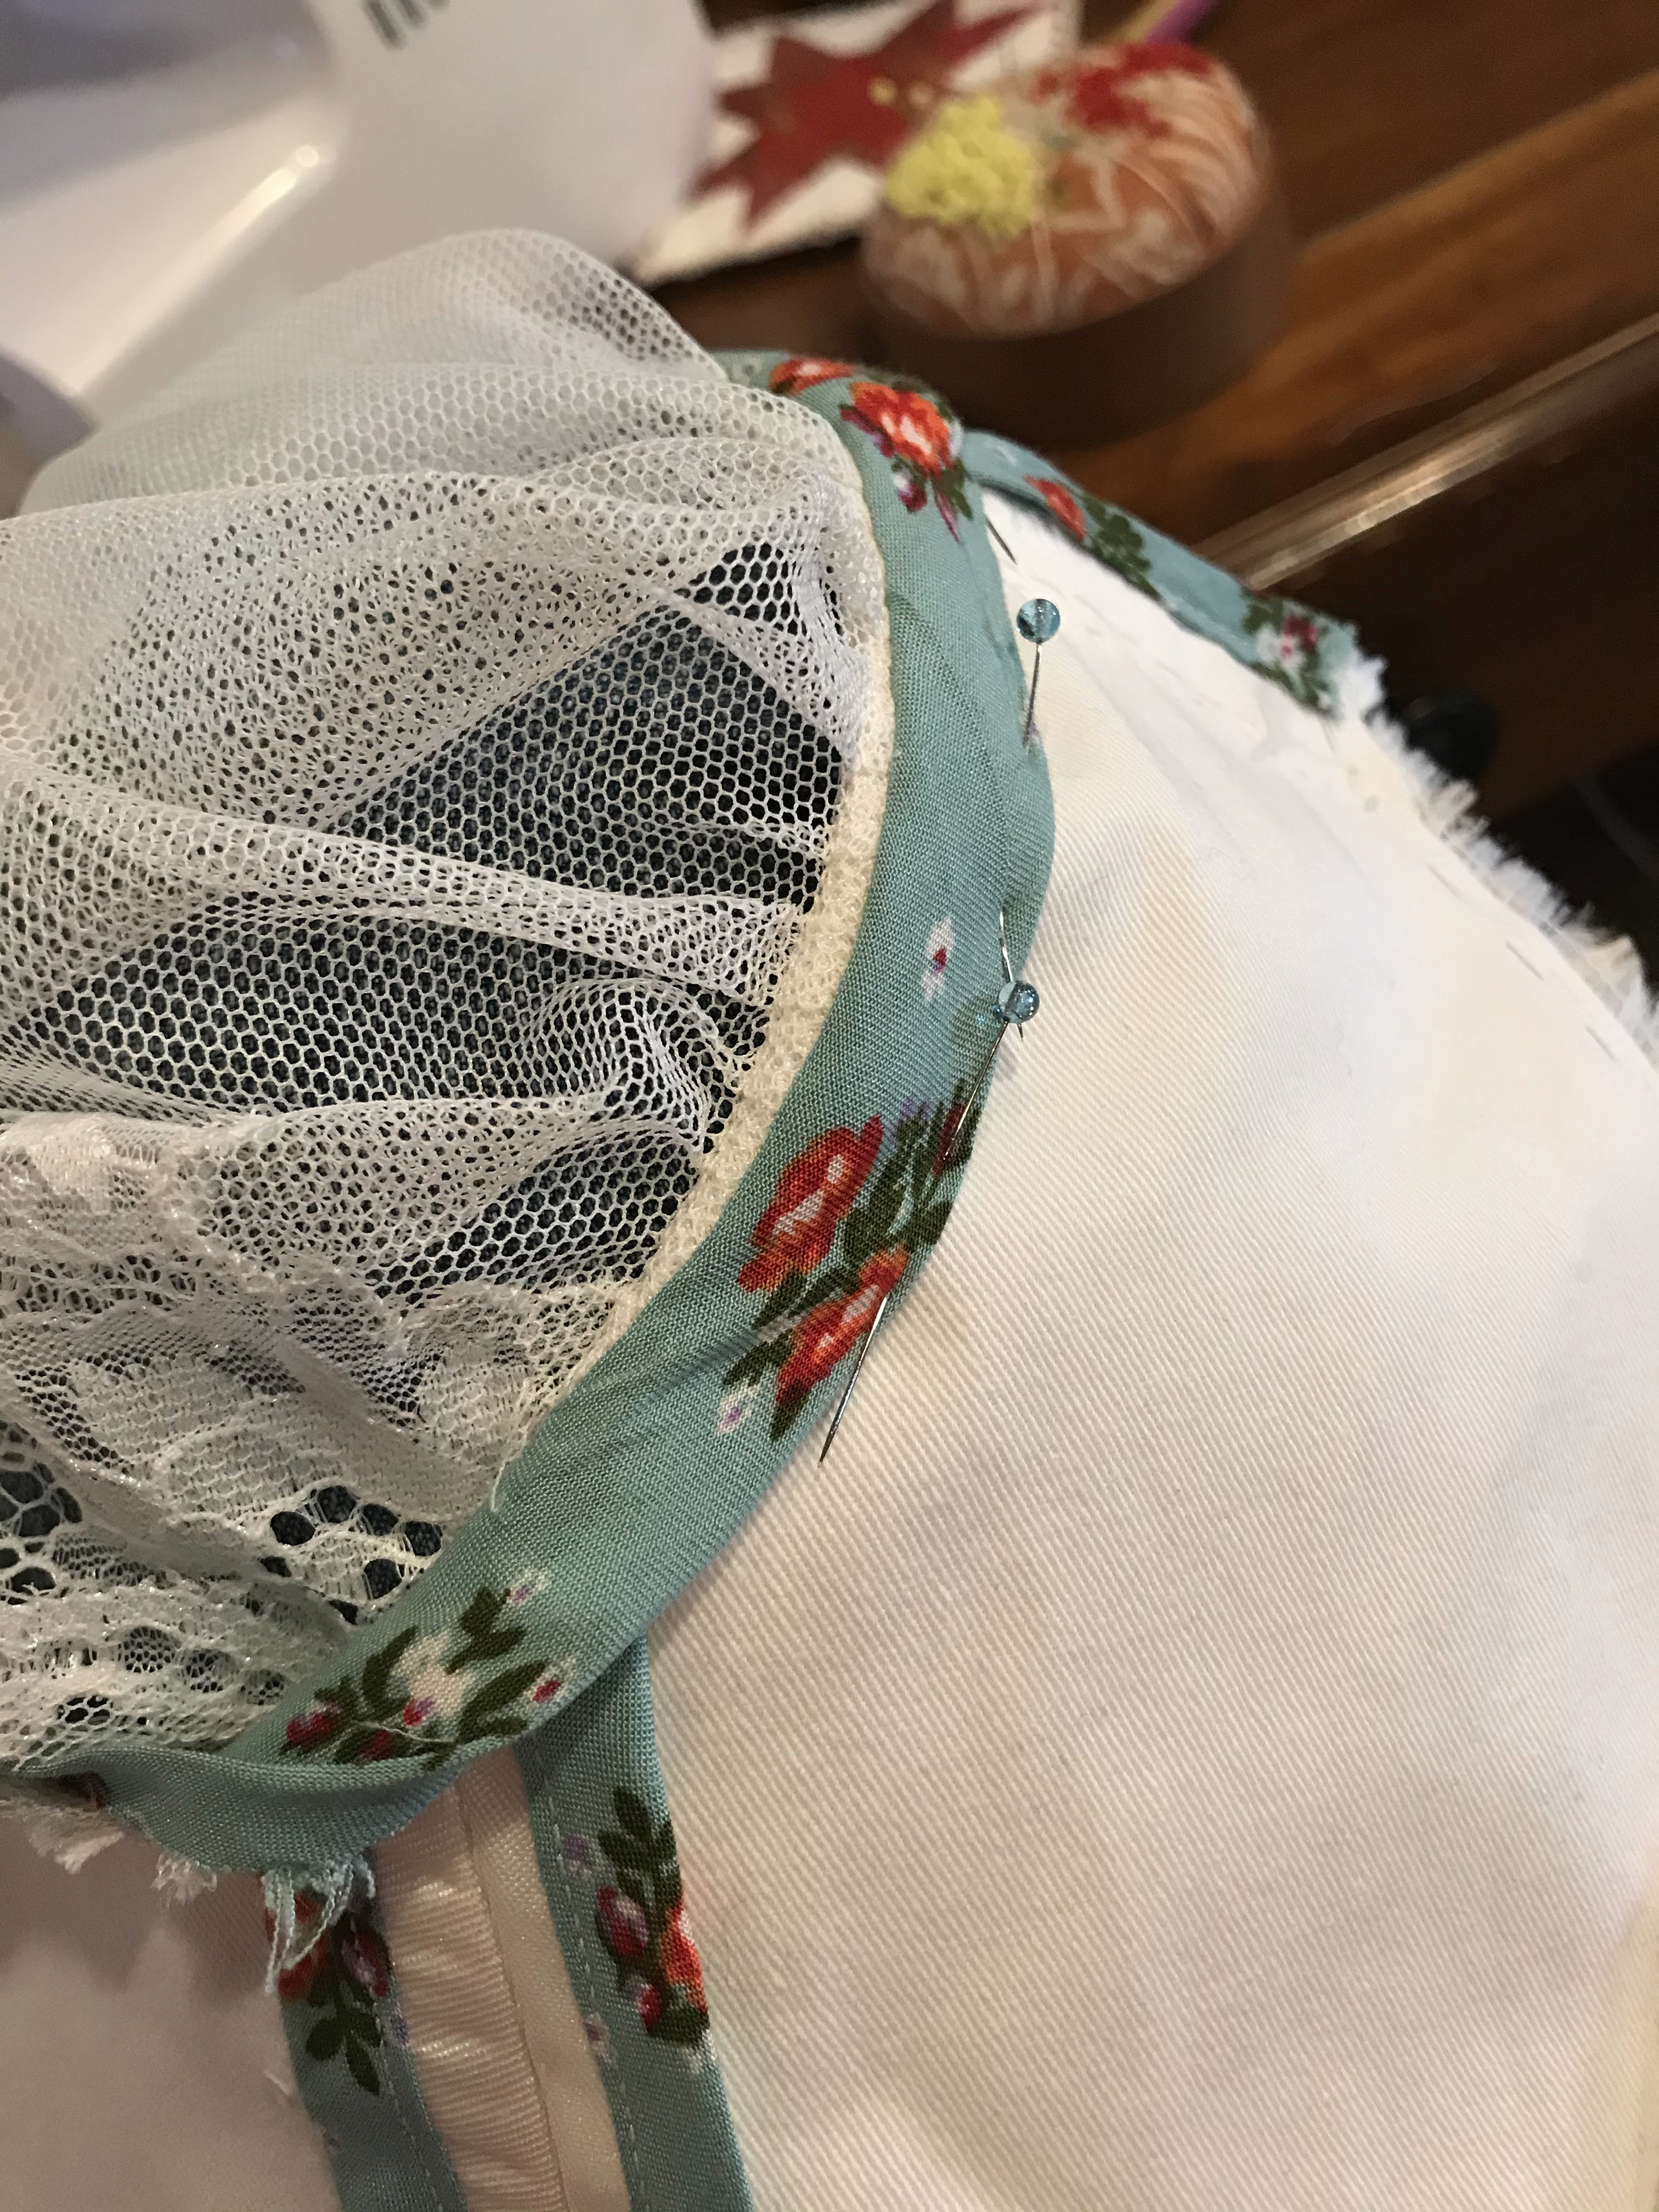
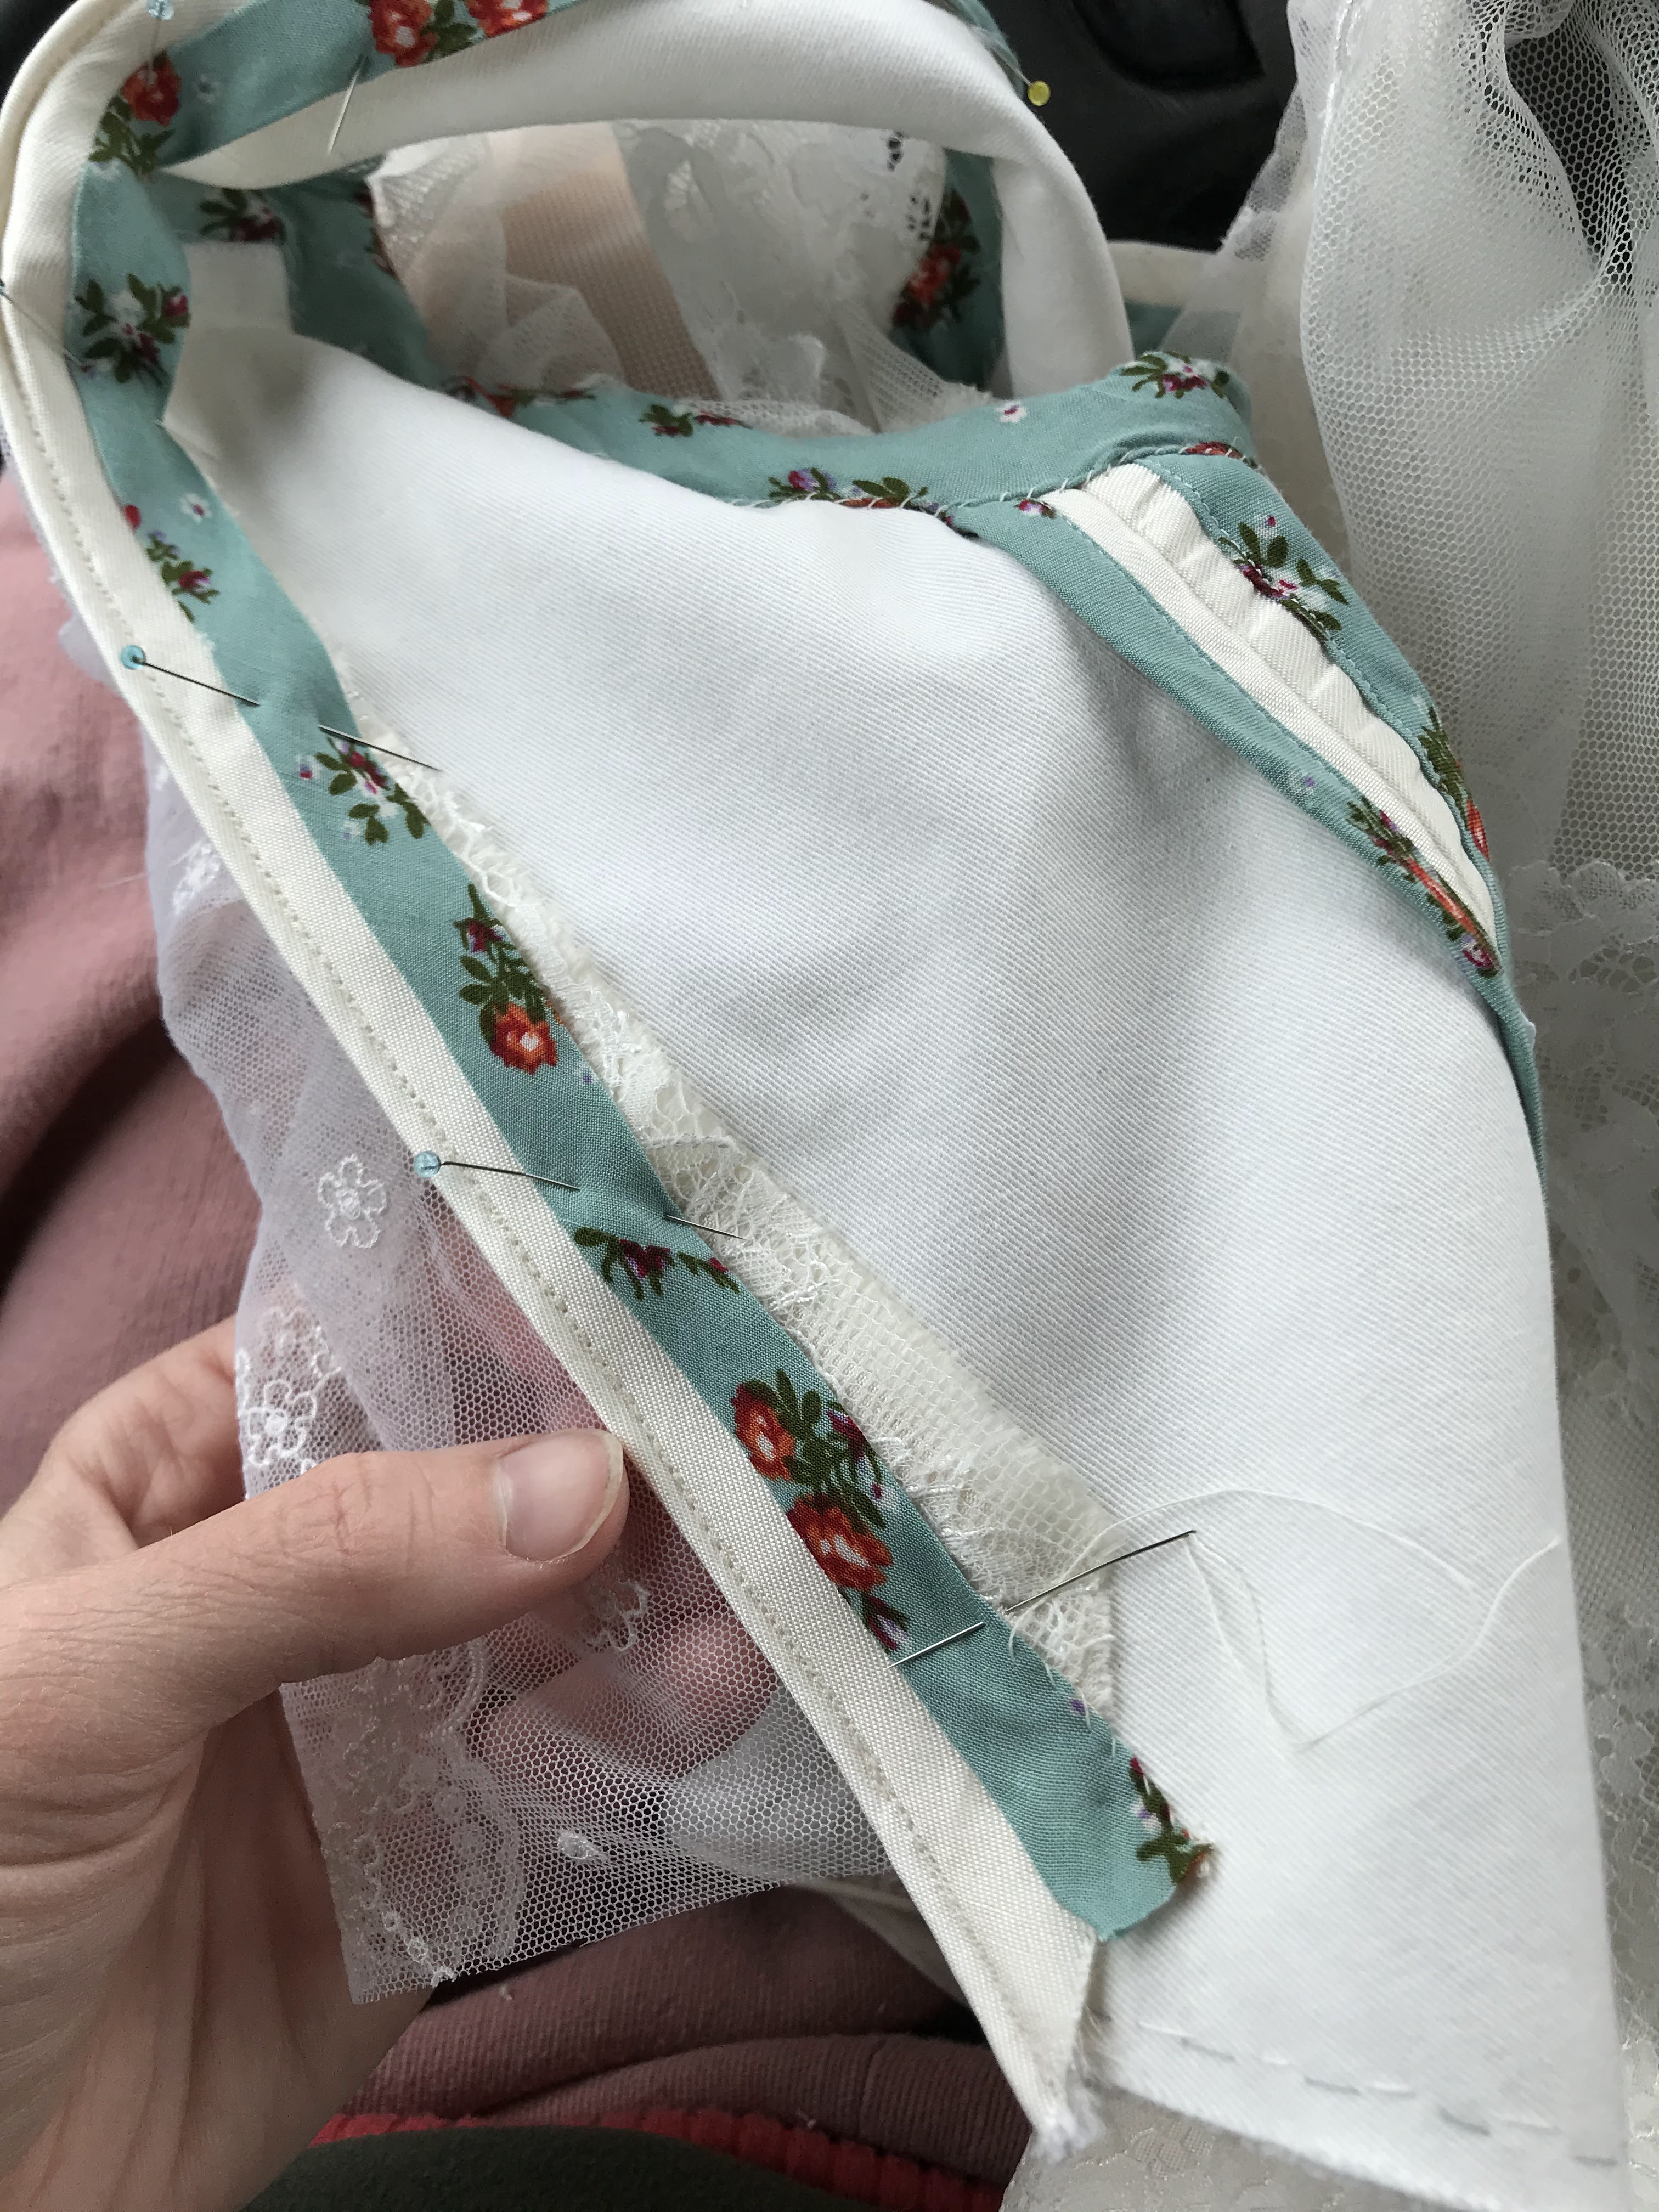
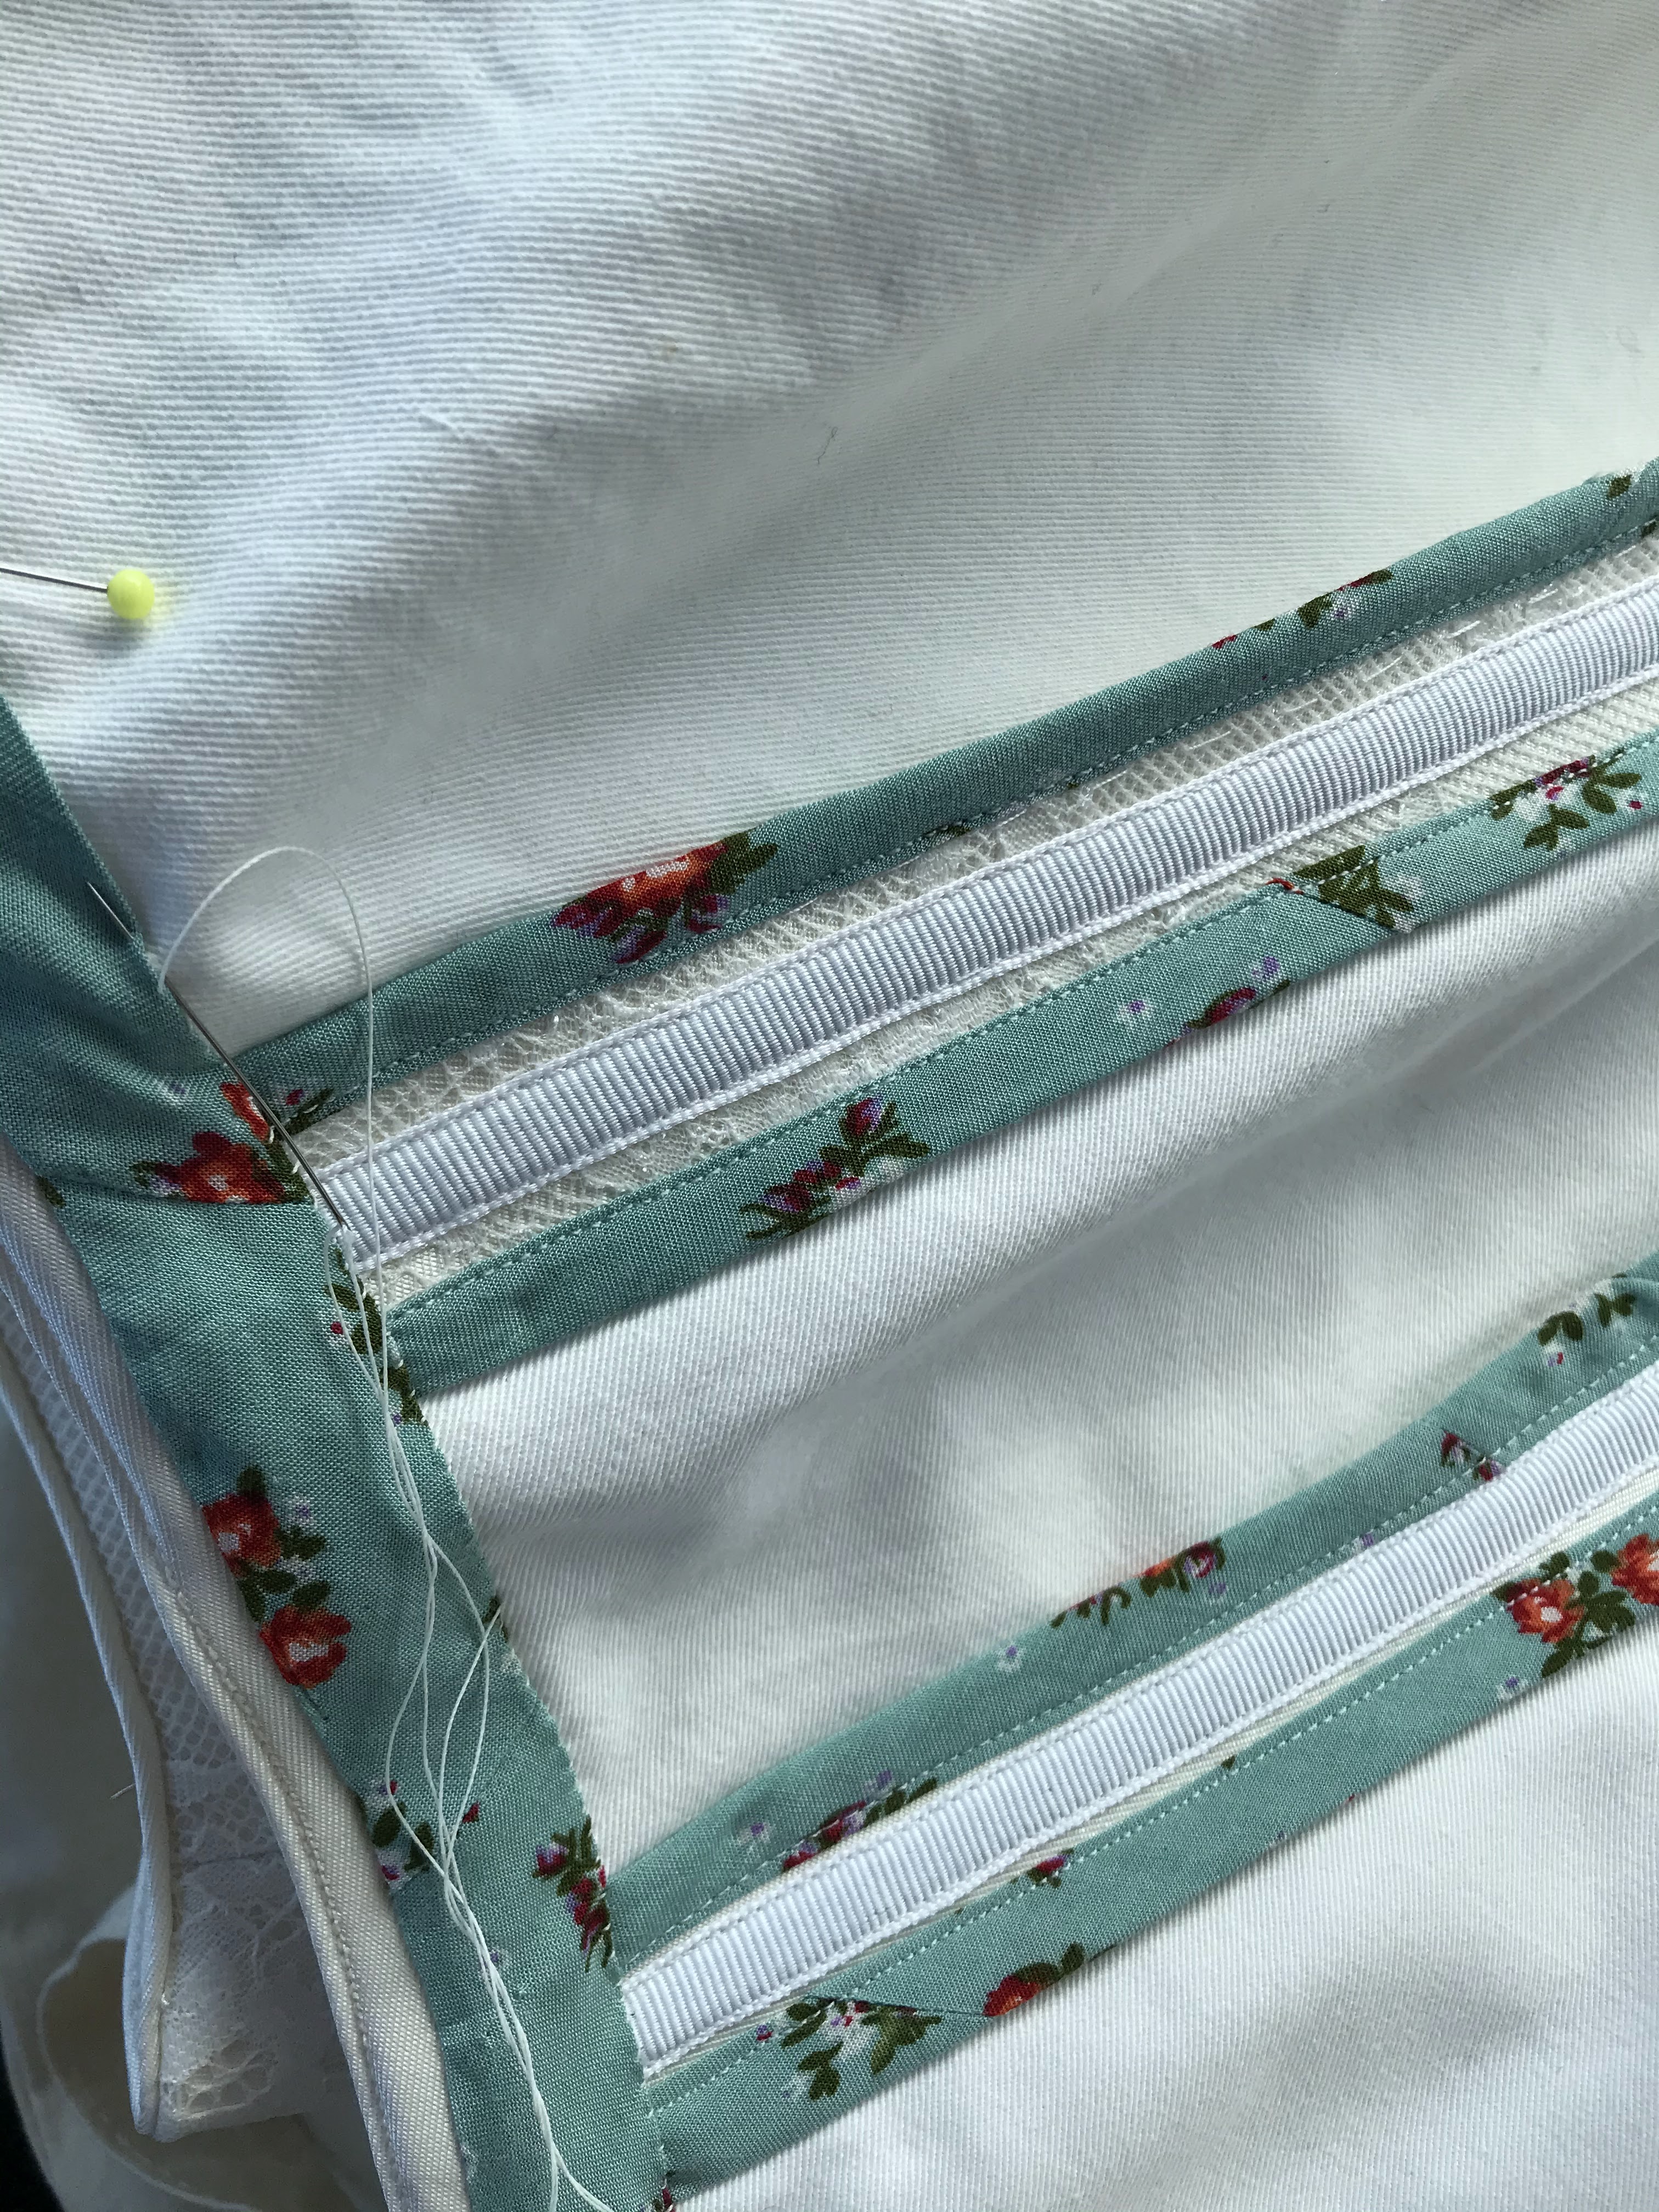
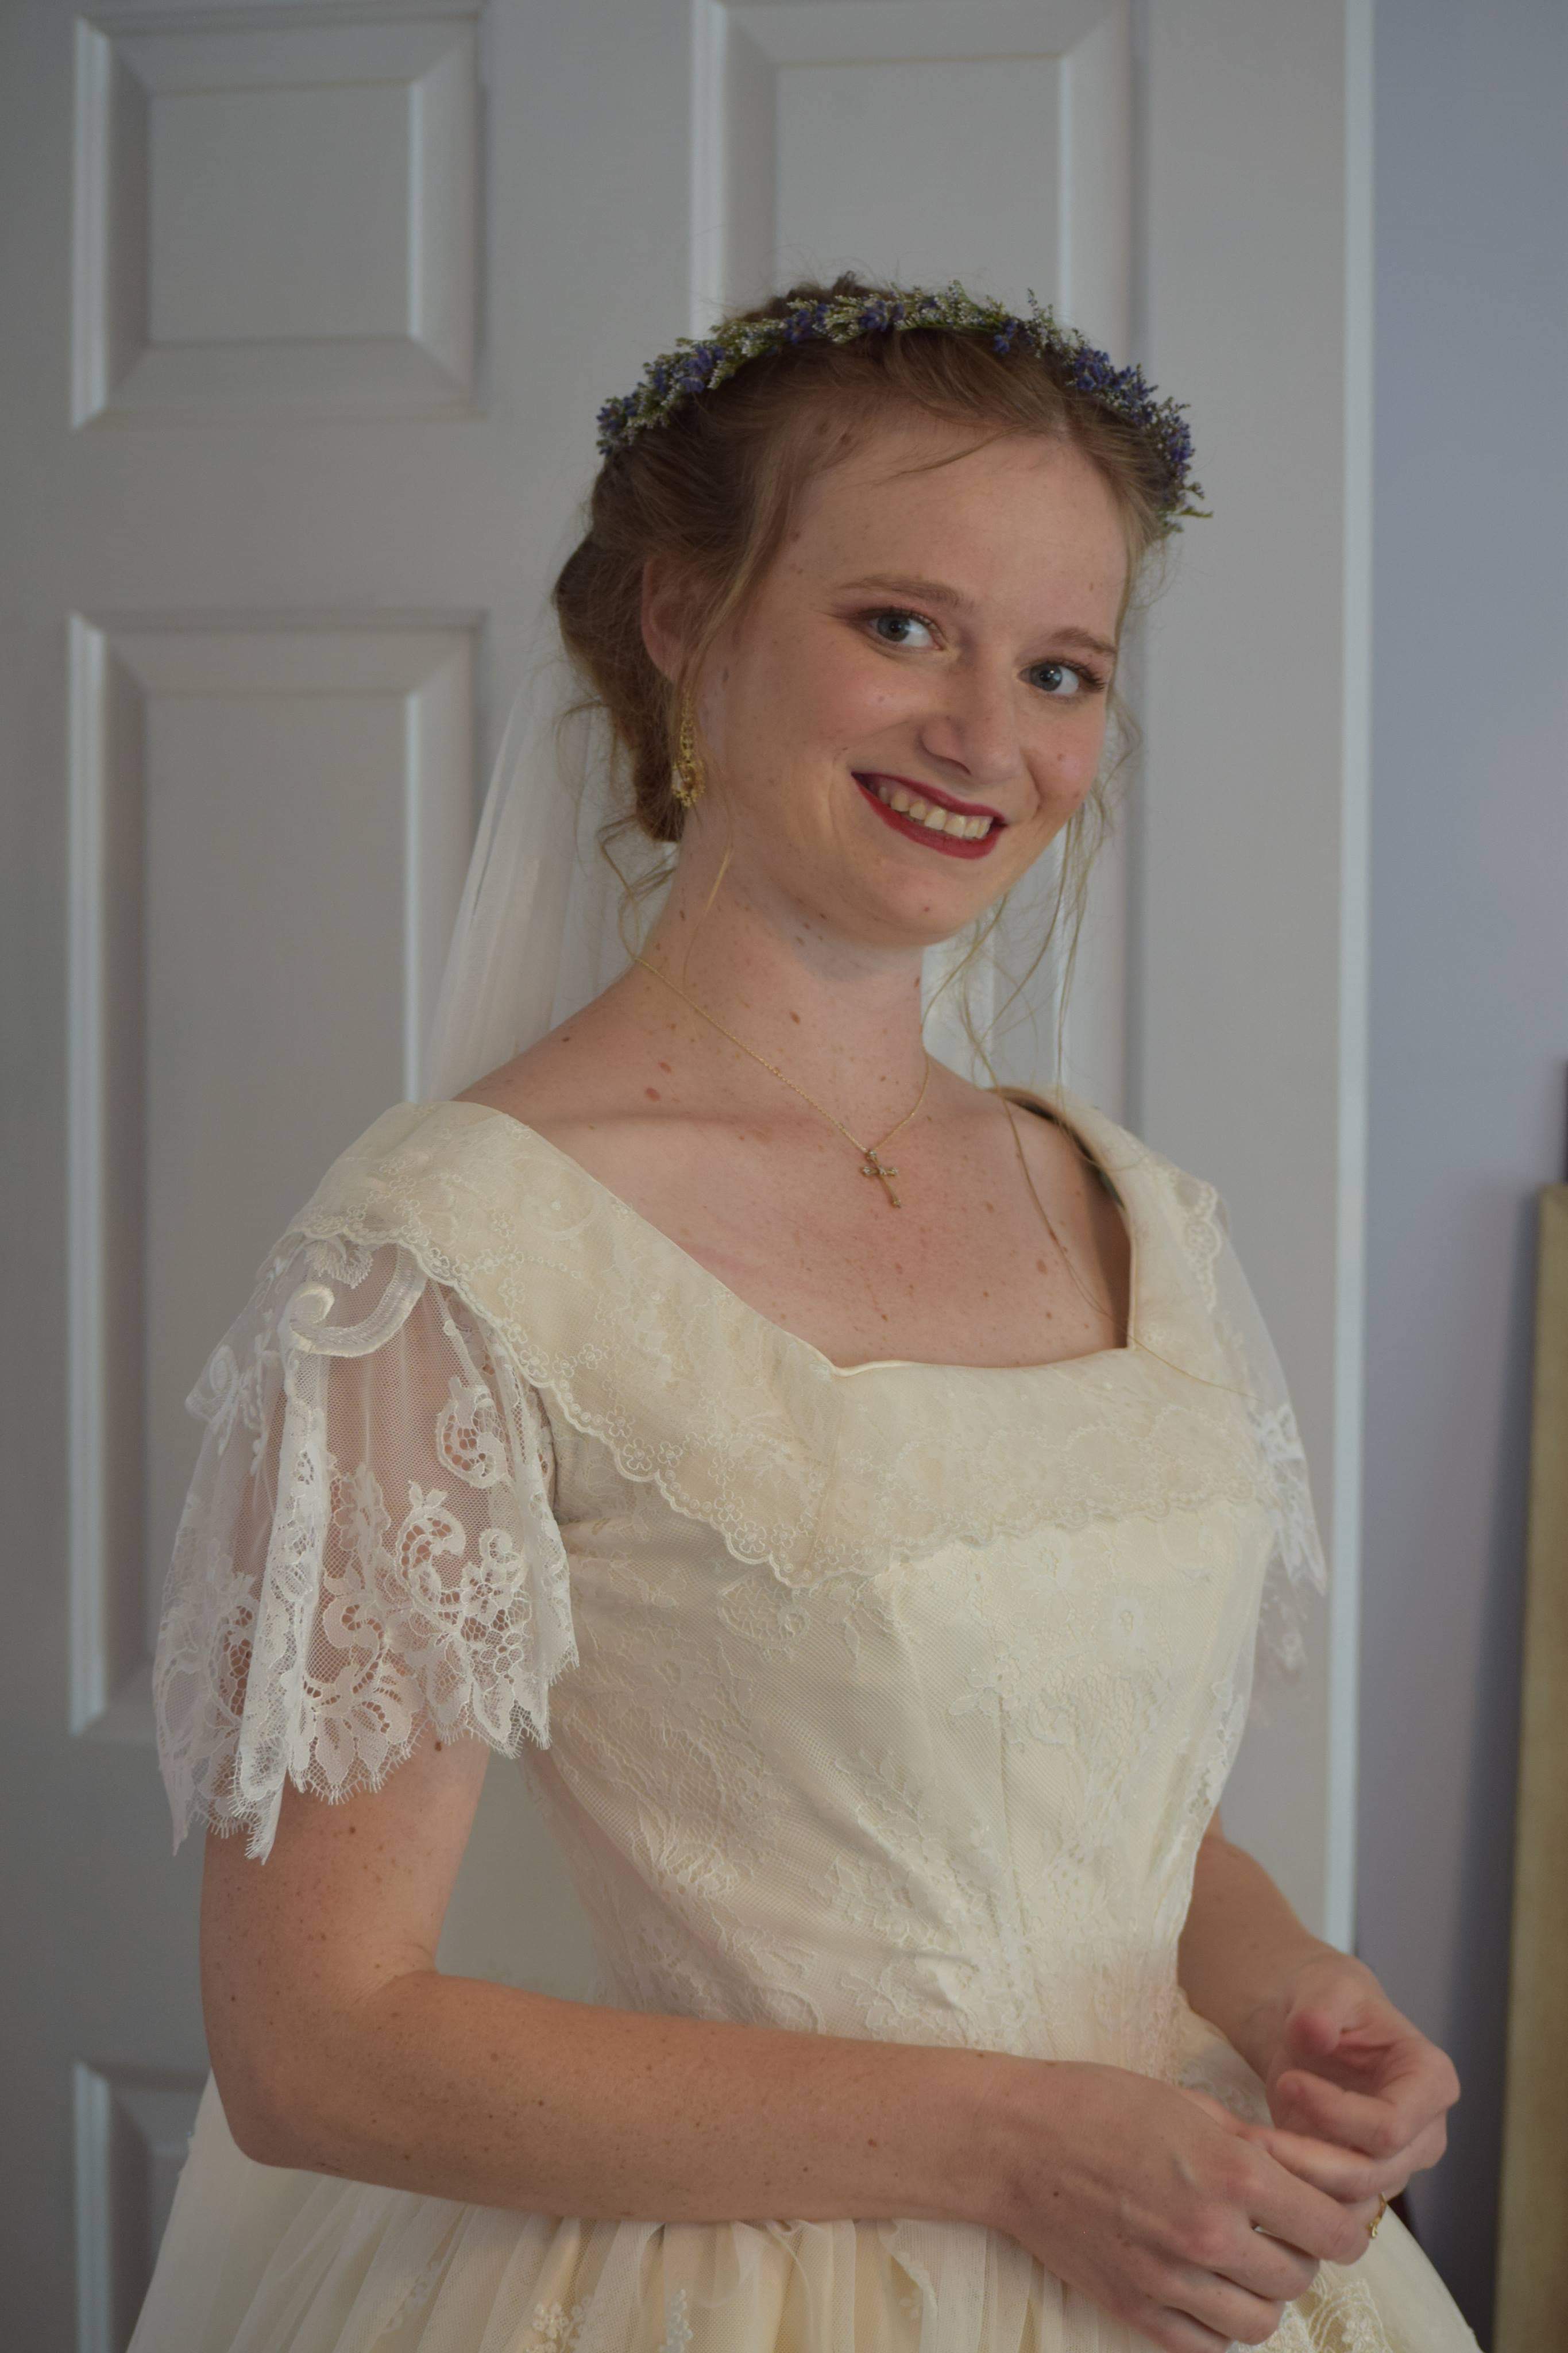
I finished the armscye with bias tape to match the rest of the bodice insides, and on the outside of the bodice I hand sewed some of the lace from the sleeves to the bodice to make the join look organic.
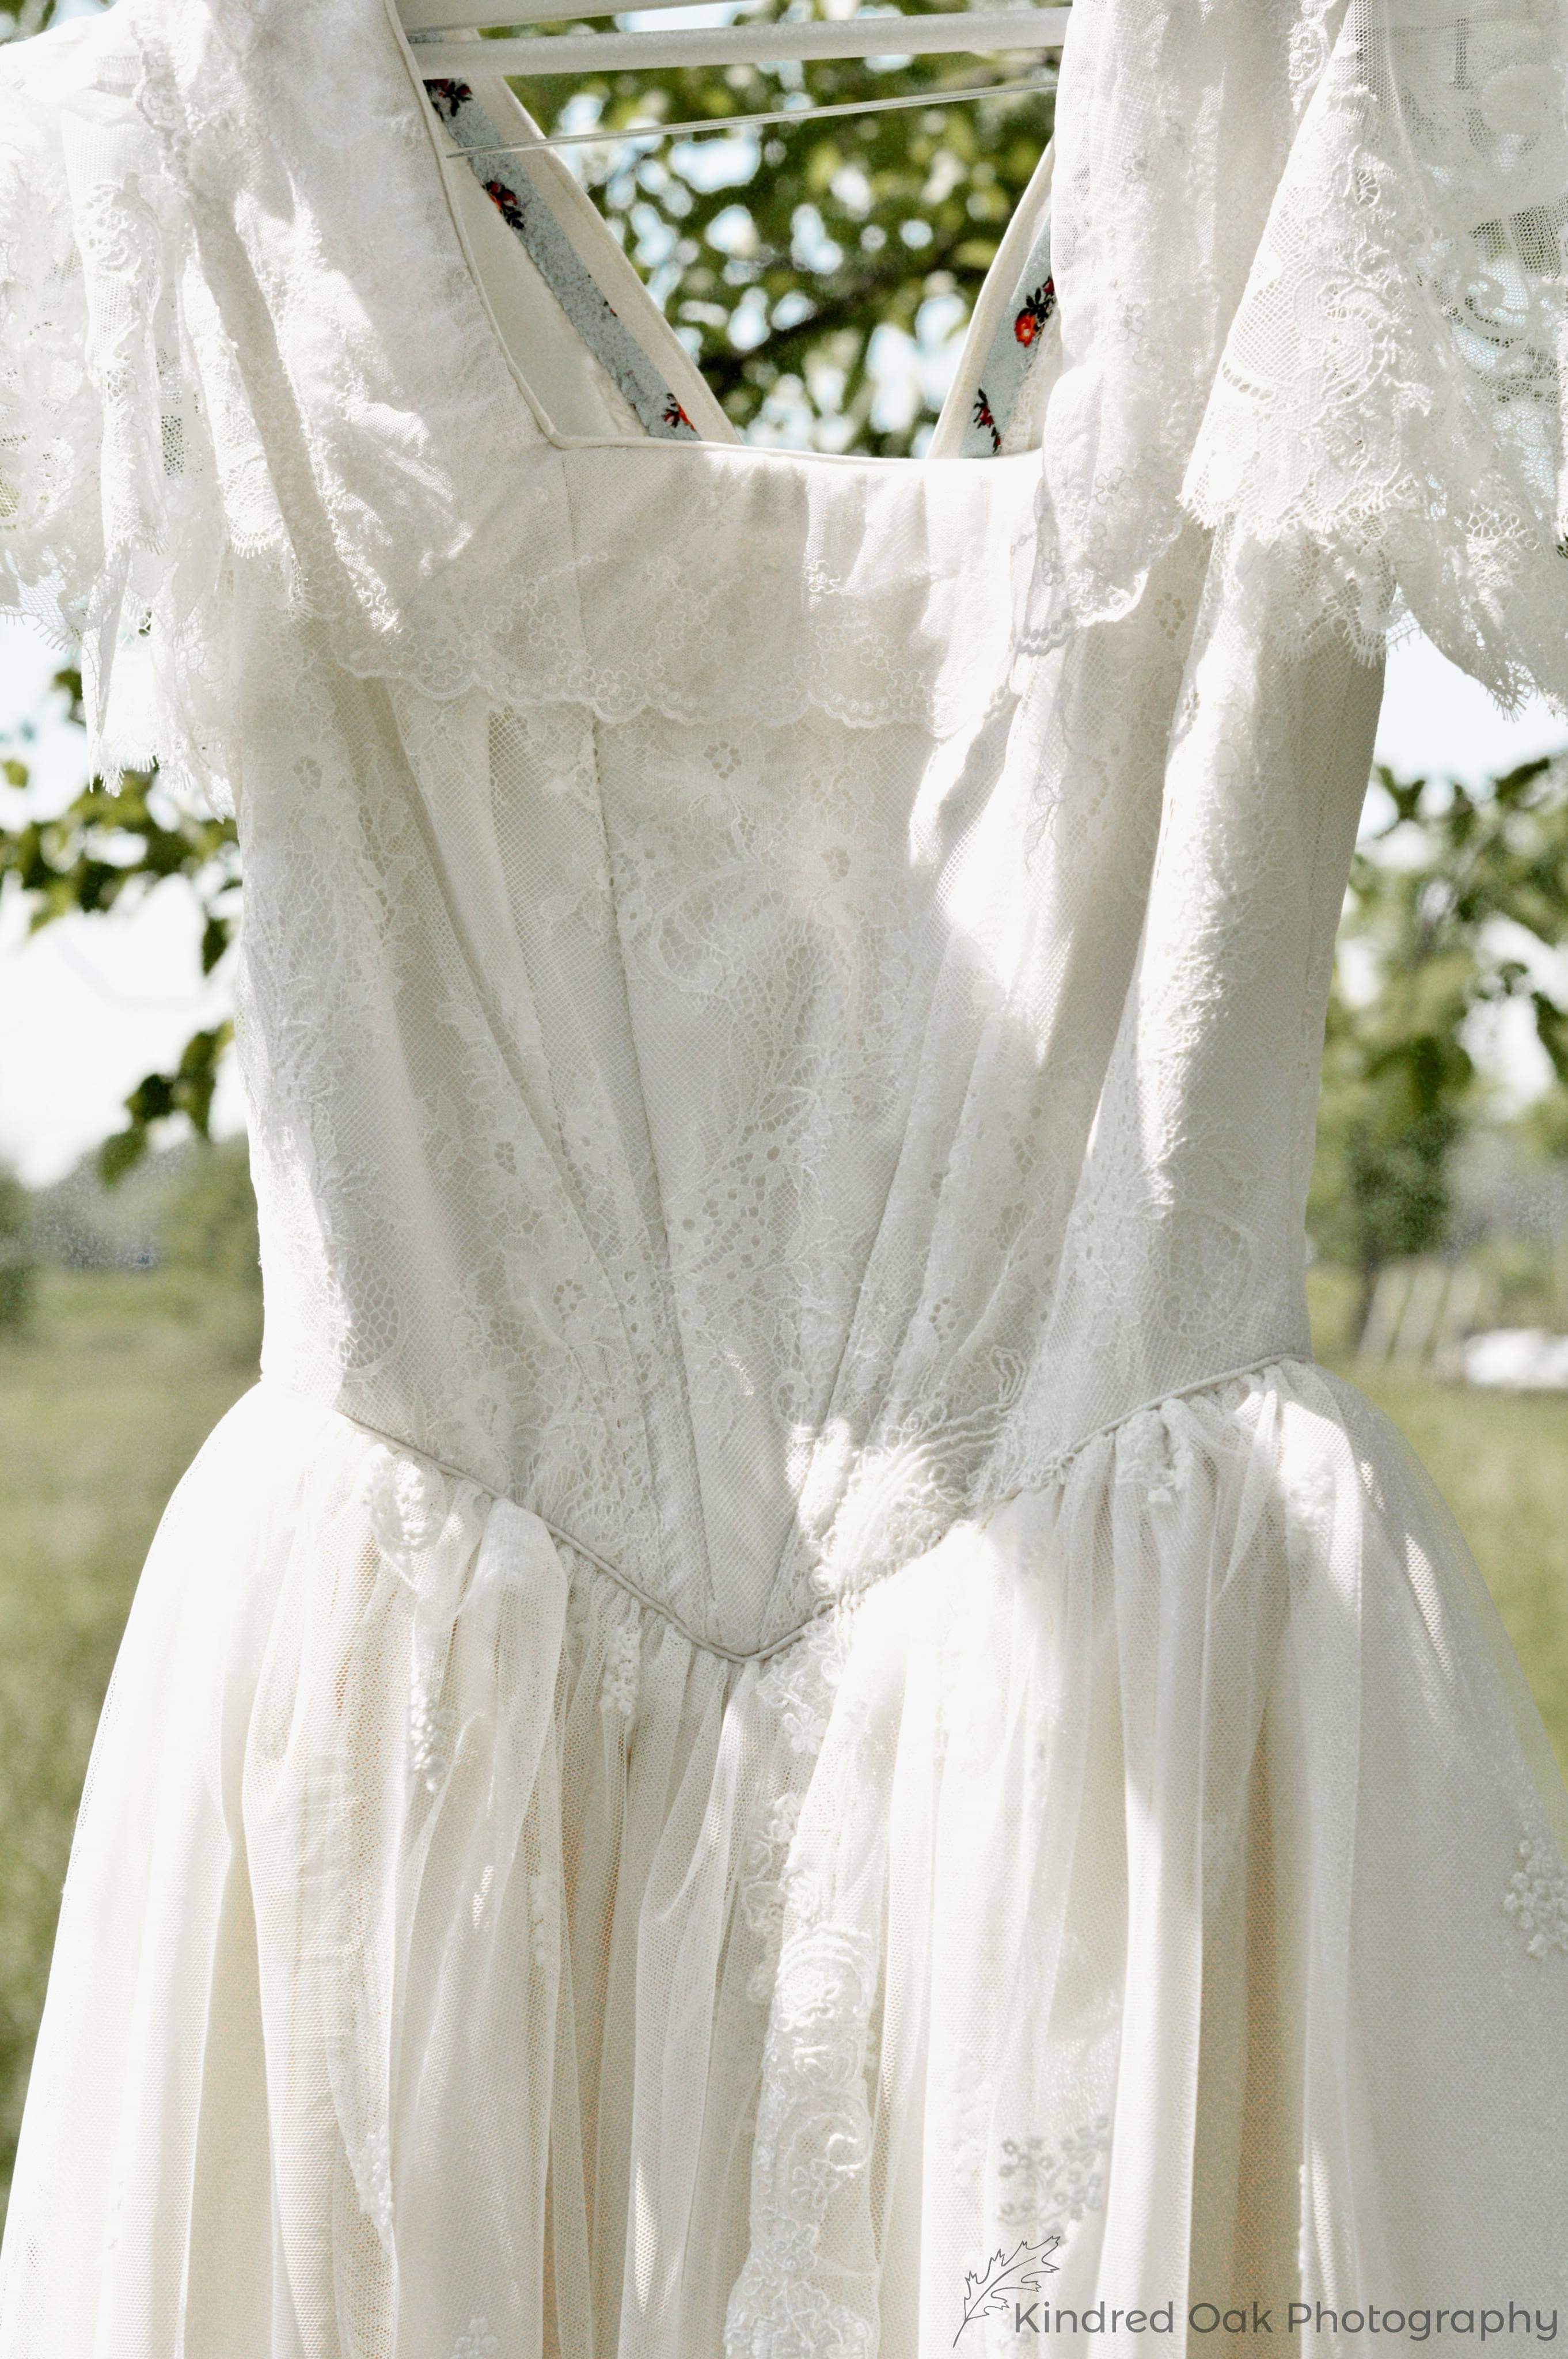
The sleeves were finally done!
They were on the bodice and wonderfully full and floaty! Now there was just one more thing to do before I was ready to make and attach the skirt - the lace collar.
I had some beautiful embroidered net lace from Malaysia that I wanted to use for the collar. It was white, just like the rest of my laces. Or so I thought. . .
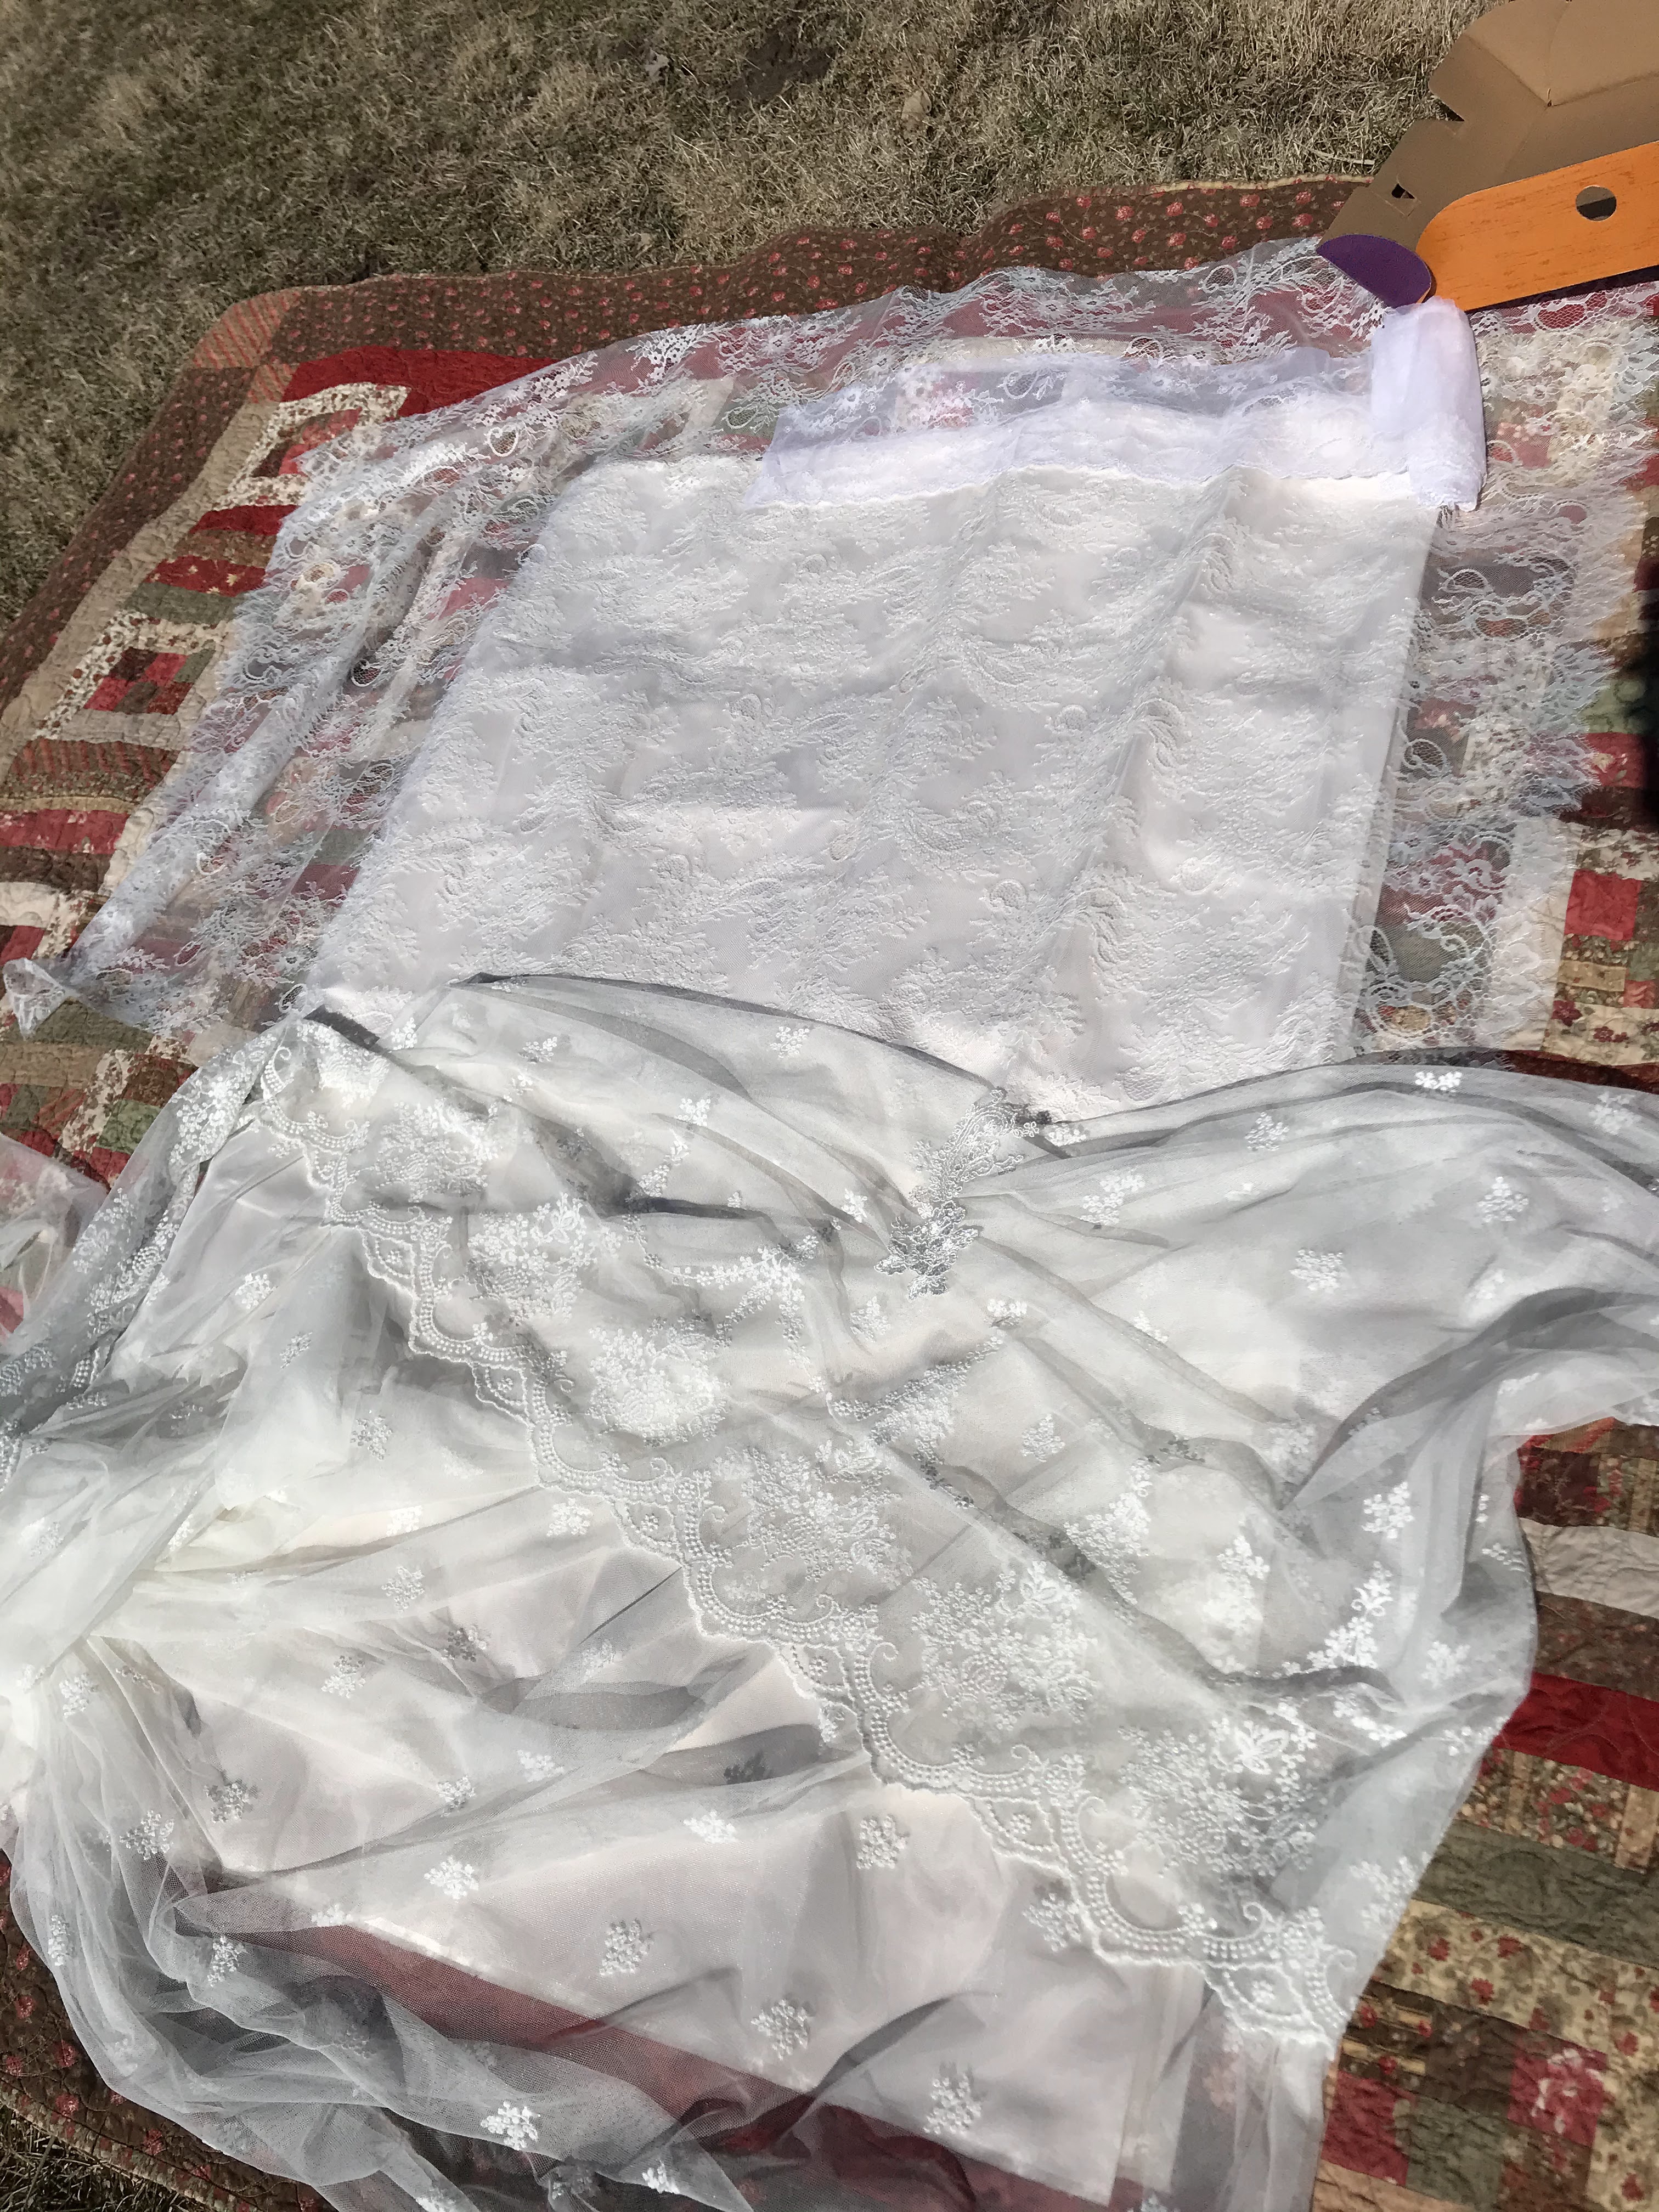
When I took all of my fabrics outside to see how they looked in natural light prior to cutting out my dress I discovered the intended collar lace was actually quite a bit more white than the rest of my laces. So white in fact it looked almost blue in fact! Well that just wouldn't do!
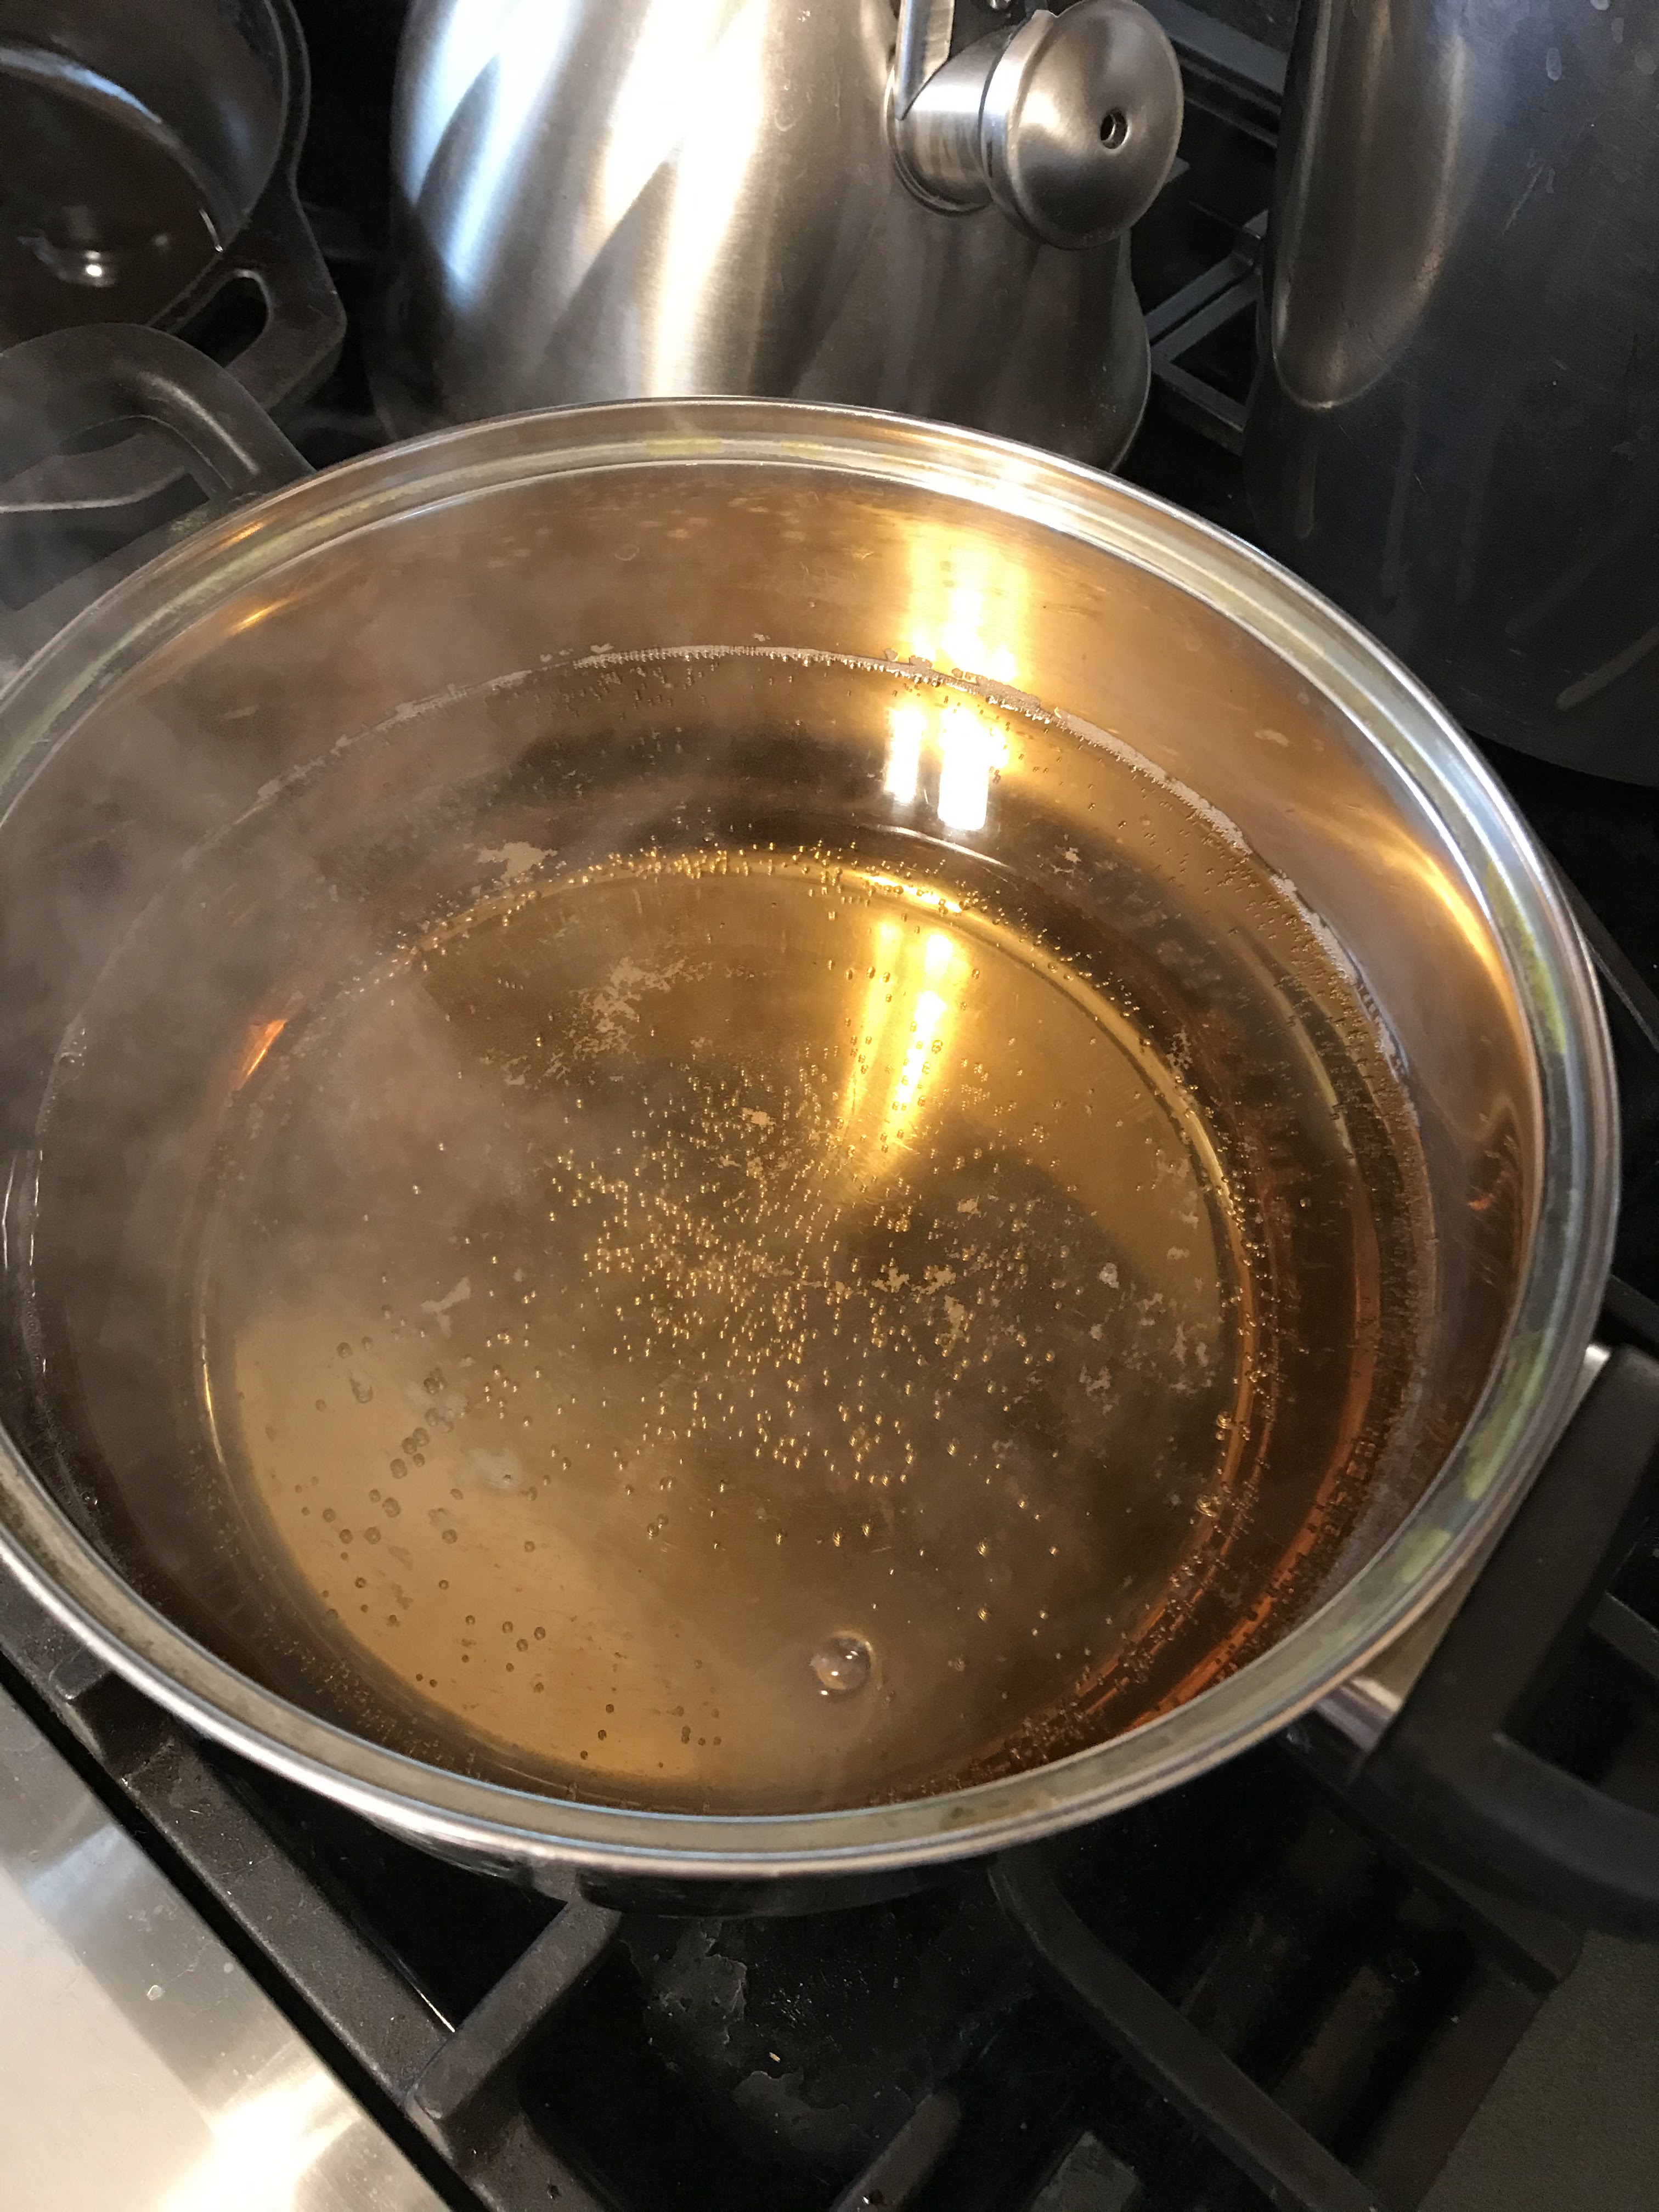
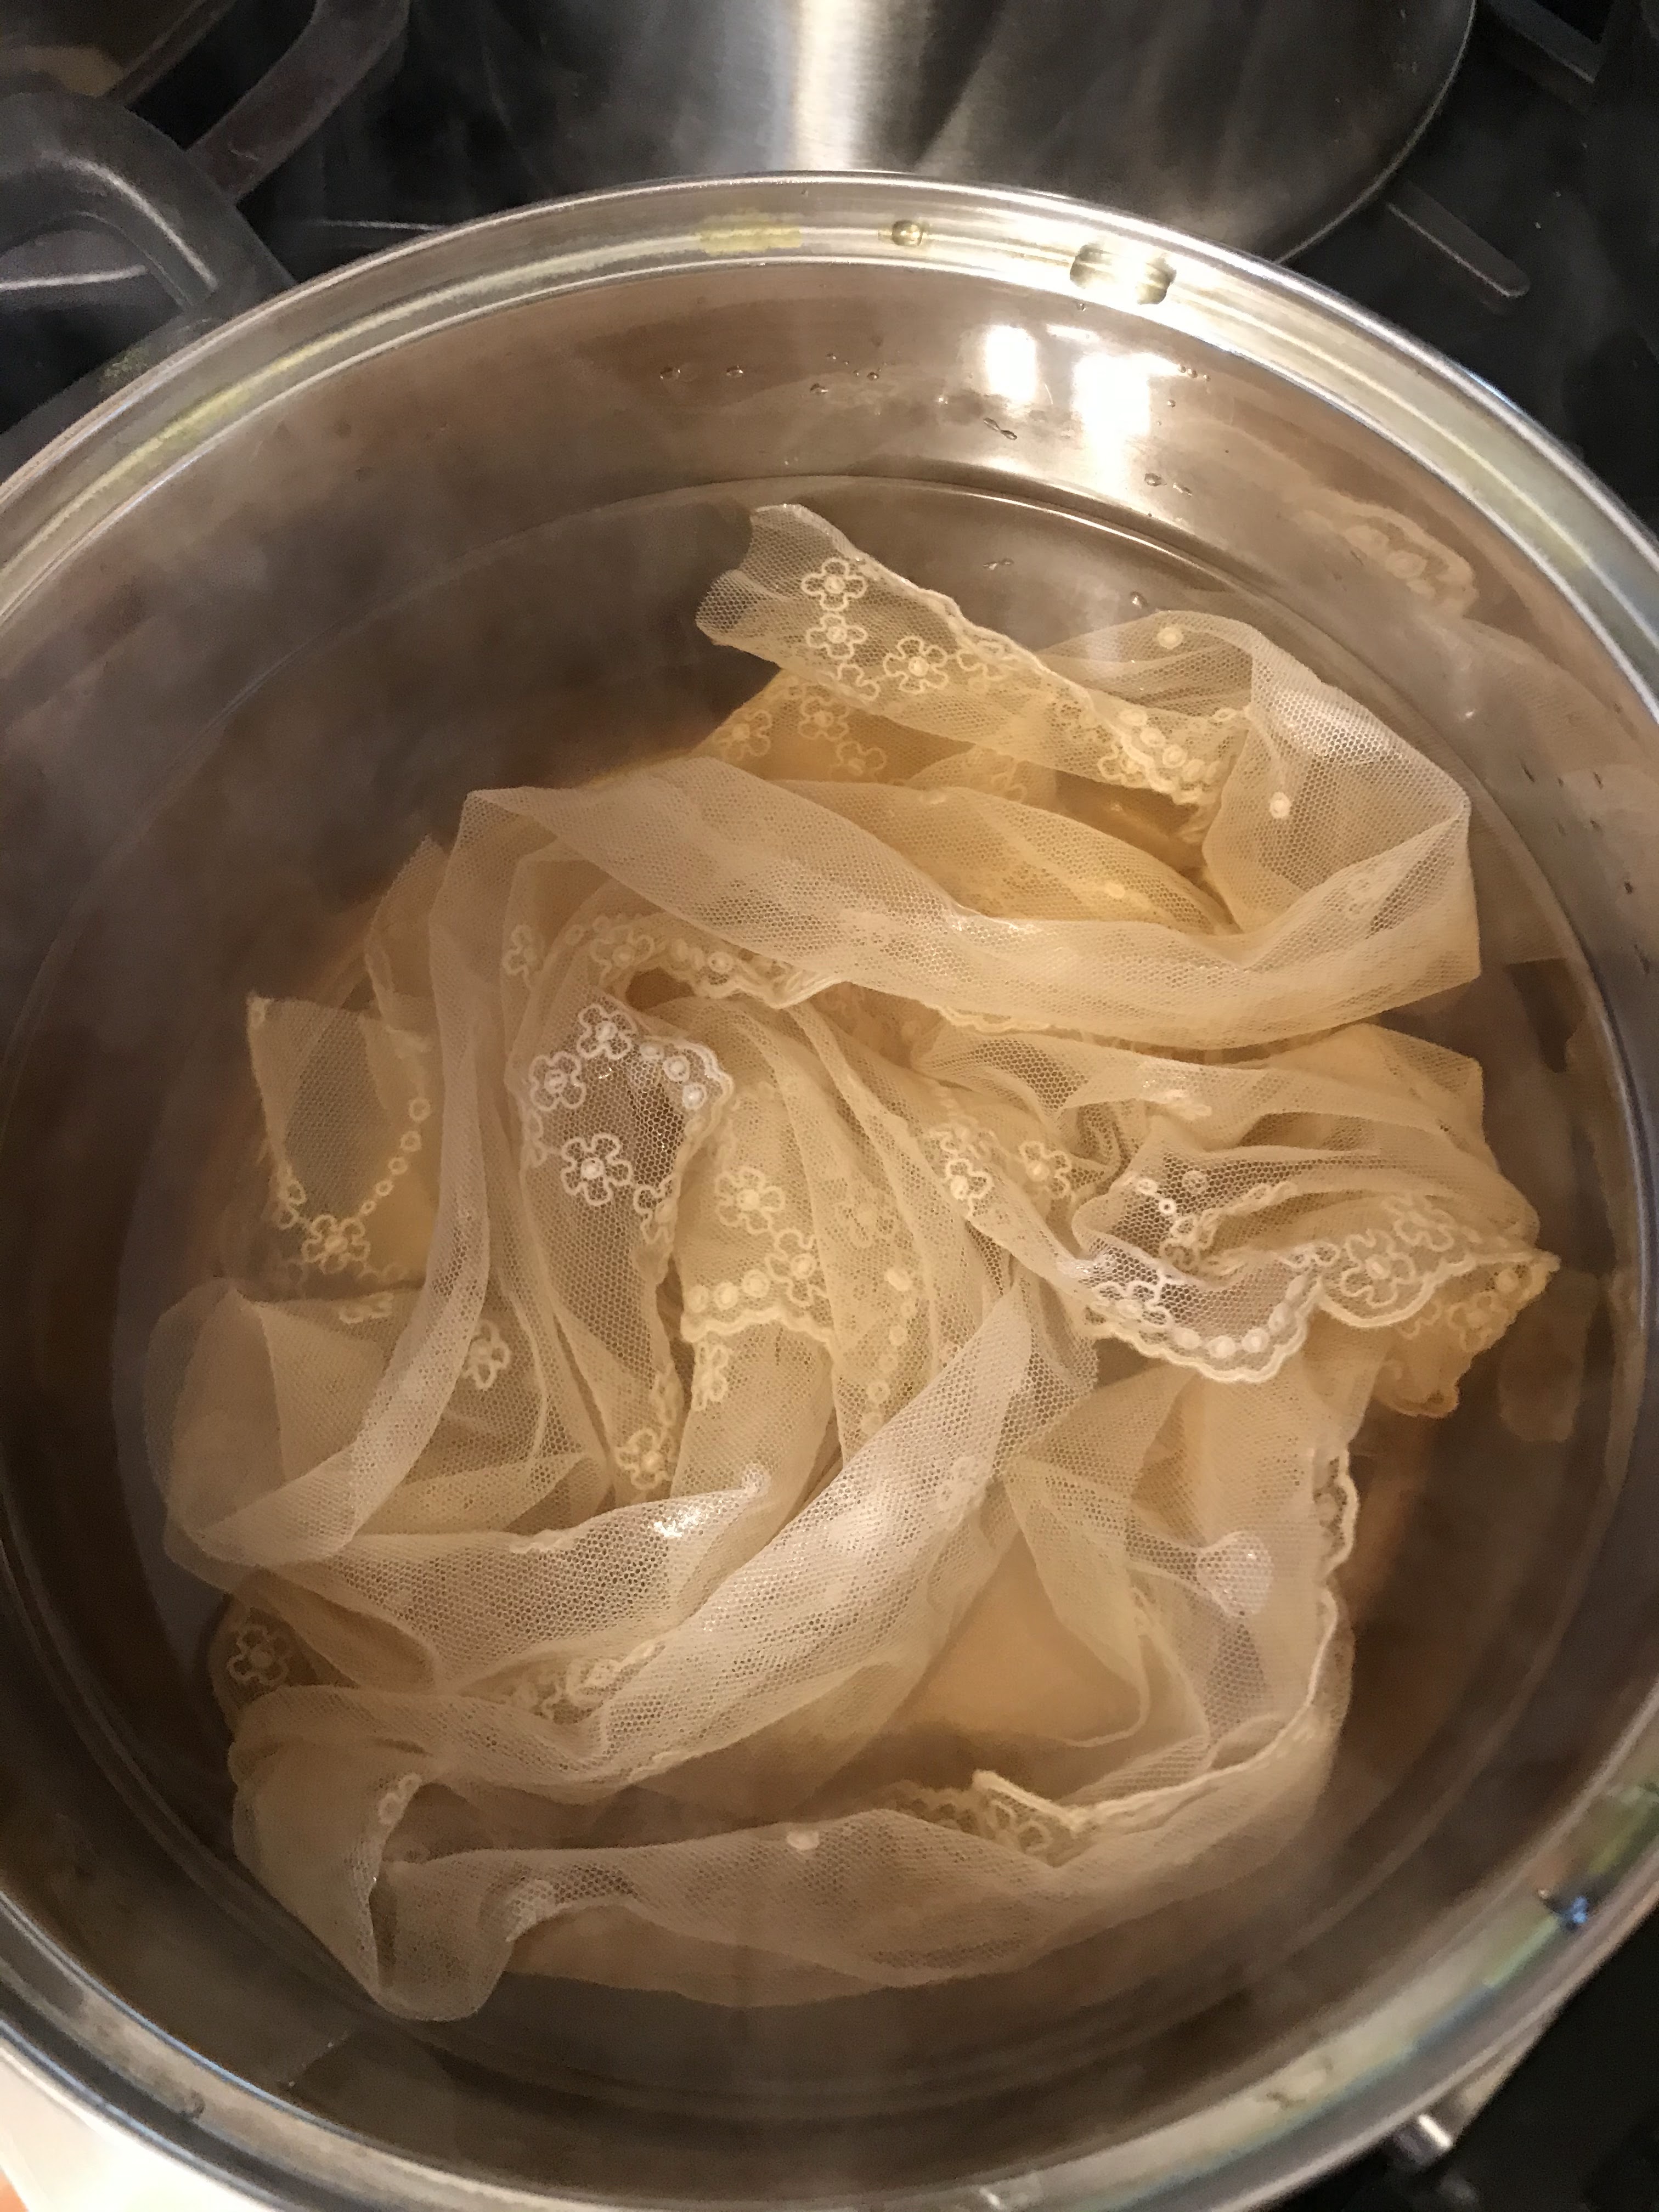
I had two choices. Either find a new lace in the right white shade, or dye my lace a touch darker. I liked the lace I had, so dying it was! I've tea dyed lace in the past, and it's come out a pale tan. Pretty for some things, but not what I wanted for my wedding dress. So off to the internet I went to figure out how to dye white ivory!
After reading multiple sources online, the consciences seemed to be that weak Lady Grey tea was the best dye for the job! Thus, I went to town, bought some Lady Grey, and gave it a go!
I only dyed half of the lace I had, just in case it didn't turn out right!
Thankfully, amazingly, it turned out just right! (Too white lace on the left, tea-dyed lace on the right.)
I breathed a sigh of relief and proceeded with attaching the lace collar to the bodice. I just draped the collar lace directly onto the bodice, shaping and pinning as I went. A few small pleats were required at the shoulders to keep things laying smooth.
I mitered the corners to match my square neckline shape, and added a bit of chain stitch embroidery in attempt to make these seams look decorative since they couldn't be hidden.
Once the shaping was done, the collar was basted in place then the neckline was finished with silk piping and more green floral rayon bias tape!
The bottom edge of the bodice was finished the same way.
And then my wedding dress was half done!
The bodice, the most time consuming, tricky part of this thing, was finished!
It was onto the easy part - the skirt!
If you've missed any part of my wedding dress series, you can catch up here:
And the Undergarments: